
A friend of mine got rear-ended at a red light. The other driver swore up and down that my friend had backed into him. My friend had a dash cam. He pulled up the clip on his phone right there at the scene, the other driver went quiet, and the insurance claim took three days instead of three months. That was the moment I stopped thinking of these gadgets as toys and started treating them as tools.
Here’s the good news: none of this tech is hard to install if you’re patient. Most of it comes down to clean cable routing and knowing which wire to tap into. You don’t need to be an electrician. You need a few basic tools, a little time, and the willingness to tuck wire behind trim without forcing anything. Here’s the practical rundown, straight from installs I’ve done on my own cars and for friends.
Dash Cams: Your Silent Witness
Why You Want One
A dash cam is cheap insurance against “he said, she said.” It captures hit-and-runs, road rage, debris flying off a truck, and the occasional beautiful sunset. Some insurers in certain states offer a small discount for having one, though I wouldn’t count on that as a reason to buy. The real value is footage when you need it most, and you always need it at the worst possible moment.
What to Look For When Buying
There’s a huge range in quality, and cheap cams fail exactly when you need them. Here’s what actually matters:
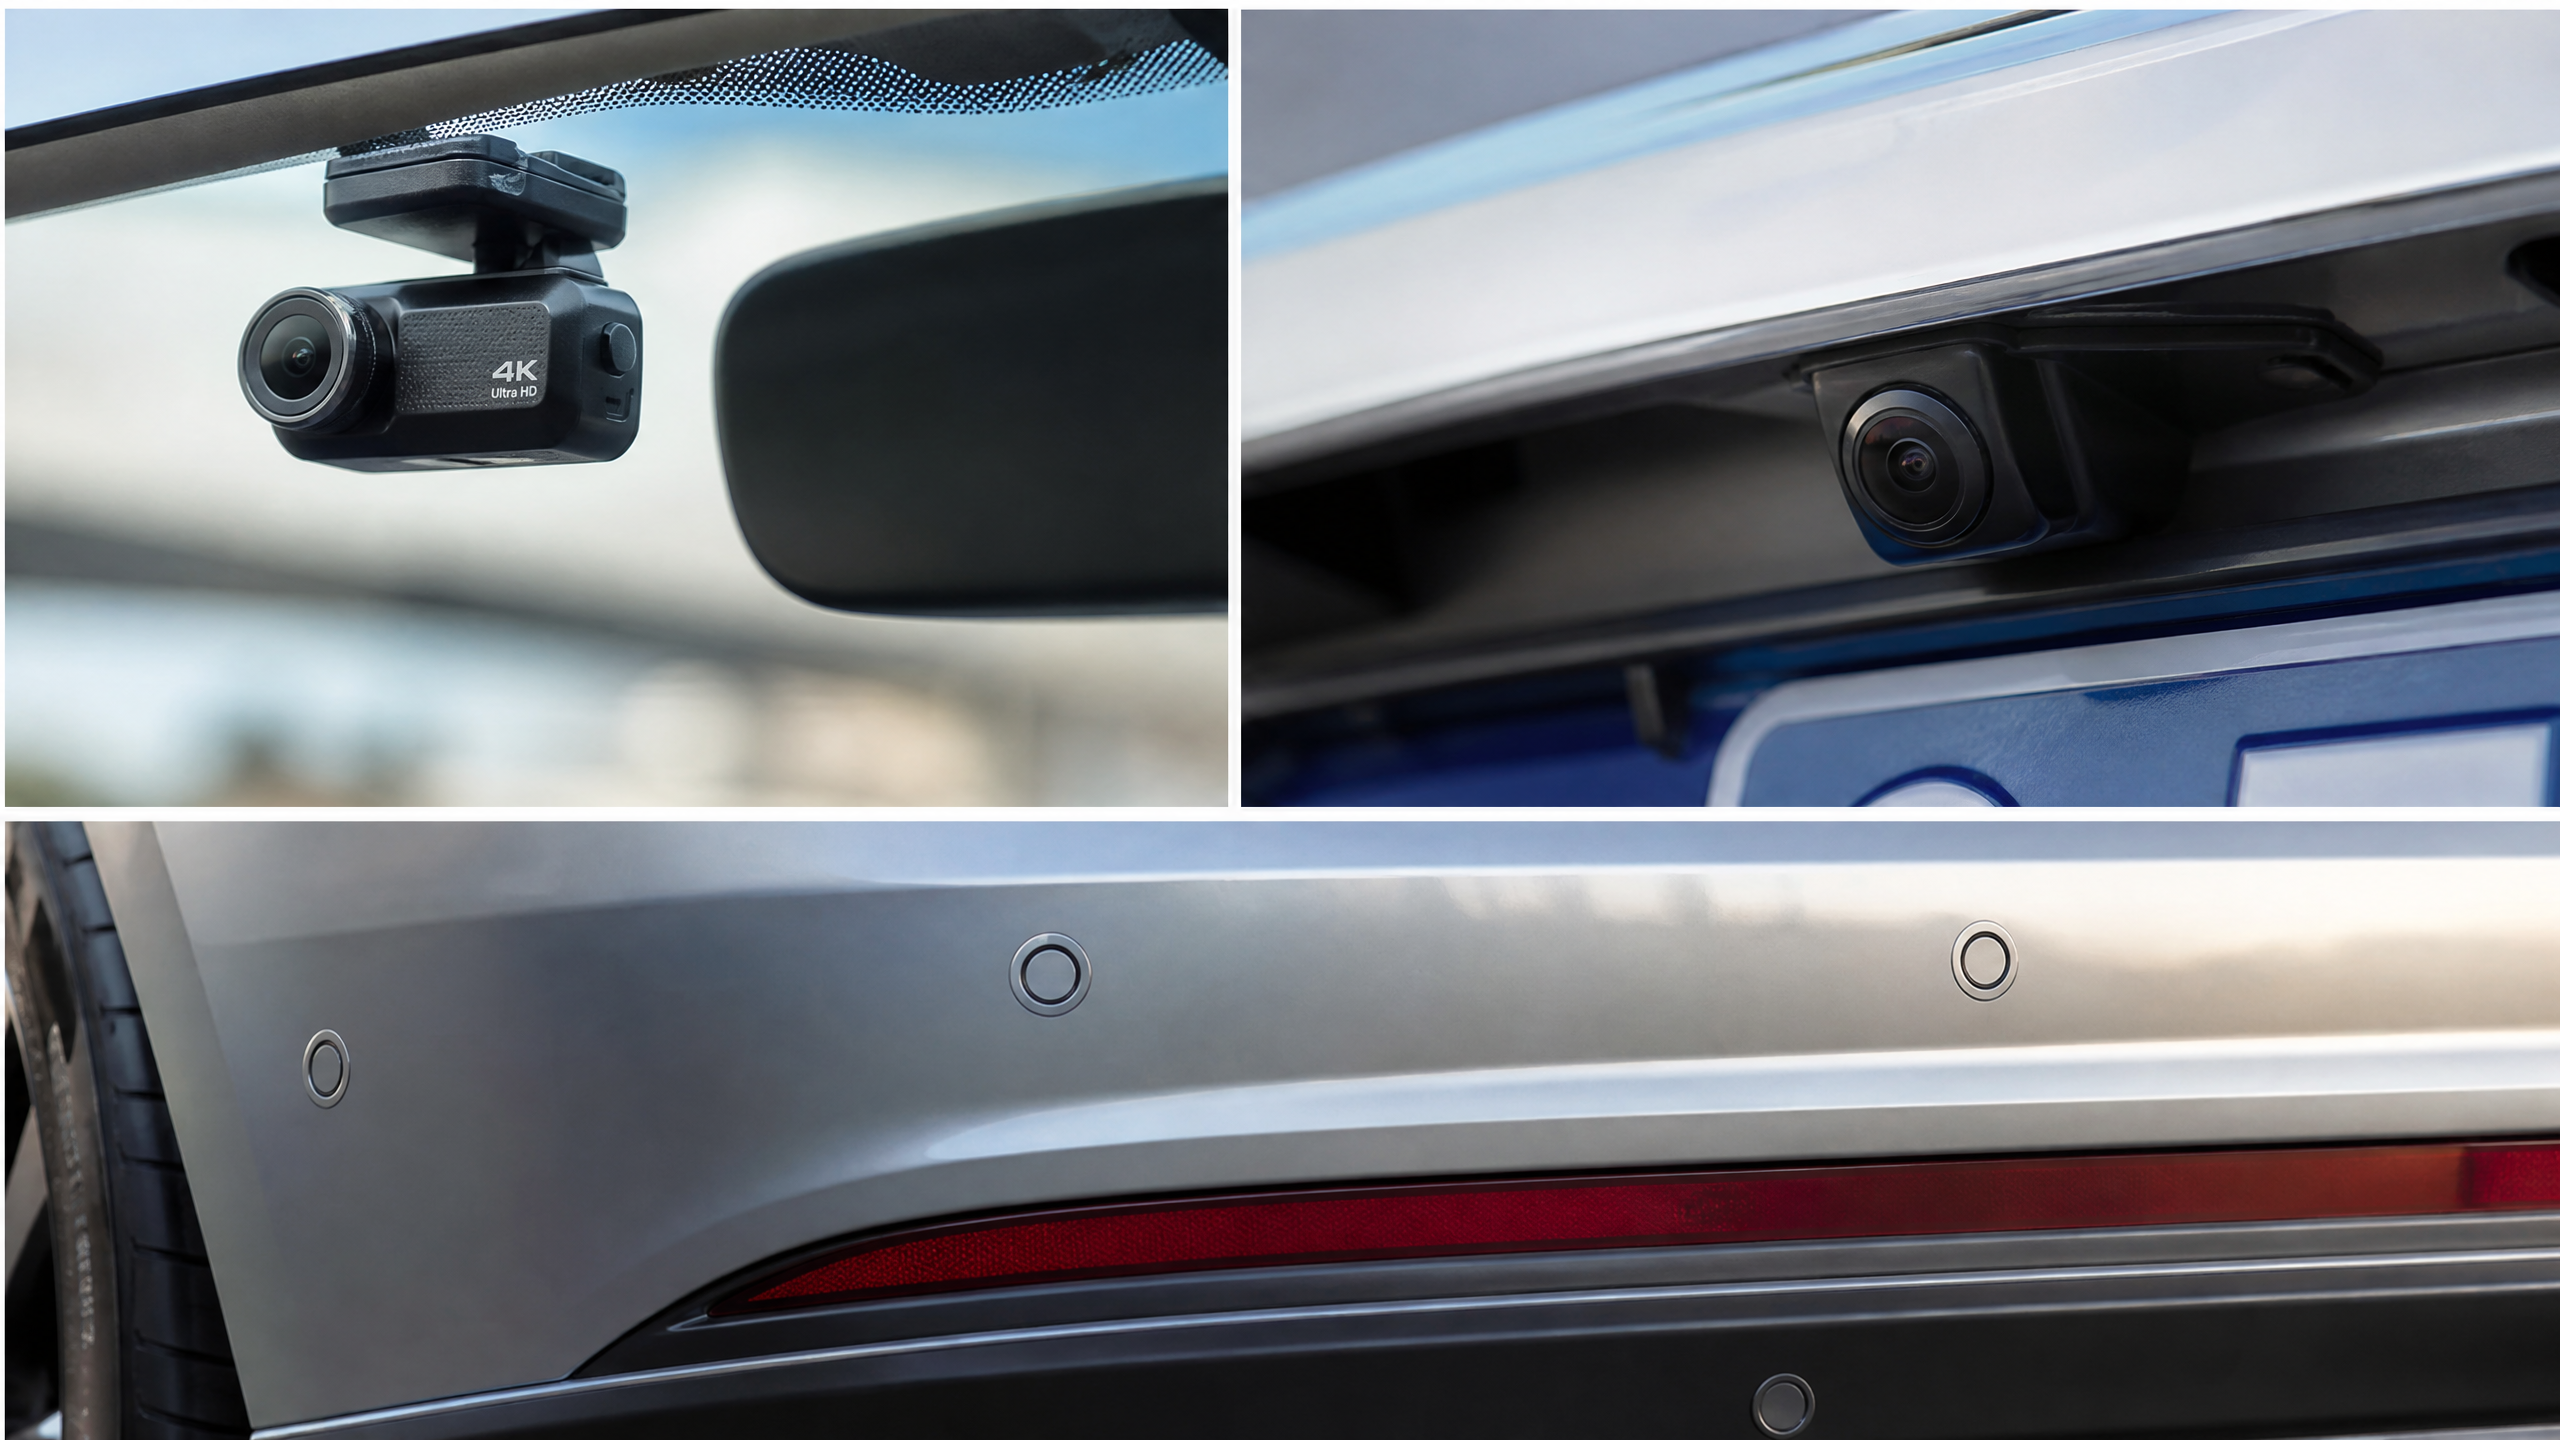
- Resolution: 1080p is the floor. 1440p (2K) reads license plates noticeably better, which is the whole point. 4K looks nice but eats memory cards and generates more heat.
- Capacitor over battery: Cheap cams use lithium batteries that swell and die in a hot parked car. A supercapacitor handles heat far better and lasts longer. This matters a lot if you park outside in summer.
- Parking mode: Records while the car is off, triggered by motion or an impact. Great for catching hit-and-runs in parking lots. Requires a hardwire kit to work.
- Loop recording & G-sensor: Loop recording overwrites your oldest footage automatically so the card never fills up. The G-sensor locks a clip when it senses a collision so it doesn’t get overwritten.
- Front + rear (dual channel): Covers the most common accident — the rear-end hit. If your budget allows, go dual channel.
- GPS: Stamps your speed and location onto footage. Handy for insurance disputes and for proving you weren’t speeding.
Installing a Dash Cam
The camera itself mounts behind the rearview mirror with adhesive or a suction cup. The real work is hiding the power cable so it doesn’t dangle across your view.
- Pick a spot that doesn’t block your sightline, usually tucked against the headliner just behind the mirror. Aim the lens so the horizon sits in the upper third of the frame.
- Route the cable along the edge of the headliner, then down the A-pillar — that’s the pillar beside the windshield.
- Run it under the door seals. Gently pull back the rubber weatherstrip and tuck the wire behind it. No cutting, no drilling, and it looks factory when you’re done.
- Finish at the 12V socket for the simplest setup, or hardwire to the fuse box for a cleaner look and to enable parking mode.
Hardwiring: The Clean Way
A hardwire kit connects into your fuse box and gives you constant power, switched power, and a low-voltage cutoff so the camera can’t kill your battery. You’ll need a few things:
- Fuse taps (also called add-a-fuse or tap-a-fuse). Match the type to your car — mini, low-profile mini, or standard ATO.
- A multimeter to identify which fuses are always-on versus ignition-switched. Probe with the key off and then on to tell the difference.
- A good ground point on bare metal nearby, usually a bolt on the body.
Set the low-voltage cutoff to around 12.0 to 12.2 volts. That protects your battery during long parking sessions and prevents a dead battery Monday morning. The whole hardwire job takes about 45 minutes once you’ve found the right fuses. Label the fuse tap so your future self knows what it powers.
Memory Card Care (The Overlooked Part)
Dash cams write to SD cards constantly, and cheap cards fail fast under that load. Buy a high-endurance card designed for dash cams — they’re built for continuous rewriting. Format the card in the camera every month or two, and replace it once a year or so. A dead card means no footage right when you need it, which defeats the whole point.
A Word on Legality
Most places allow dash cams, but a few have rules about windshield obstruction or audio recording. Check your local laws, especially around mounting position and whether you need consent to record audio. It’s a quick search that can save you trouble later.
Backup Cameras: See What’s Behind You
The Three Main Types
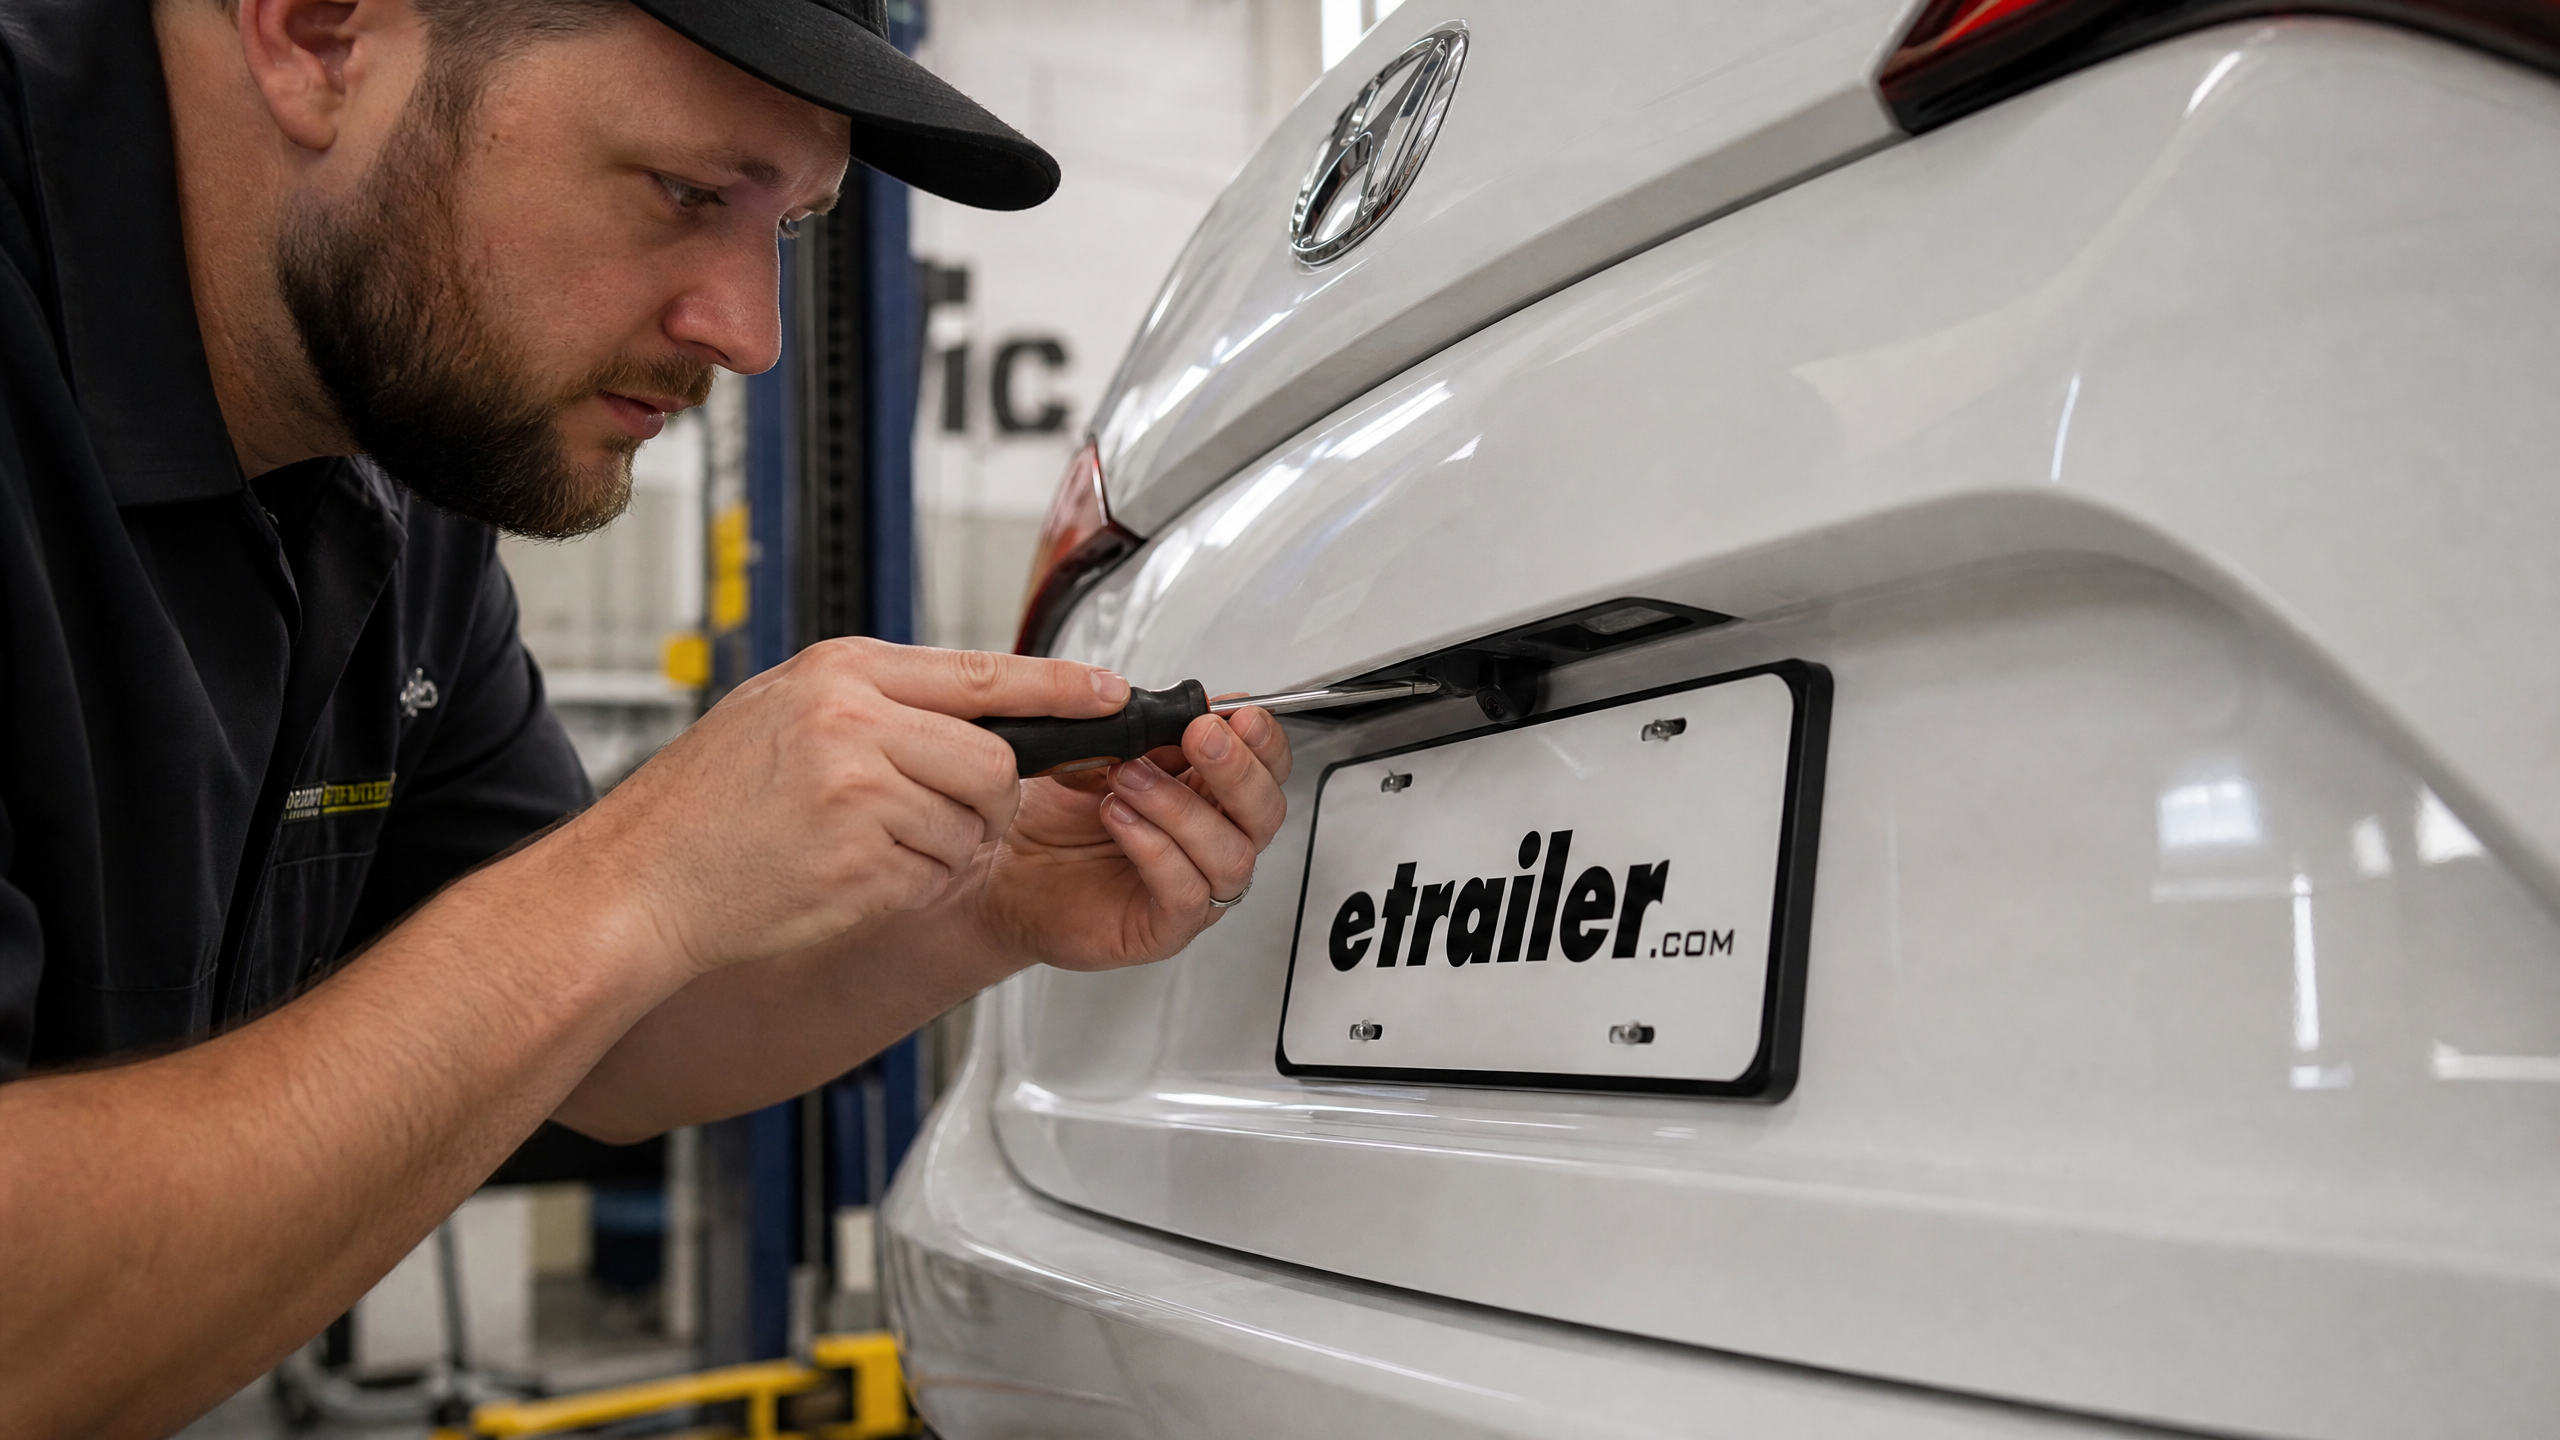
- License plate frame camera: The easiest option. It mounts to or replaces the license plate frame. Great DIY starter choice, and you can swap it to your next car.
- OEM-look camera: Replaces or mounts near the trunk handle for a factory appearance. More work to install, but it looks like the car came with it.
- Integrated camera: Built into a new tailgate handle or trim piece. Cleanest result, usually vehicle-specific.
How the Wiring Works
Every backup camera needs two things: power when you’re in reverse, and a video signal to a screen. The screen can be an aftermarket head unit, a rearview mirror monitor, or a small add-on display. Here’s the general flow:
- Tap the reverse light wire at the taillight. When you shift into reverse, this wire gets 12V, which wakes the camera. Use a test light or multimeter to confirm — have a helper shift into reverse while you probe the wires.
- Run the RCA video cable from the camera, through the trunk, along the door sills, up to the dash. Most kits include a long RCA cable with a small red trigger wire running alongside it.
- Connect that red trigger wire to the head unit’s “reverse trigger” or “camera in” lead so the screen knows when to switch to the camera view.
- Route through a rubber grommet when passing from the trunk into the cabin, to protect the cable from sharp metal edges.
Wired vs. Wireless
You’ll see “wireless” backup cameras that transmit video over a radio signal instead of a long cable. They’re easier to install since you skip the cable run, but they still need power from the reverse light, and the signal can drop or pick up interference. For reliability, I still prefer a wired RCA run. Wireless is a reasonable compromise for trucks or SUVs where running a cable is genuinely difficult.
Parking Sensors: Stop Bumping Curbs
How They Work
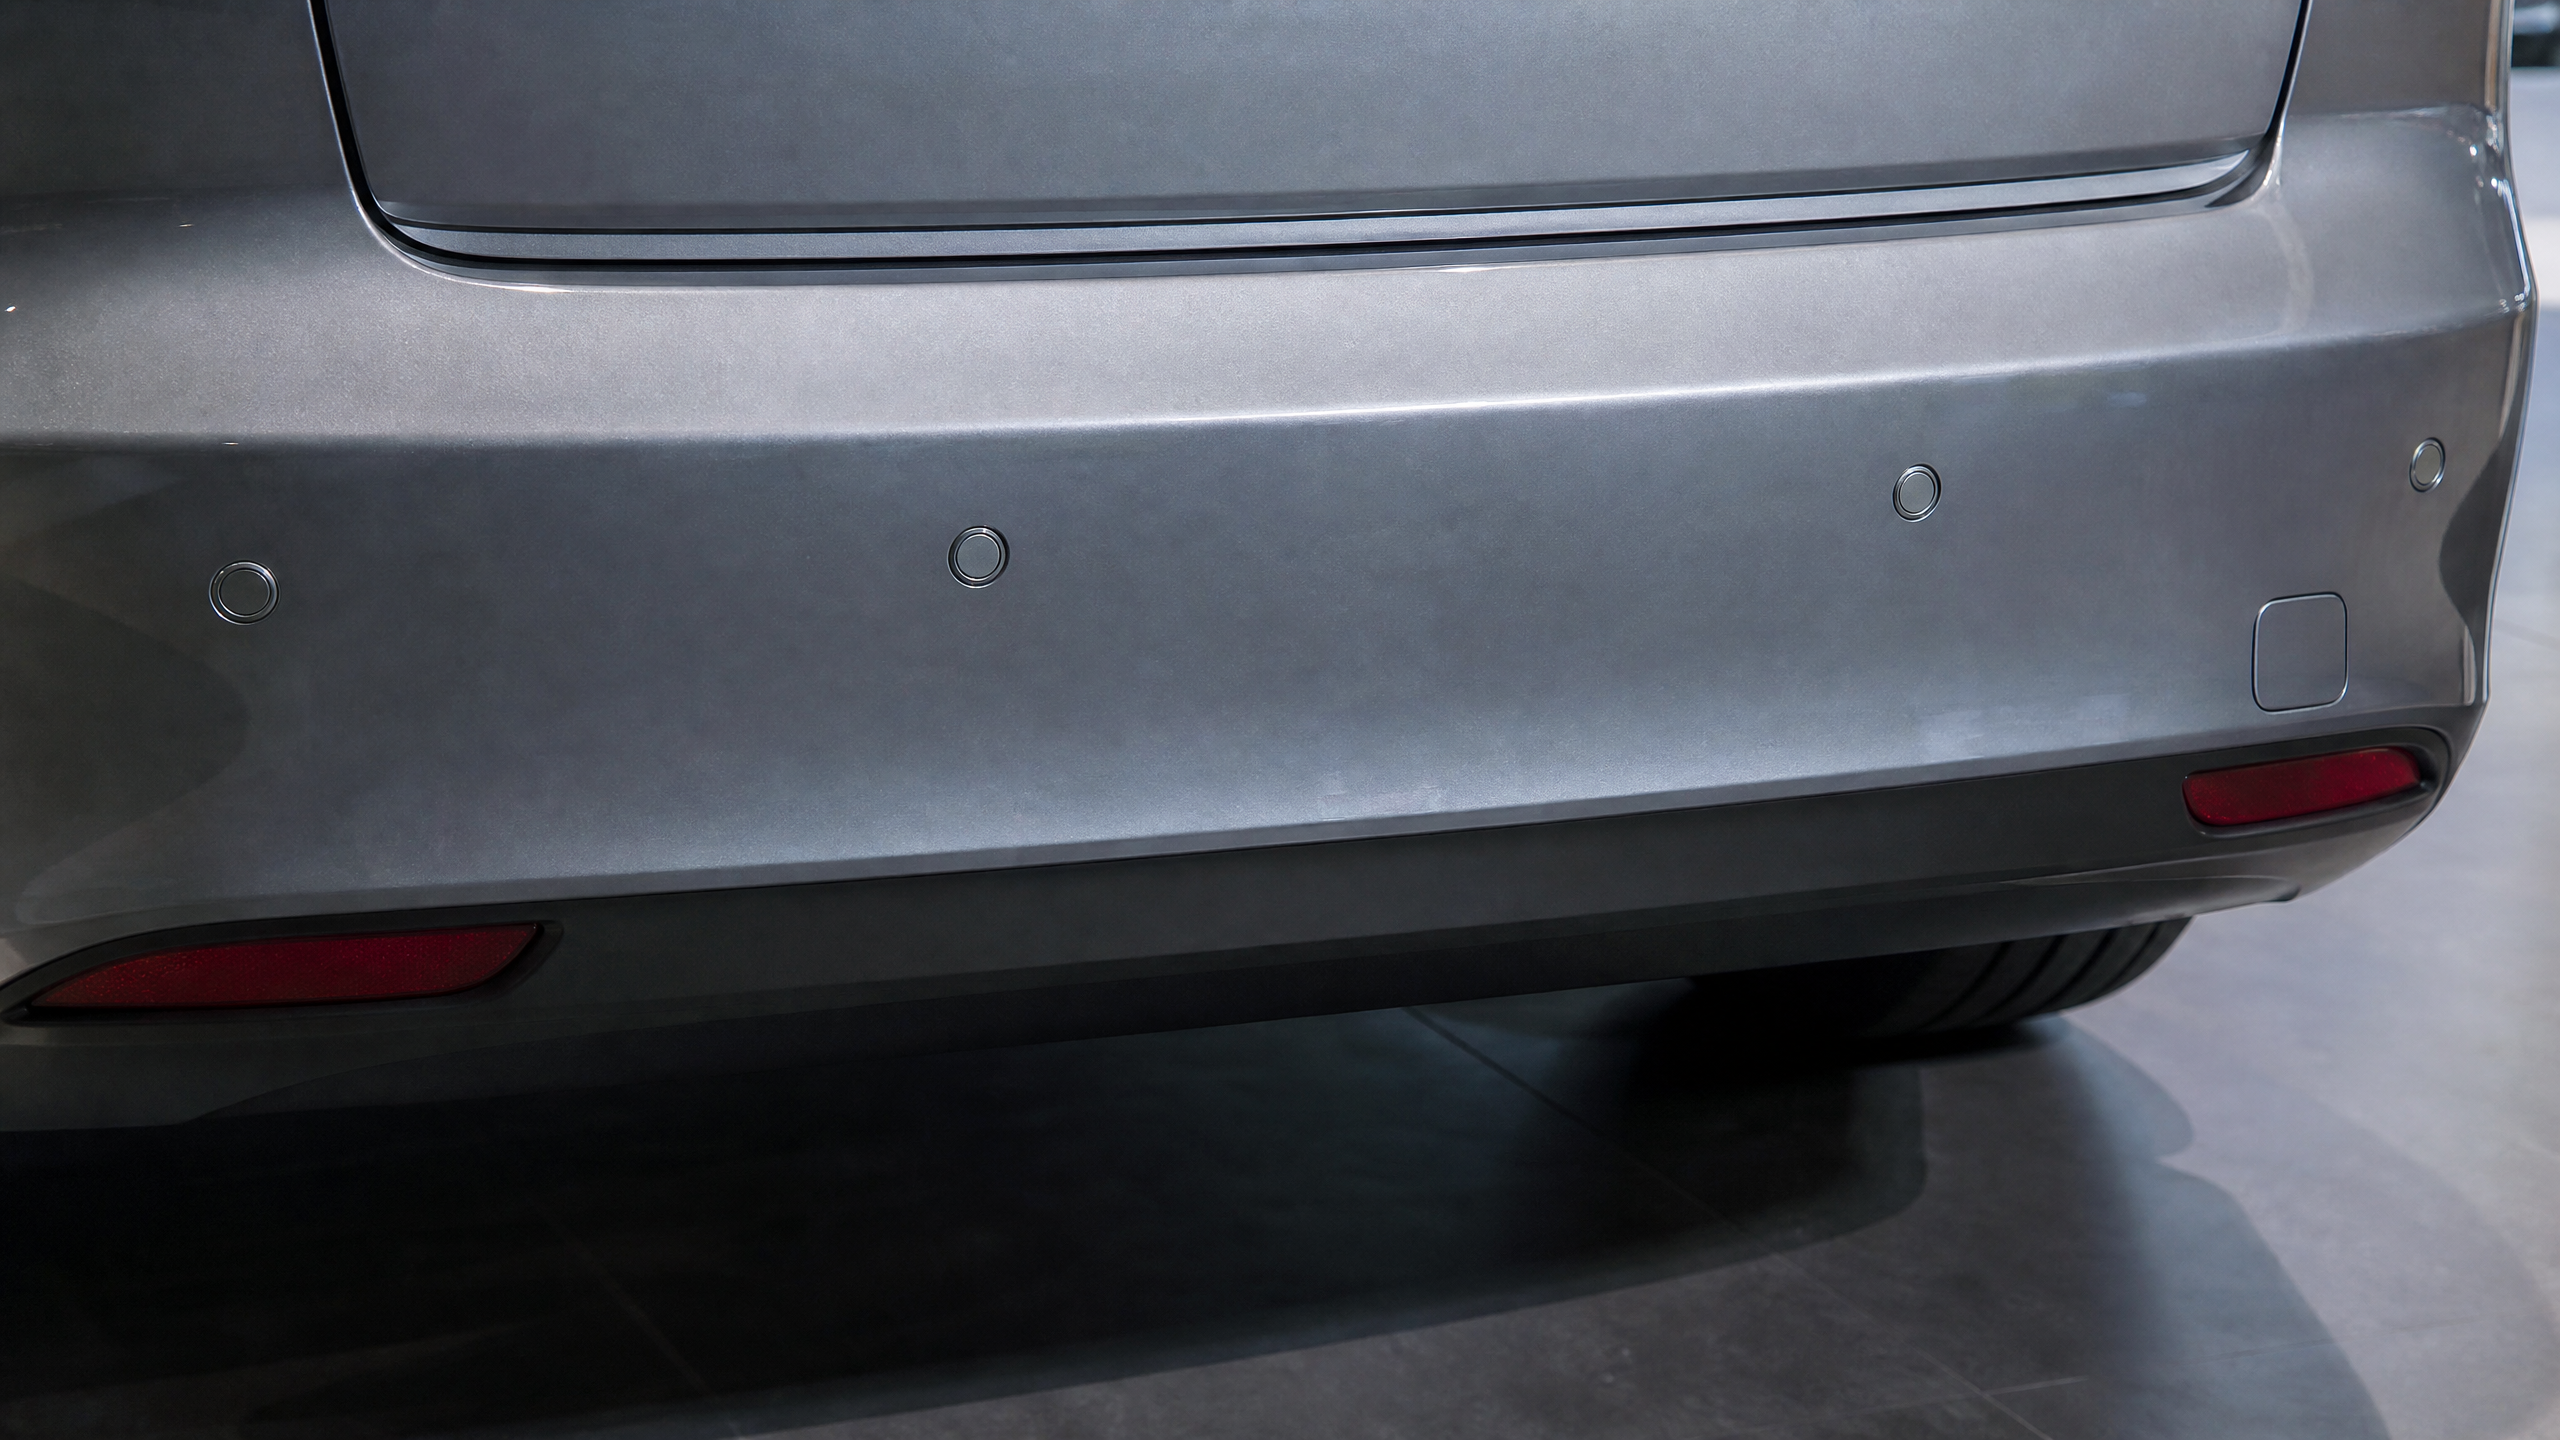
Parking sensors are ultrasonic. Each sensor pings out a high-frequency sound wave and measures how long the echo takes to return. The control box turns that timing into a distance and warns you with beeps that get faster as you get closer, or with a small display showing the actual distance in feet or meters.
Choosing a Kit
- Sensor count: 4 sensors is standard for a rear bumper. Some kits do 8 — four front and four rear — for all-around coverage.
- Display type: A simple buzzer is the cheapest and easiest. A small display with a distance readout is more precise and easier to trust.
- Paintable sensors: Most come black but can be painted to match your bumper. Use light coats and keep paint off the sensor face so you don’t muffle it.
Installing Parking Sensors
- Mark the bumper. Sensors should sit about 20 to 25 inches off the ground, evenly spaced, and pointing straight back. Use a template if the kit provides one.
- Drill the holes with the included hole saw — usually around 18.5 mm, but follow your kit exactly. Go slow and keep the bit square to the bumper so the hole isn’t angled.
- Snap the sensors in and route the wires behind the bumper toward the trunk.
- Mount the control module somewhere dry behind the bumper or in the trunk, away from standing water and road spray.
- Tap the reverse light for power, same as the backup camera, so the sensors only activate when you’re in reverse.
- Mount the buzzer or display within earshot or eyeshot of the driver’s seat.
Other Tech Upgrades Worth Considering
Once you’ve got the big three handled, a few more upgrades round out a modern car nicely:
- Blind spot monitoring add-on kits: Radar-based sensors that warn you when a car is in your blind spot. Great for older cars without the feature.
- OBD-II scanner with live data: Not a permanent install, but a quality scanner lets you read codes, clear check engine lights, and watch live sensor data. Pays for itself the first time a light comes on.
- Heads-up display (HUD): Projects speed onto the windshield so your eyes stay on the road. Simple to wire to the OBD port.
- Quality phone mount with wireless charging: Small thing, huge daily quality-of-life improvement, especially paired with phone navigation.
- Tire pressure monitoring (TPMS) sensors: If yours are dead or missing, replacing them improves safety and can clear a warning light.
Cost Snapshot
| Upgrade | Kit Cost | DIY Time | Difficulty |
|---|---|---|---|
| Basic dash cam (12V socket) | $40 – $120 | 20 – 40 min | Easy |
| Dash cam + hardwire kit | $90 – $250 | 1 – 2 hrs | Easy–Moderate |
| Backup camera (plate frame) | $30 – $90 | 2 – 4 hrs | Moderate |
| Parking sensors (4-sensor) | $30 – $120 | 2 – 3 hrs | Moderate |
| Blind spot monitoring kit | $150 – $400 | 3 – 5 hrs | Moderate–Advanced |
Troubleshooting Common Problems
- Dash cam won’t turn on: Check the fuse tap seating and the ground. A loose ground is the number one cause of “dead” accessories.
- Backup camera stays on or never turns on: The reverse trigger wire is wired to the wrong circuit. Re-verify with a multimeter while someone shifts gears.
- Parking sensors beep constantly: A sensor is aimed at the ground or blocked by dirt/snow, or it’s mounted too low. Clean them and check the angle.
- Fuzzy or rolling camera image: Usually a weak video connection or interference. Reseat the RCA plugs and keep the video cable away from power wires.
Quiz: Which Tech Upgrade Should You Install First?
1. What worries you most while driving?
2. How much wiring are you comfortable with?
3. What’s your budget?




Leave a Reply