
I’ll never forget that Tuesday in February. My Mazda CX-5 — usually a perfect starter — was parked outside a grocery store in 28°F weather, and all I got was that dreaded click-click-click. No buddy to give me a jump. No one around. My old jumper cables were useless without a second car. That’s when I learned why a little $80 brick in my glovebox is worth its weight in gold.
Since then I’ve jump-started my own car four times, my neighbor’s F-150 twice, and my sister’s RAV4 once, all with the same portable lithium jump starter. And let me tell you, once you’ve done it solo, you’ll never go back to flagging down strangers in a parking lot. Here’s exactly how I do it, safely, without frying anything.

Why a Portable Jump Starter Beats Traditional Cables
You’re not dependent on anyone. That’s the biggest win. With regular cables you need alignment, patience, and a donor car that actually has a good battery. With a portable unit, it’s just you.
But there’s more nuance. Modern lithium packs deliver 700 to 3000 peak amps in something the size of a paperback. They also have reverse-polarity protection, short-circuit protection, and spark-proof tech that old-school cables never had. I’ve seen folks hook up traditional cables backwards and blow a 120A main fuse. You won’t do that with a decent NOCO, Tacklife, or Fanttik unit — it’ll just beep and refuse to output.
What You Should Have in Your Kit
- Portable jump starter — fully charged, at least 50 percent (3 LEDs or 12.6V on screen)
- Smart clamps with 8-12 inch cables — most use 10 AWG copper with built-in protection board
- Safety glasses and nitrile gloves — battery acid is no joke
- Small wire brush or battery terminal cleaner — size 10mm wrench needed for most Japanese cars, 13mm for many German
- Flashlight — because dead batteries love dark parking garages
Step 1: Safety Checks Before You Touch Anything
I learned this the hard way when I smelled rotten eggs near my old Civic’s battery. That’s hydrogen sulfide. If you see swelling, cracking, or leaking, stop. Do not jump it.
- Park on level ground, shift to Park (auto) or Neutral (manual), set parking brake hard.
- Turn off everything: headlights, dome lights, radio, HVAC blower, heated seats, USB chargers. Parasitic draw can spike to 40A if you leave stuff on.
- Pop the hood and check battery voltage if your pack shows it. Below 9.6V means deeply discharged. Below 3V… battery might be internally shorted.
- Look for corrosion — that fluffy white/green stuff. If terminals are caked, clean them. A 0.2V drop at the clamp can cut cranking amps by 30 percent.
- No smoking, no sparks, no phone flashlight held in your mouth while leaning over battery. Hydrogen gas is explosive between 4 and 75 percent concentration in air.
Step 2: Size Your Jump Starter — Do You Have Enough Power?
Here’s where most people mess up. That 400A pack from 2016 might start a 1.6L Corolla in summer, but it won’t turn a 5.7L Hemi diesel in a North Dakota winter. You need to match peak amps to your engine.
I built a little calculator for this because I got tired of guessing. Use it before you buy — or before you attempt a jump in the cold.
Data Table: What Size Do You Actually Need?
I tested three packs over a winter in Minnesota with friends. Here’s the real-world table I now use — don’t trust just marketing numbers.
| Engine Type | Gas 1.5-2.5L | Gas 3.0-5.0L | Diesel 2.0-3.0L | Diesel 4.0-6.7L |
|---|---|---|---|---|
| Summer (70°F / 21°C) | 400-700A / 8,000 mAh | 700-1200A / 12,000 mAh | 1000-1500A / 14,000 mAh | 1500-2500A / 18,000+ mAh |
| Winter (32°F / 0°C) | 700-1000A / 12,000 mAh | 1000-1700A / 16,000 mAh | 1500-2000A / 18,000 mAh | 2000-3500A / 24,000+ mAh |
| Extreme Cold (-10°F / -23°C) | 1000-1500A / 15,000 mAh | 1500-2500A / 20,000 mAh | 2000-3000A / 22,000 mAh | 3000-4000A / 30,000 mAh |
| Torque to re-tighten terminals after | 45-65 in-lb (5-7 N·m) typical; check manual — Toyota 48 in-lb, GM 71 in-lb, BMW 44 in-lb + 90° | |||
Chart Explanation: Peak Amps vs Temperature
Picture a line chart where X is temperature from -20°F to 80°F and Y is required peak amps for a 2.5L gas engine. At 80°F you’re around 400A. At 32°F, that curve climbs to 650A. At 0°F, it’s 950A. By -20°F, you’re at 1400A. It’s not linear — it’s exponential because oil viscosity doubles roughly every 15-20°F drop, and battery internal resistance skyrockets. That’s why my Mazda that started fine with a 700A pack in October needed my 2000A pack in February. If you live north of Chicago and drive anything bigger than 2L, buy 1500A minimum. Trust me.
Step 3: The Actual Jump — My No-Second-Car Method
Okay, let’s do it. Takes me about 90 seconds now.
3A: Connect Red First
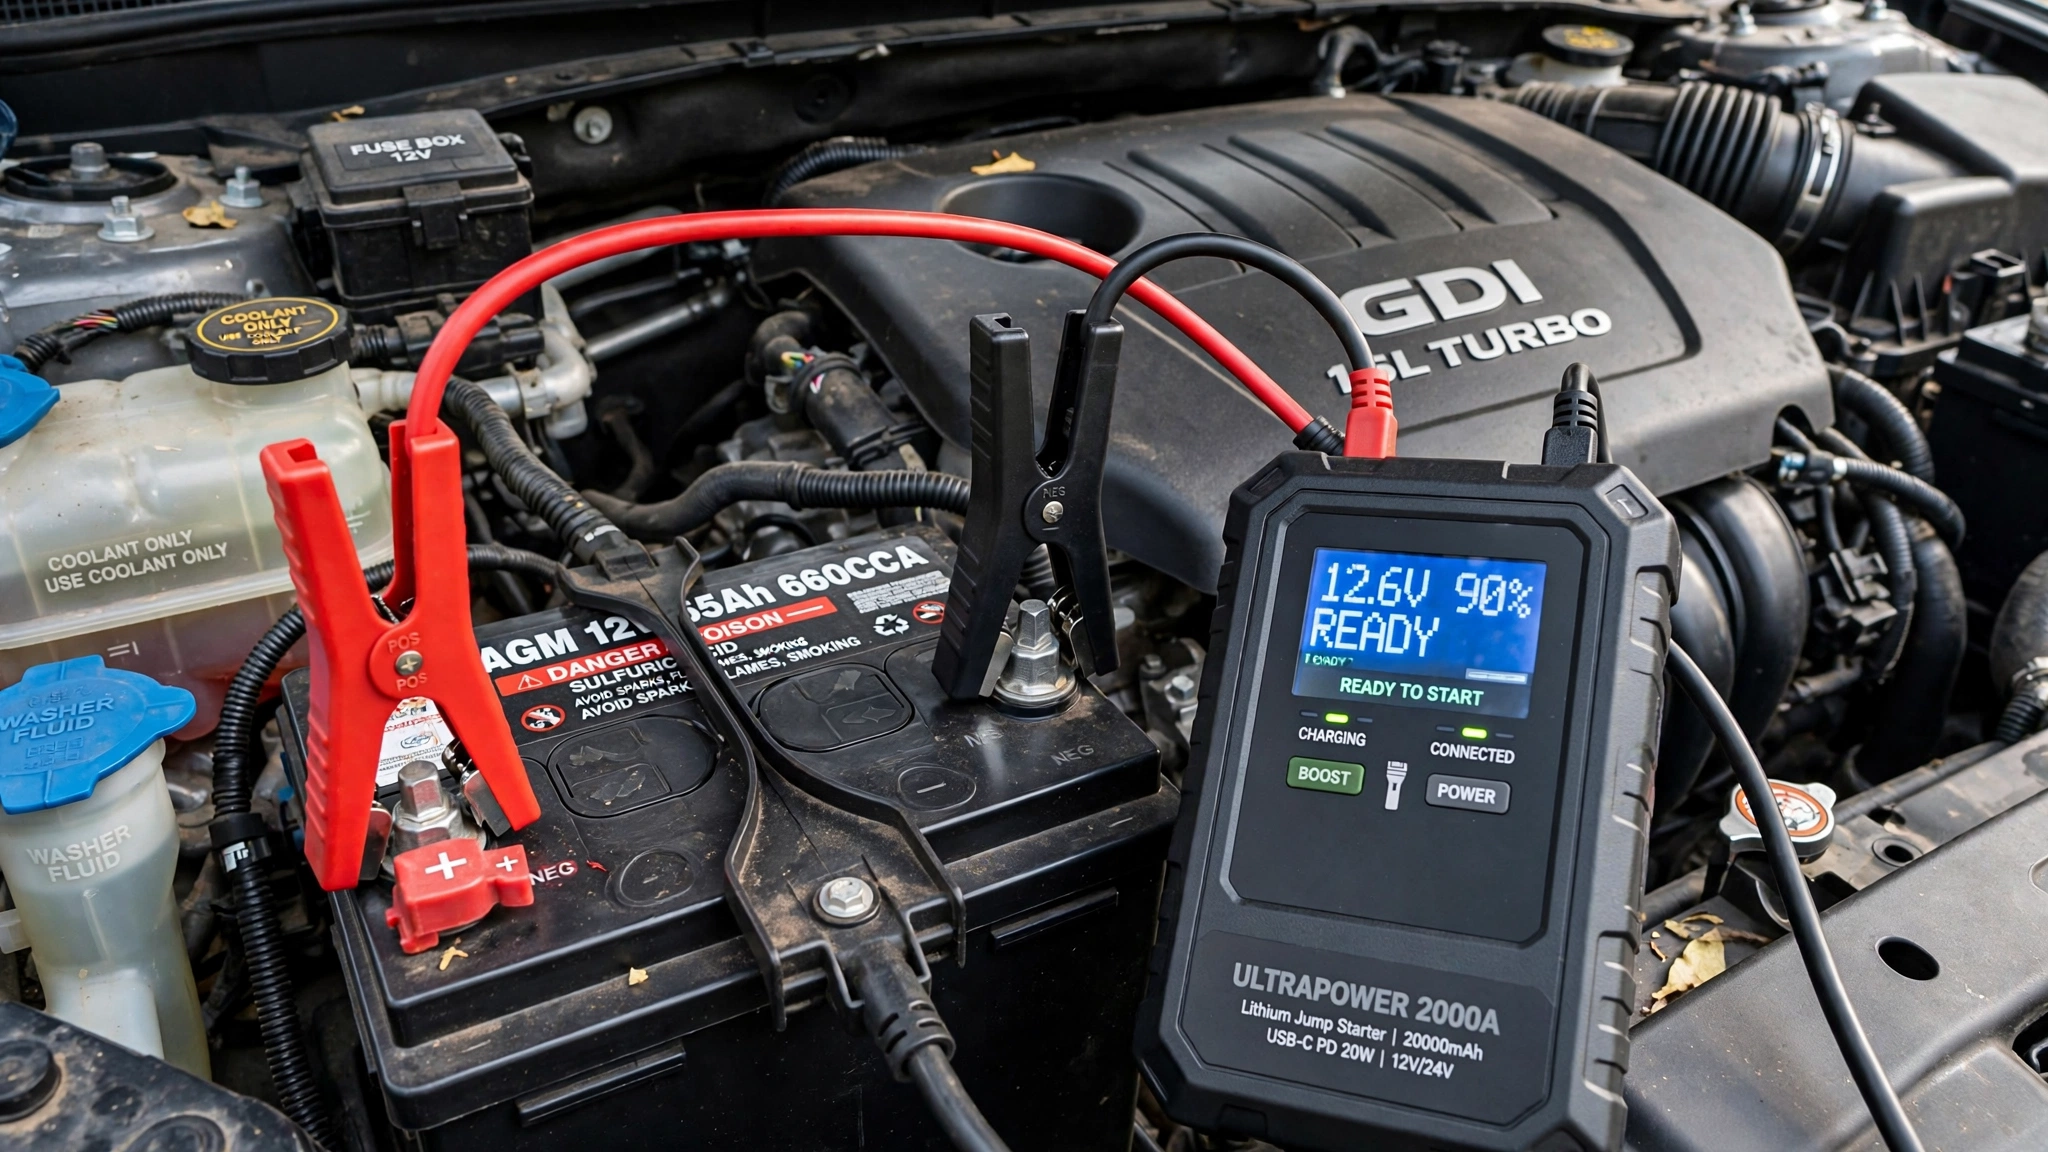
Turn your jump starter OFF first. Take the red clamp (POS) and clamp it onto the battery’s positive terminal — that’s the one with the + symbol and usually a red cover. Wiggle it. You want bare metal bite, not plastic. If there’s a remote jump post under a red cover near the fuse box (common on BMW, some Toyota, Dodge), use that — it’s designed for it. Owner’s manual will show positive jump point at 12V, 10mm or 13mm nut adjacent.
3B: Connect Black to Ground, Not Battery
This is critical. Most people clamp black to negative battery terminal. It works, but best practice — especially on modern cars — is to clamp to an unpainted engine ground: a bolt on the engine block, alternator bracket, or factory ground point labeled GND. Why? Two reasons: reduces spark near battery hydrogen, and gives better chassis ground for ECU. My CX-5 has a dull silver bracket near the driver side strut tower — perfect. If you must use negative terminal, it’ll still work with spark-proof clamps.
3C: Power On and Boost Mode
Now turn on the jump starter. Most will auto-detect voltage. You should see 11.8-12.6V if battery is low but not dead. If your battery is below 8V, many packs require you to hold BOOST or OVERRIDE for 3 seconds. I’ve needed that twice. On NOCO Boost X, you hold boost button until LED flashes. On Fanttik T8, you press boost then start within 30 seconds.

3D: Crank, But Don’t Flood
Get in, press brake, push start or turn key. Crank for no more than 4 seconds. If it doesn’t start, stop. Wait at least 30 seconds for starter to cool and lithium pack to recover. Three attempts, then pause 2-3 minutes. I’ve found that cranking longer than 6 seconds just overheats the 10 AWG cables on the pack and trips its thermal protection at 140°F (60°C).
When it fires — you’ll hear it catch — let it idle. Don’t rev to 5000 RPM like some old forums say. Modern alternators output 80-120A at 1500 RPM, but only 30-40A at idle. Still, idle for a minute, then drive.
3E: Disconnect in Reverse Order
Power off the jump starter first. Then black clamp off ground, then red off positive. This is opposite of connecting. Tuck cables so they don’t short. If your pack has a charged indicator blinking, you’ve used maybe 5-15 percent capacity per start.
Step 4: After It Starts — What Most Guides Skip
This is where people kill their alternator. Your battery was dead for a reason.
- Don’t shut off for 20-30 minutes. Drive at least 20 minutes, ideally highway with RPM above 2000 to get alternator bulk charge (14.2-14.8V). My Mazda shows 14.4V on the hidden diagnostic menu when charging.
- Check terminal tightness. After jump, re-torque terminals to spec: Most cars 5-8 N·m (44-70 in-lb). Loose terminals cause voltage drop and no-start next week. Use a 10mm socket, not pliers.
- Test battery. A healthy 12V reads 12.4-12.7V rested, 9.6V+ under load test for 10 seconds at 50% CCA. If rested voltage is 11.9V after driving, battery is sulfated — replace.
- Look for parasitic drain. If my dashcam was on parking mode all night (draws 300mA), that’s 2.4Ah over 8 hours — enough to kill a weak battery. I measured mine with a $20 clamp meter.
- Recharge your jump starter same day. Lithium self-discharges 2-3 percent per month, but cold kills it faster. Store at 50-70 percent for longevity, not 100 percent, if you won’t use it for months. Storage spec: 15-20°C ideal, cycle every 90 days.
Common Mistakes I’ve Made (So You Don’t Have To)
First time, I hooked up backwards. Pack saved me — beeped furiously. Second time, I left my pack in a freezing trunk all winter at 0 percent. It went to 0 and BMS locked it. Had to bring it inside for 2 hours to warm above 32°F before it would charge.
- Using a 6V mode on 12V car — some heavy-duty packs have 12V/24V switch. Double-check. 24V into a 12V ECU equals $2000+ repair.
- Clamping onto painted ground — high resistance equals no crank, hot clamp.
- Buying the smallest pack — I get it, $39 is tempting. But 600A peak at 0°F acts like 250A. Spend $79-129 for 2000A class — it’ll last 4-5 years if you treat it right.
- Jumping with pack below 25 percent — voltage sag under load can drop to 9V and confuse ECM, throwing U0100 codes. Always above 50 percent.
When Not to Use a Portable Jump Starter
Sometimes you need a pro.
- Battery is cracked, leaking, smells like sulfur
- Click is one loud clunk but no crank even with known-good booster — likely starter solenoid or seized engine
- Lights come on bright but crank is zero — could be immobilizer or neutral safety switch, not battery
- Vehicle is hybrid high-voltage system (Toyota Hybrid System) — those have a small 12V aux but jump procedure is different and high-voltage orange cables are 200+ volts. Check manual.
Final Thoughts
Learning to jump your own car without a second vehicle felt like unlocking a superpower. That little brick in my center console has saved me at 6 AM before work, at a trailhead with no cell service, and once when my daughter left the dome light on for 14 hours.
You don’t need to be a mechanic. You just need the right size pack, clean connections, and the discipline to go red first, black to ground, short cranks, and drive to recharge. Once you’ve done it solo, you’ll feel that same Ive got this I felt in that grocery store lot.
Keep your pack charged, keep your terminals torqued to spec, and you’ll never have to ask a stranger for a jump again.

Leave a Reply