
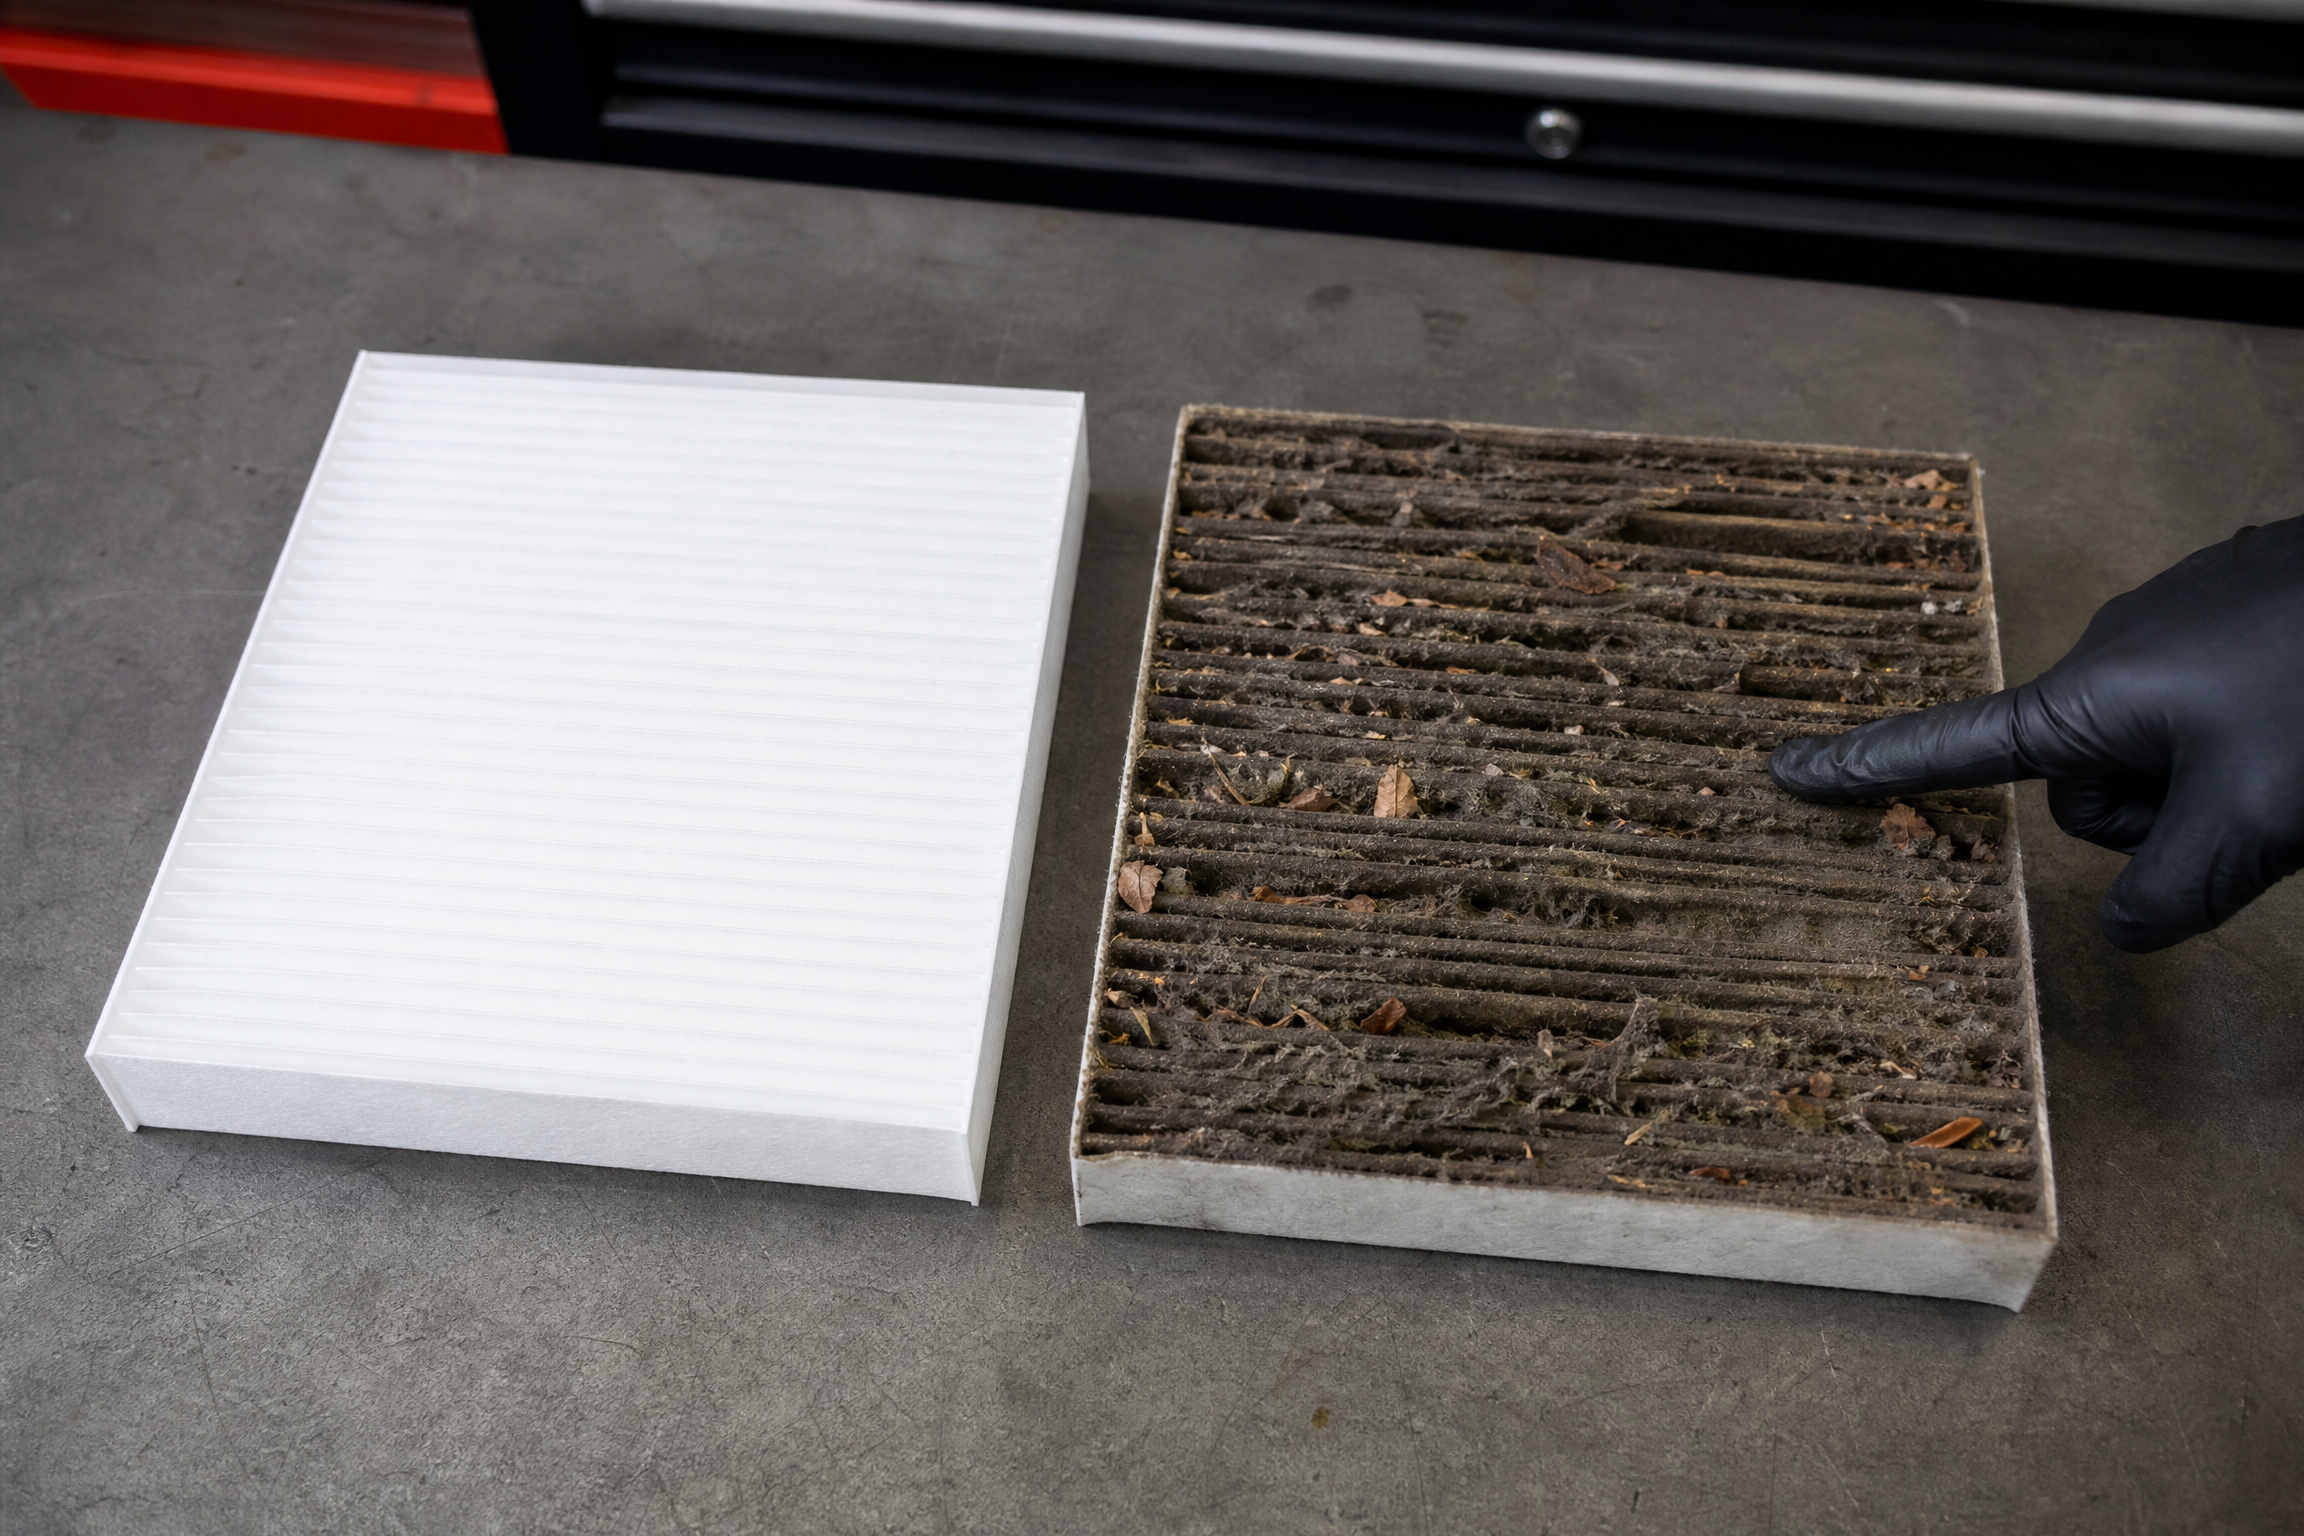
A customer complained last fall that her car “smelled like a wet dog” every time the fan kicked on. She’d paid for two interior detail jobs and the smell kept coming back.
I pulled her cabin air filter and it was gray felt made of leaves, road film, and one unfortunate insect. The detail cleaned the seats; the smell was living behind the glovebox. A $22 filter and four minutes fixed what $150 of detailing couldn’t.
The cabin air filter is the most ignored filter on the car, and the easiest to replace. Here’s how to do it and why your nose and lungs care.
What the Cabin Filter Does
Everything the fan blows at your face passes through that filter first: pollen, dust, brake dust, diesel soot, and the general film of the road.
It also protects the evaporator core, the cold coil behind the dash. A clogged filter starves the evaporator of airflow, the coil stays wet, and wet plus dark plus leaf debris is a mushroom farm. That’s the musty smell people try to detail away.
If you ride with allergies, kids, or a lot of city traffic, this little rectangle of paper is doing real health work every drive.
Signs It’s Done
- Weak airflow even on the fan’s highest setting.
- A musty or dusty smell when the system starts.
- Windows that fog slowly or won’t clear, because the defrost can’t move enough air.
- A whistling or wheezing noise from the dash at speed.
- Sneezing fits in the car that don’t happen outside.
Any one of those is a pull-the-filter-and-look moment. All of them together means it’s been a while.
Where It Hides
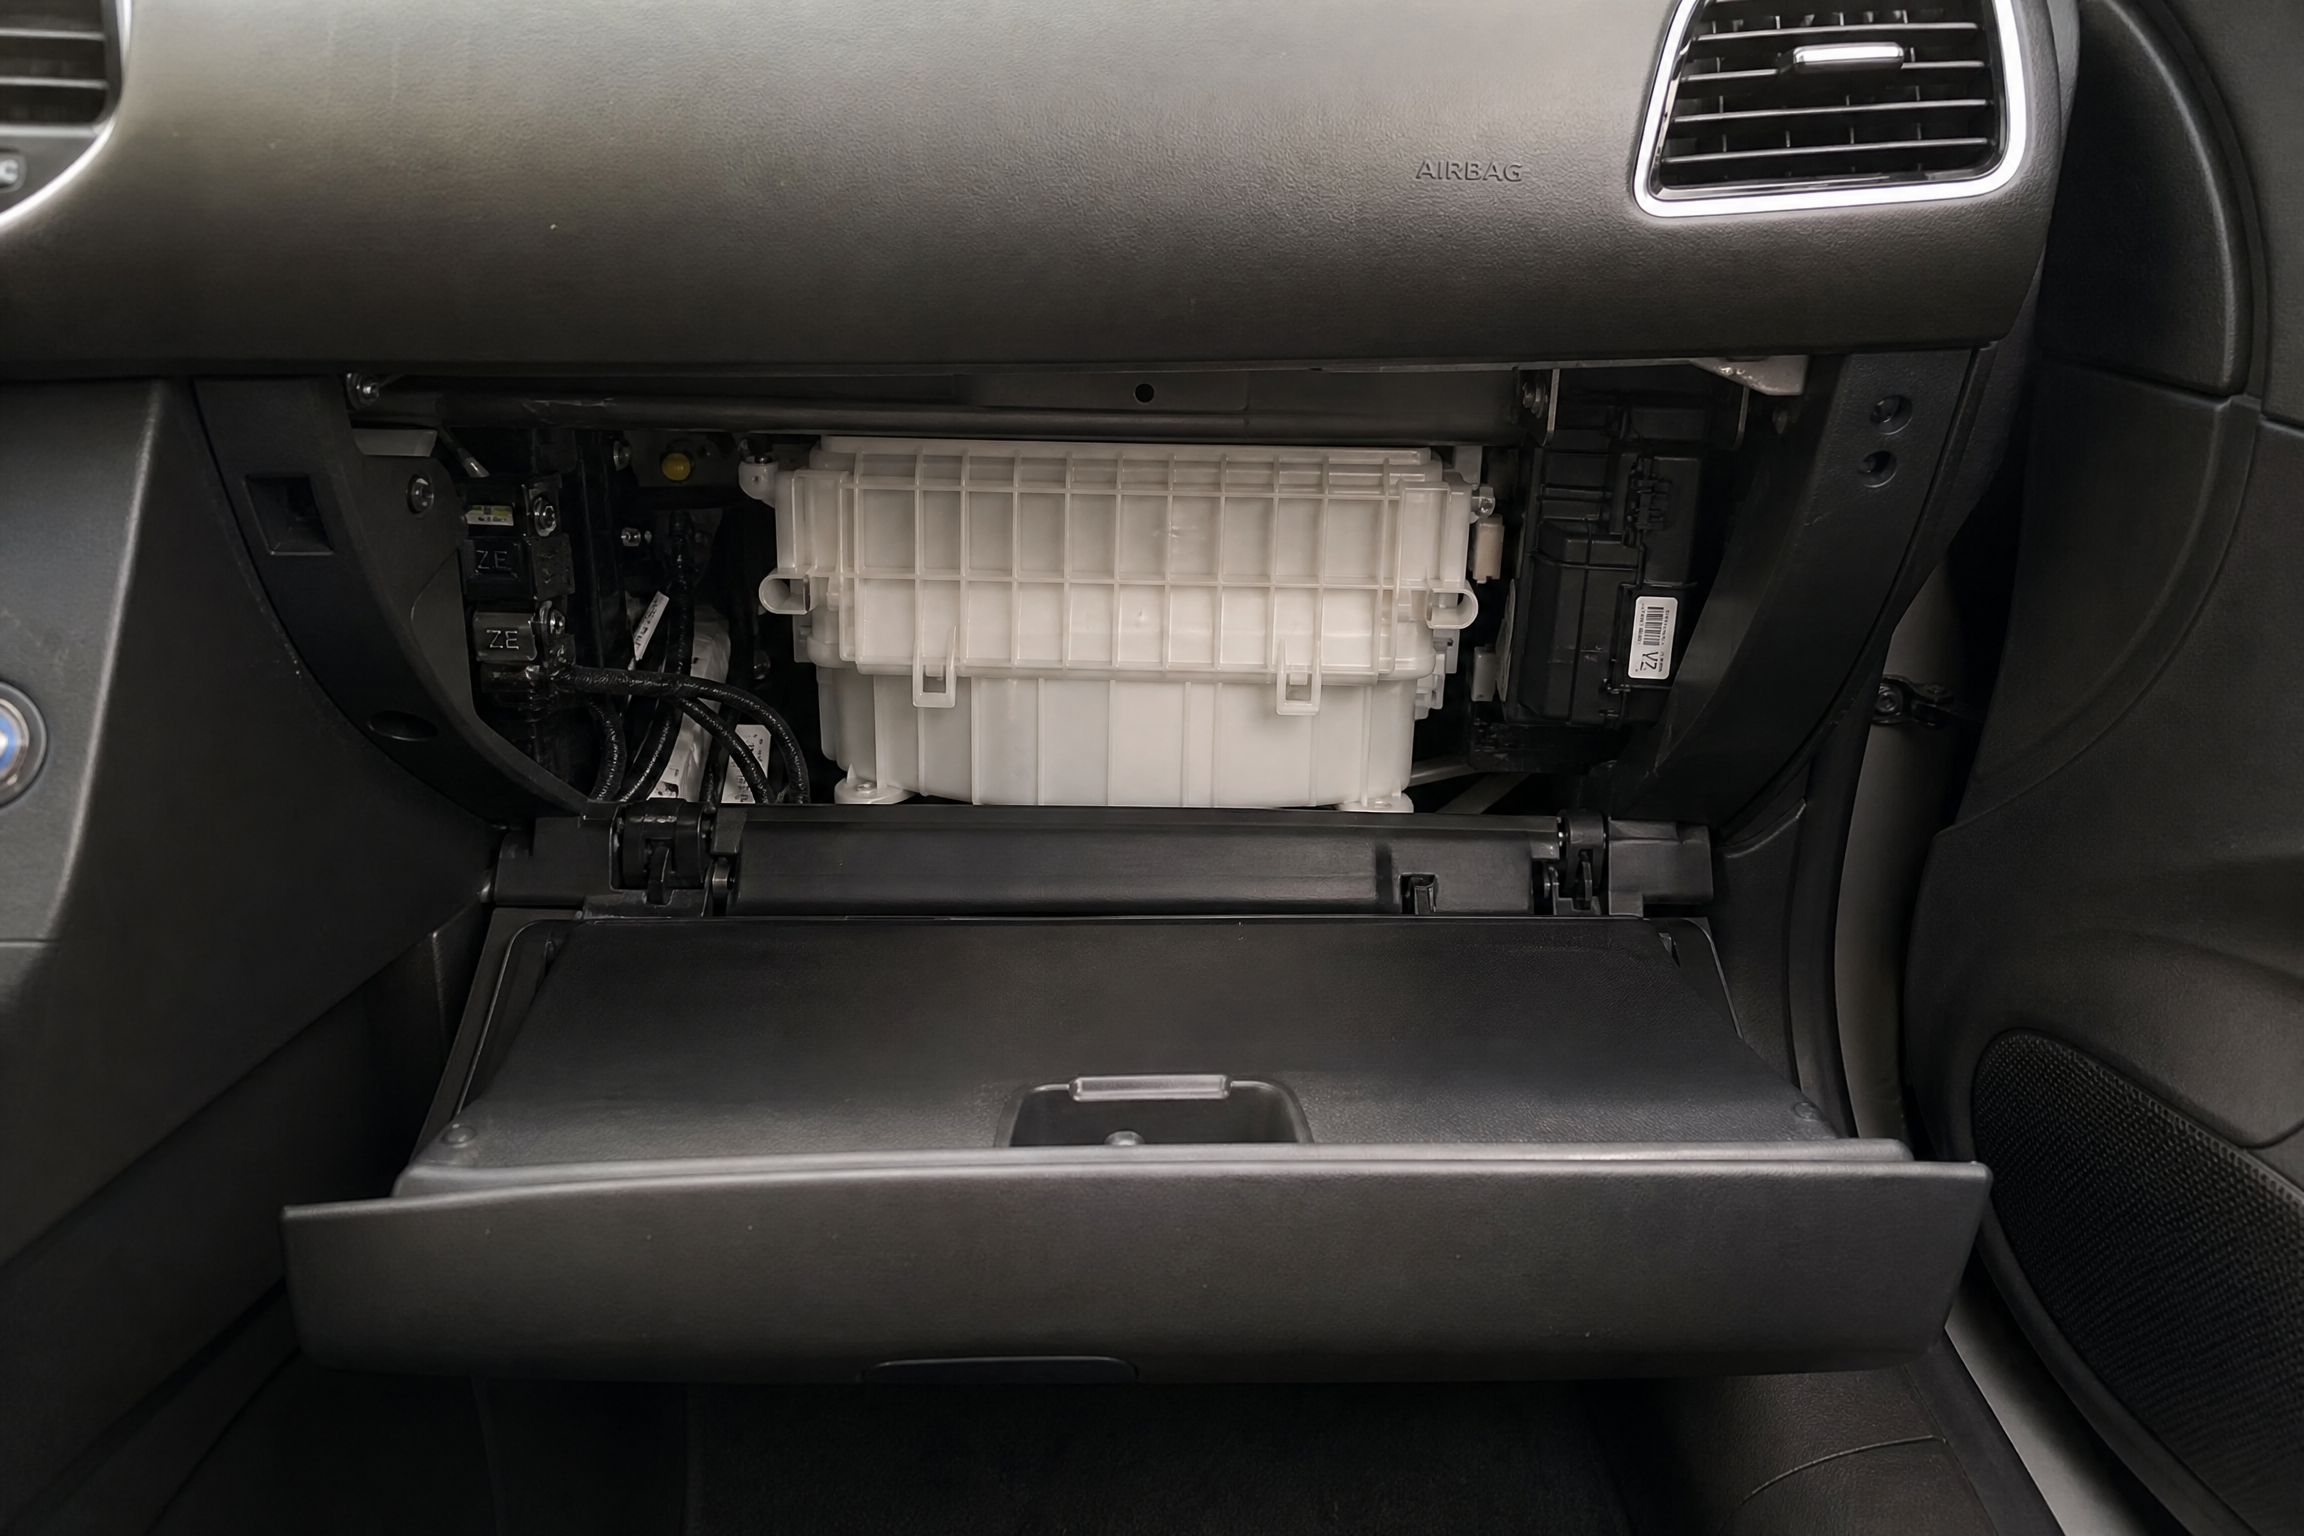
On most cars the filter sits behind the glovebox. Open the box and look up through the top or back for a rectangular plastic cover.
Some cars put it under the hood at the base of the windshield, in the plastic cowl where the wipers live. A few hide it under the dash near the pedals, which is the annoying version.
Your manual or a two-minute parts-store lookup tells you which. The part itself costs $15 to $30, and the box lists your car.
The Glovebox Version, Step by Step
1. Empty the glovebox. Everything out, including the manuals you’ll never read.
2. Drop the door. Most boxes are held open by a damper arm on one side — unclip it. Then squeeze the box’s sides inward, or push the two stop tabs out of their slots, and the door swings down past its normal stop.
3. Find the cover. A rectangular plastic plate, sometimes with two screws, sometimes with squeeze tabs.
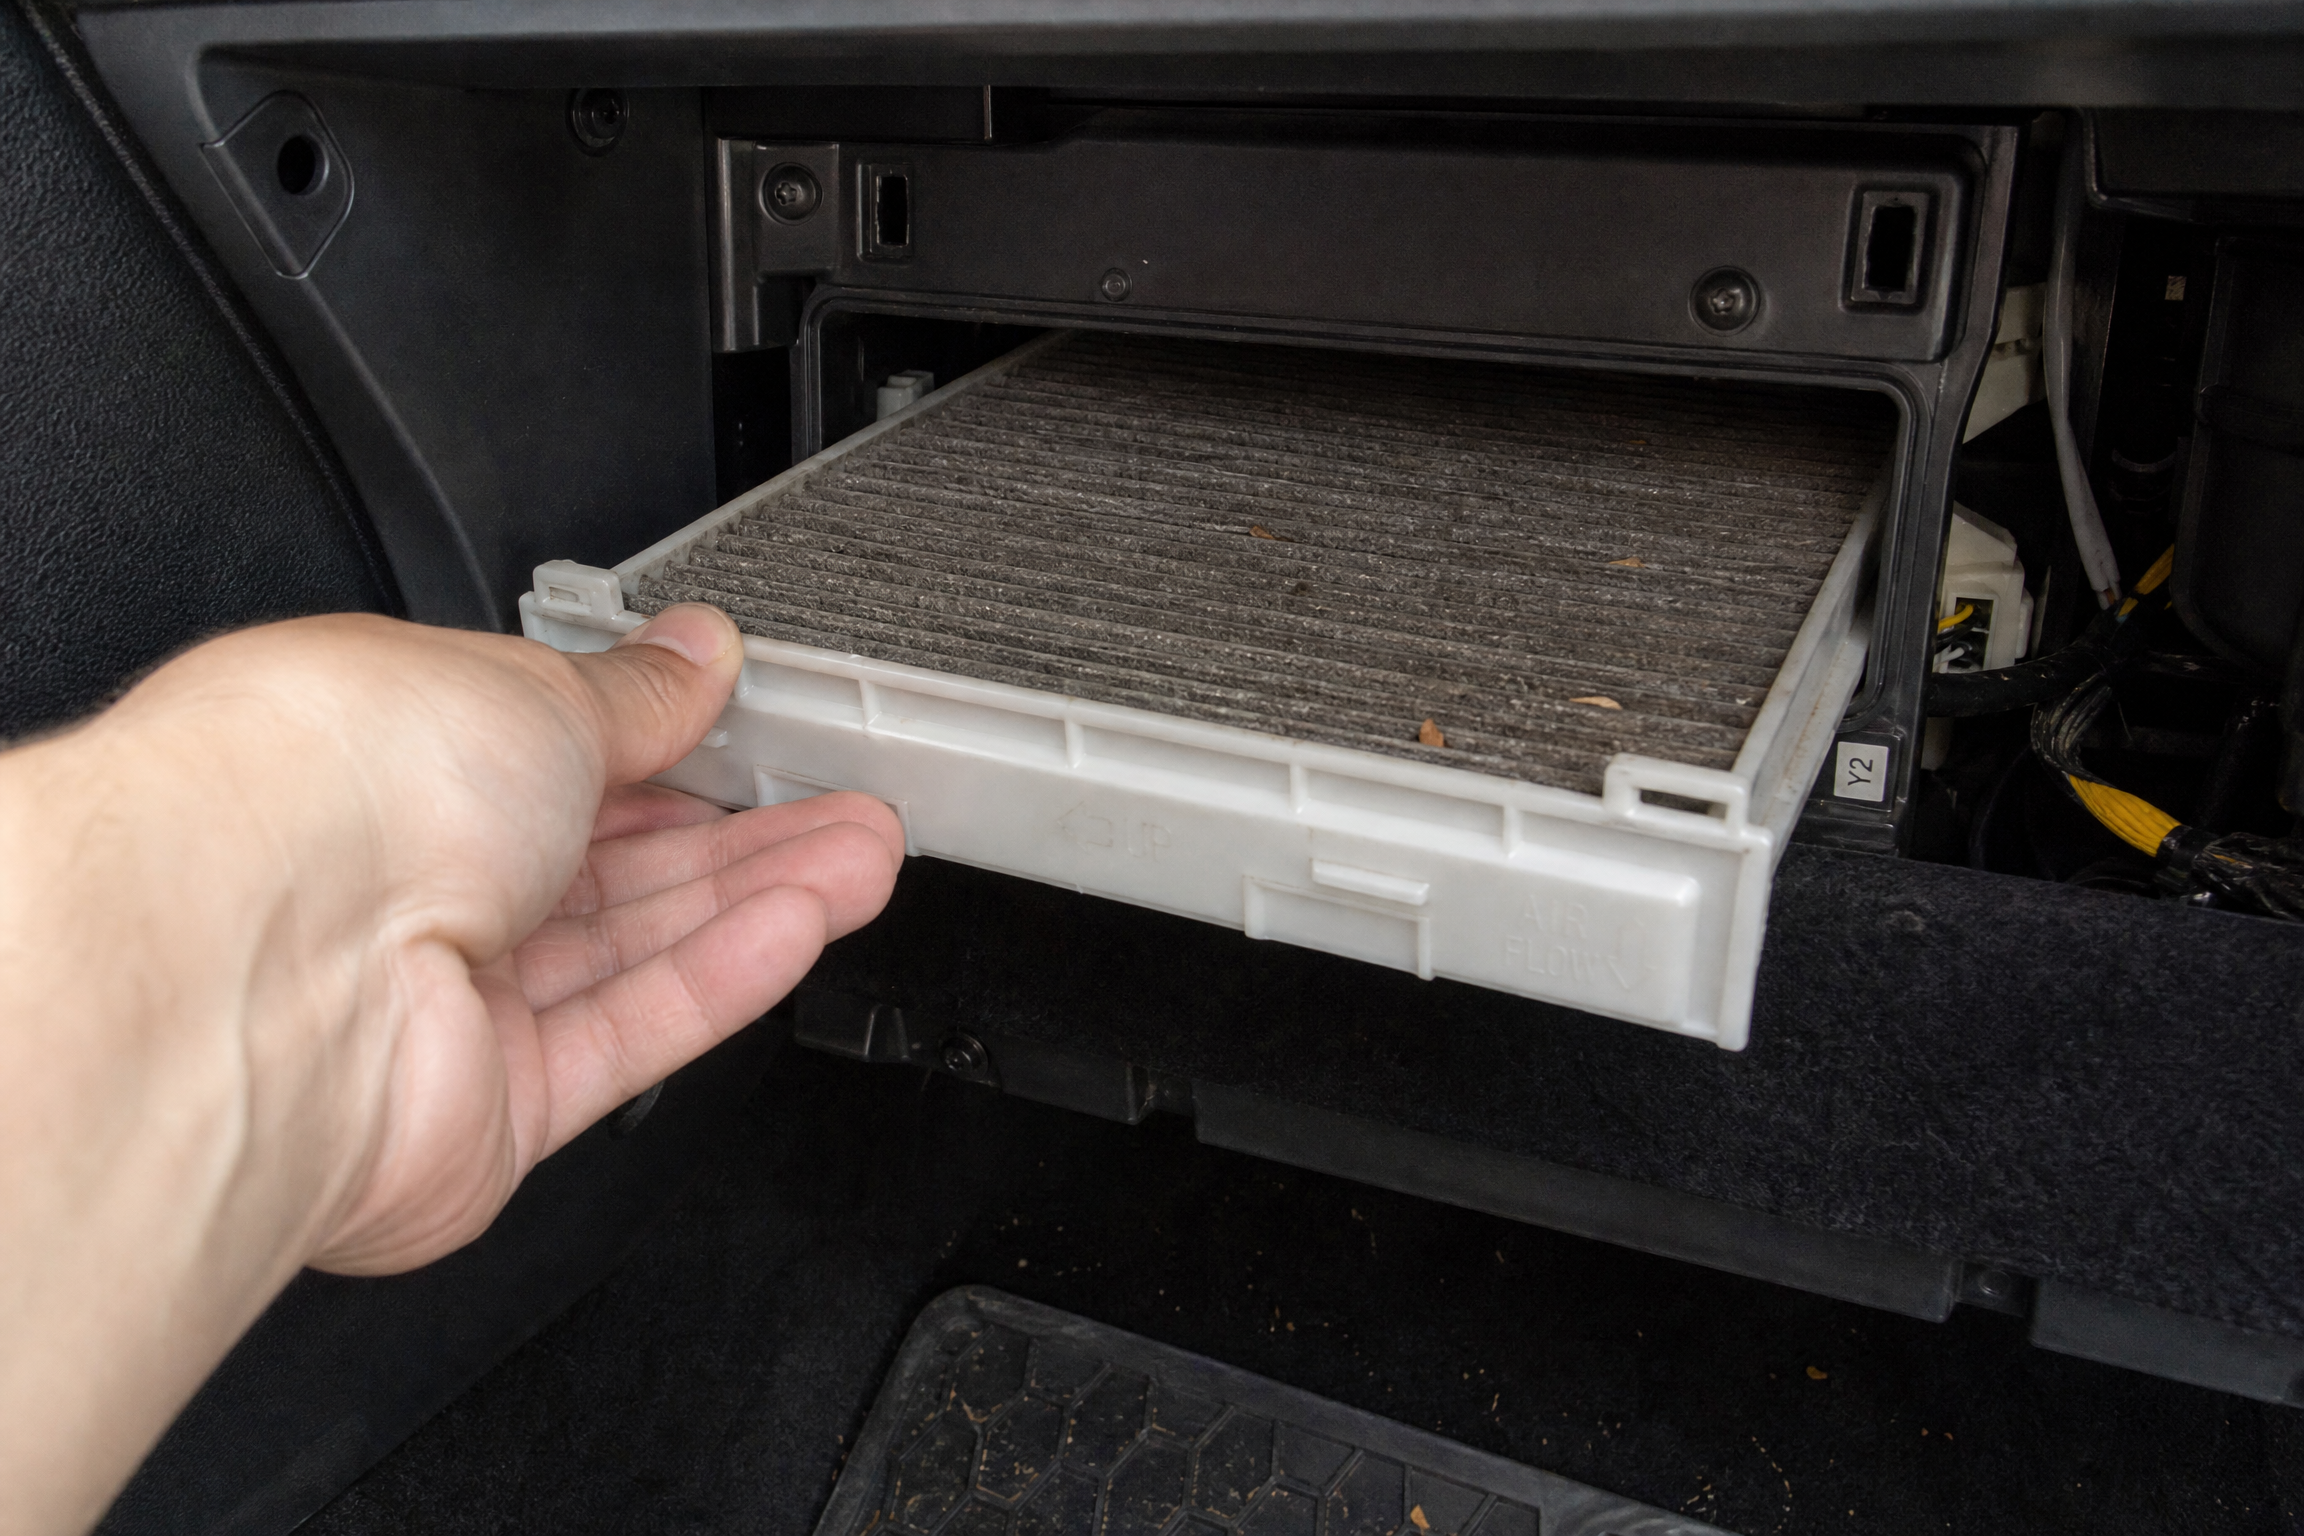
4. Open it and slide the filter straight out. Pull it toward you slowly so the debris on top doesn’t shower into the housing.
5. Look at it. Hold it to the light. Gray, matted, or leafy means replace. Even “not bad” filters get replaced if they’re past a year in my truck.
6. Vacuum the housing. A quick pass with the handheld vac or a brush wipes out leaves and fuzz before they reach the new filter or the evaporator.
7. Note the airflow arrow. The new filter’s edge is printed with an arrow showing which way air travels, usually pointing down toward the blower. Wrong way around, the filter fights the airflow and seals badly.
8. Slide it in. It should drop in flat with the frame seated all the way around. If you have to bend it hard, it’s the wrong part or the wrong orientation.
9. Close the cover, hang the glovebox. Re-engage the stops, clip the damper, and you’re done. Four minutes, first try included.
Picking a Filter: Paper, Carbon, or Fancy?
Particulate (standard) filters catch dust and pollen. Fine for most drivers and the cheapest.
Activated carbon filters add a charcoal layer that adsorbs odors, exhaust fumes, and ozone. If you commute in traffic or hate the “city smell,” this is the one. It costs a few dollars more and is my default.
Electrostatic or high-efficiency versions grab finer particles for allergy households. Great if someone in the car sneezes for a living.
Skip no-name filters that are a size off. Gaps around the frame let unfiltered air straight past, which defeats the whole point.
How Often?
My rule: every 12 months or 10,000 to 15,000 miles, whichever comes first. City driving, dirt roads, or a tree-heavy neighborhood cut that in half.
I swap mine every fall when the leaves drop, so the winter defrost season starts with full airflow. Foggy mornings are the wrong time to discover a choked filter.
When the Smell Won’t Leave
If a new filter kills the weak airflow but the musty smell remains, the evaporator core itself has biofilm on it. Two fixes help.
First, find the A/C drain tube under the dash and make sure it flows. A plugged drain keeps the evaporator soaked, and soaked stays smelly.
Second, use an evaporator cleaner spray with the fan running and the drain open, per the can’s instructions. It’s not magic on thick slime, but on early smell it resets the system.
And please don’t mask it with a dashboard air freshener. That’s a bandage on a mushroom farm.
Mistakes I Keep Seeing
Arrow backwards. The filter works against itself and can collapse the pleats.
Forcing the wrong size. A bent frame leaves gaps; gaps are dirt highways.
Skipping the housing cleanup. Leaves left in the box ride on top of the new filter and keep the smell alive.
Never checking because “the dealer does it.” The dealer does it when you pay for it, which is usually never.
Try It: Cabin Air Verdict
Three questions, straight answer.
How’s your cabin air?
Months since last change
Any symptoms? (weak air, smell, fogging, whistle)
Where you drive
Wrap-Up
The cabin filter is the cheapest health upgrade your car will ever get, and the rare job where the first attempt takes the same time as the tenth.
Change it yearly, pick carbon if traffic is your commute, and vacuum the housing while it’s open. Your fan blows harder, your windows clear faster, and the wet-dog smell stays a story instead of a smell.
Weird glovebox that won’t drop, or a cover with mystery screws? Comment with the year and model and I’ll talk you through it.




Leave a Reply