
There is a specific kind of satisfaction that only a car guy understands—stepping into a cockpit that smells like fresh leather instead of old fast food, where the carpets are so clean you almost feel bad putting your boots on them. Most people think “detailing” just means a quick vacuum and a spruce-up with some shiny dashboard spray, but if you want that showroom-new feel that lasts, you have to go deeper. You have to get into the fibers, the pores of the vinyl, and the hidden crevices where dust and grime have been staging a hostile takeover for years.
I’ve spent countless Saturdays in my driveway with a torn-up t-shirt and a bottle of APC (All-Purpose Cleaner), chasing down coffee stains that the previous owner swore were permanent. What I learned is that the interior is actually harder to maintain than the exterior paint. Your seats and steering wheel are high-friction zones, constantly absorbing body oils, sweat, and UV rays. If you don’t have a systematic plan, you’ll just end up moving dirt from one corner to the other.
In this massive guide, we are going to break down the professional top-to-bottom detailing workflow, look at the essential chemicals every DIYer needs in their kit, compare the best interior dressings, walk through a meticulous cleaning checklist, and test your skills with our interior detailing mastery quiz.
The Detailing Hierarchy: Why You Must Work Top-to-Bottom
If you start by vacuuming your carpets and then move on to cleaning your dashboard and headliner, you are wasting your time. Gravity is your enemy in detailing. Every time you scrub a sun visor or wipe down a dusty air vent, microscopic particles and chemical overspray fall onto the surfaces below. If your carpets are already clean, you’ve just contaminated them again.
The professional workflow always starts with the headliner and works its way down to the floor mats. The headliner is the most delicate part of your interior—usually made of thin fabric glued to a foam backing. If you soak it with too much cleaner, the glue will fail, and you’ll end up with a sagging “ceiling” that’s nearly impossible to fix without a total replacement. I always use a dry microfiber towel and just a mist of cleaner on the cloth, never the fabric itself.
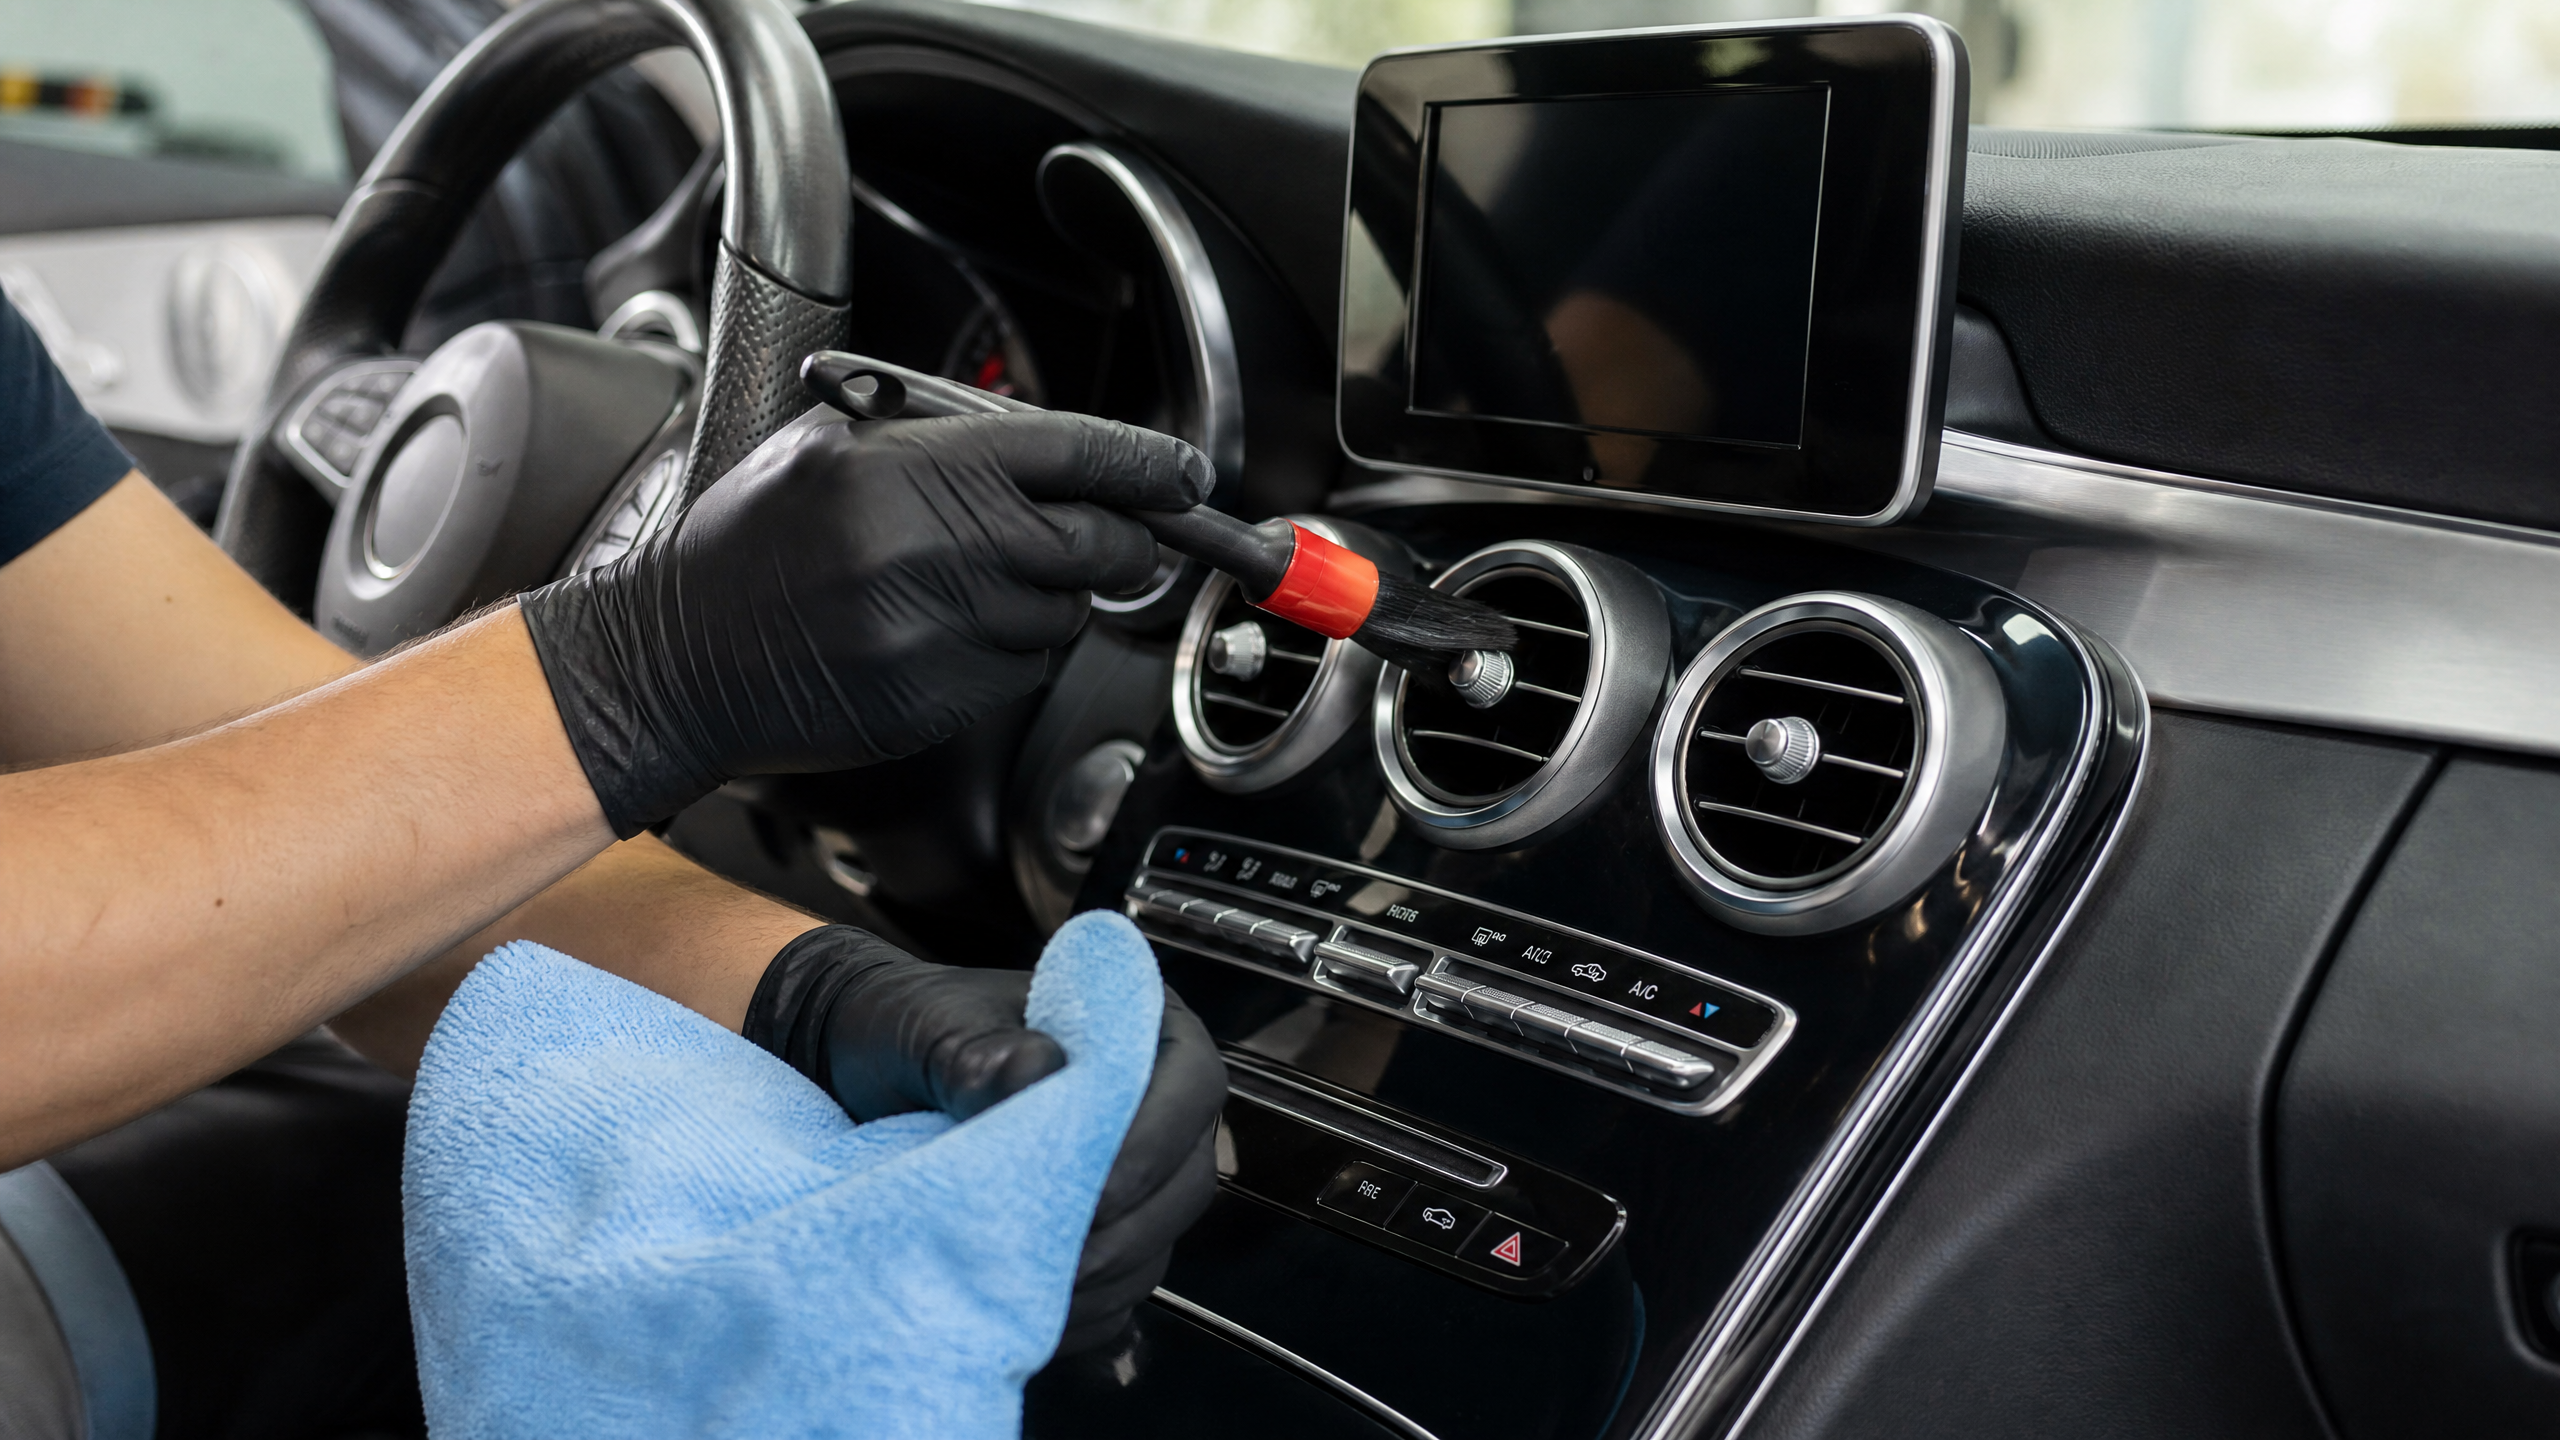
Next come the pillars and the upper dashboard. These areas are prime targets for UV damage. Over time, the sun bakes the plasticizers out of your dash, leading to that brittle, cracked look you see on old project cars. Cleaning these areas requires a pH-balanced interior cleaner that lifts dirt without stripping away the remaining oils. I like to use a soft-bristled detailing brush to agitate the grain of the plastic, pulling the dirt out of the texture rather than just wiping over it.
Windows and glass should actually be saved for the very last step. Even if you clean them early, you’re likely to get interior dressing or dust on them while working on the seats and door panels. Using a dedicated glass cleaner (ammonia-free if you have tinted windows) and two separate microfiber towels—one for the initial wipe and one for the final buff—is the only way to get that streak-free clarity that makes the car feel truly invisible.
Don’t forget the door jambs and sills. These are the transition zones between the dirty outside world and your clean interior. A car can have spotless seats, but if the door sills are covered in grease and road salt, the whole detail feels unfinished. I use a slightly stronger dilution of APC here and a stiff brush to get into the hinges and weatherstripping, ensuring every inch of the car reflects the work I’ve put in.
When you work on the steering wheel, remember it is the single most touched surface in the entire car. It accumulates a literal layer of dead skin cells and oils that turn a matte factory finish into a greasy, shiny mess. Using a dedicated interior cleaner and a soft brush to gently lift that grime will completely change the tactile feel of the car. It’s the difference between driving a used taxi and a brand-new machine.

Essential Interior Detailing Supplies & Chemical Safety
Walking into an auto parts store can be overwhelming with rows of colorful bottles promising “miracle” results. You don’t need fifty different products; you need a few high-quality basics and the knowledge of how to use them safely.
| Product Category | Primary Use Case | Pro Tip |
|---|---|---|
| Interior APC | Hard plastics, vinyl, and rubber mats | Always dilute 10:1 for interior use to avoid staining |
| Leather Cleaner/Conditioner | Genuine and synthetic leather surfaces | Use a horsehair brush for deep pore agitation |
| Fabric Extractor Solution | Deep cleaning carpets and cloth seats | Pre-treat stains with a dedicated enzyme cleaner |
| Matte Interior Dressing | UV protection for dash and door panels | Avoid “high-gloss” silicone products that cause glare |
Chemical safety is something many DIYers ignore until they ruin a $500 door panel. Never spray a cleaner directly onto a hot surface that’s been sitting in the sun. The heat causes the chemical to evaporate instantly, leaving behind concentrated streaks or “chemical burns” in the plastic. Always work in the shade and ensure the interior is cool to the touch before applying any liquids.
When it comes to leather, remember that most modern car leather is actually “top-coated” with a thin layer of clear vinyl. This means you aren’t actually conditioning the hide itself, but rather cleaning the protective coating. Using heavy, oily conditioners on top-coated leather just creates a sticky mess that attracts more dirt. A light, water-based protectant is all you need to keep it looking supple and factory-fresh.
Microfiber towels are the backbone of any detailing job, but they aren’t all created equal. I keep a color-coded system: blue for glass, yellow for interior plastics, and black for the greasy stuff like door jambs. This prevents cross-contamination. If you use the same towel to wipe a greasy door hinge and then try to clean your navigation screen, you’re going to have a bad time. And whatever you do, never use fabric softener when washing your microfibers—it ruins their ability to absorb and trap dirt.
Advanced Material Care: Alcantara, Carbon Fiber, and Piano Black
As car interiors evolve, we are seeing more exotic materials in everyday vehicles. If you have a modern performance car, you likely have Alcantara or microsuede surfaces. This stuff feels amazing, but it’s a nightmare to clean if you treat it like regular cloth. Alcantara is actually a synthetic polyester blend that mimics suede, and its biggest enemy is the oils from your skin. Over time, those oils mat down the fibers, turning a soft, fuzzy surface into a flat, greasy-looking patch.
To clean Alcantara, you need a dedicated suede/Alcantara cleaner and a very soft brush. I use a technique called “cross-hatching.” I lightly mist the cleaner onto the brush, work it in one direction, and then work it perpendicular to the first pass. The goal is to lift the fibers back up. Once it’s dry, I use a clean, dry brush to “groom” the nap so it looks uniform. Whatever you do, never use a steam cleaner or high heat on Alcantara—you’ll permanently melt the synthetic fibers and ruin the texture.
Then there’s “Piano Black” trim—the bane of every detailer’s existence. It looks beautiful for exactly five minutes after leaving the showroom, and then it becomes a magnet for fingerprints and micro-scratches. I treat piano black like the exterior paint of the car. I never wipe it dry. I always use a plush microfiber and a quick detailer or a very mild interior cleaner. If it’s already scratched, you can actually use a tiny bit of finishing polish and a hand applicator pad to bring the shine back, just like you would on your hood.
Carbon fiber trim is usually finished with a thick clear coat, similar to your car’s exterior paint. This makes it fairly durable, but it can still yellow or crack if exposed to extreme UV rays over many years. I always make sure to apply a UV-protectant dressing to any exposed carbon fiber. If the clear coat on the carbon fiber gets scratched, you can buff it out just like paint. Just be careful not to go too deep—if you hit the actual carbon weave, there’s no fixing it without a total replacement.
The Battle Against Pet Hair and Stubborn Stains
If you have a dog, you know that pet hair doesn’t just sit on the carpet—it weaves itself into the fibers like it’s trying to become part of the car. A standard vacuum won’t touch the really stubborn stuff. I’ve tried every “pet hair tool” on the market, and the most effective thing I’ve found is a simple rubber squeegee or a specialized pet hair brush with rubber bristles. The rubber creates static electricity that pulls the hair out of the carpet pile, making it easy to vacuum up.
Another pro trick for pet hair is using a pumice stone—but be careful! You can only use this on heavy-duty carpets, never on delicate upholstery or leather. You gently “rake” the stone across the carpet, and it catches the hair and pulls it into a pile. It’s incredibly satisfying to watch, but again, test it in an inconspicuous area first to make sure you aren’t tearing up the carpet fibers. I’ve seen people ruin their trunk liners by being too aggressive with a pumice stone.
Stains are a whole different animal. The key to stain removal is understanding what you’re fighting. Protein-based stains (like milk or blood) require an enzyme cleaner that literally eats the organic matter. Oil-based stains (like dropped french fries or makeup) need a degreaser. I always start with the mildest cleaner possible and work my way up. I once spent three hours trying to get a red Gatorade stain out of a tan seat—the trick ended up being a steam cleaner and a white cotton towel to “wick” the stain out of the fabric.
For those of you with kids, you know the struggle of “mystery gunk” in the back seat. Whether it’s melted crayons or dried juice, the approach is the same: soften, then lift. For something like gum or wax, I use an ice cube to freeze it, which makes it brittle so I can chip it off. For sticky spills, I use warm water and a mild soap, letting it dwell for a few minutes before blotting it up. Never rub a stain—you’ll just push it deeper into the foam padding under the fabric.
Step-by-Step Checklist: The Deep Interior Clean
- The Big Purge: Remove all trash, floor mats, and personal items. Use an air compressor or a can of compressed air to blow dust out of the tightest cracks, like seat rails and button gaps.
- Dry Vacuuming: Use a high-powered shop vac with a crevice tool. Go over the carpets twice—once in each direction—to pull up sand and grit buried deep in the fibers.
- Headliner and Pillars: Lightly mist a microfiber with interior cleaner and gently wipe down the fabric. Avoid scrubbing, which can cause pilling or sagging.
- Dashboard and Console: Use a detailing brush and APC to agitate the texture of the plastic. Wipe away the grime immediately with a clean towel. Use Q-tips for the tiny vents and buttons.
- Seat Restoration: For leather, use a leather cleaner and a soft brush. For cloth, use a fabric cleaner and a stiff brush, followed by a wet-vac extraction if possible.
- The Floor Mat Scrub: Take your rubber or carpet mats outside. Scrub them with a stiff brush and soapy water, then let them dry completely before putting them back in.
- Glass and Final Inspection: Clean the windows with an ammonia-free cleaner. Check your work with a flashlight to ensure there are no streaks or missed dust in the corners.
Odors are the final frontier of interior detailing. If your car still smells “off” after a deep clean, the culprit is likely the cabin air filter or bacteria in the HVAC evaporator. Replacing the filter is a 5-minute job on most cars, and using an aerosol “odor bomb” or an ozone generator (with caution!) can neutralize those stubborn smells that cleaning alone can’t reach.
Maintaining the work you’ve done is much easier than doing a full deep clean every time. I keep a small pack of interior detailing wipes in my glove box for quick spills and a small microfiber towel to dust the dash at red lights. If you spend five minutes a week on maintenance, you only have to do the “big job” once or twice a year.
Finally, consider the psychological impact of a clean car. Studies have shown that a cluttered, dirty environment increases stress levels. When you spend two hours a day commuting in a mobile trash can, it takes a toll on your mood. A clean, organized interior makes every drive feel like a luxury experience, even if you’re just headed to the grocery store in a 10-year-old sedan.

Interactive Interior Detailing Quiz
Interior Detailing Mastery Quiz
1. Why should you avoid using ammonia-based glass cleaners on your car?
A) It makes the car smell like a hospital.
B) Ammonia can damage window tint and dry out interior rubber seals.
2. What is the biggest risk when cleaning a car’s headliner?
A) Getting dust in your eyes.
B) Over-saturating the fabric, which can dissolve the glue and cause the headliner to sag.
Correct Answers: 1 is B (tint safety), 2 is B (glue failure risk).
Taking the time to detail your interior isn’t just about vanity; it’s about preserving the value of your vehicle and making your daily drive a whole lot more pleasant. A well-maintained interior tells the next buyer that the car was loved, and it tells you that you take pride in your machine.
For more ways to keep your car in top shape, check out our guides on ceramic coating vs. wax and how to clay bar your car.
Related posts:
 Brake Fluid Breakdown: Understanding DOT Ratings and When to Bleed Your Braking System
  Rainy Season Car Care: Essential Tips for Safe Wet-Weather Driving
  The Science of Suspension: Choosing the Right Car Parts for Enhanced Performance and Comfort
  How to Replace Your Air Filter: Boost Fuel Economy & Engine Health
Leave a Reply