
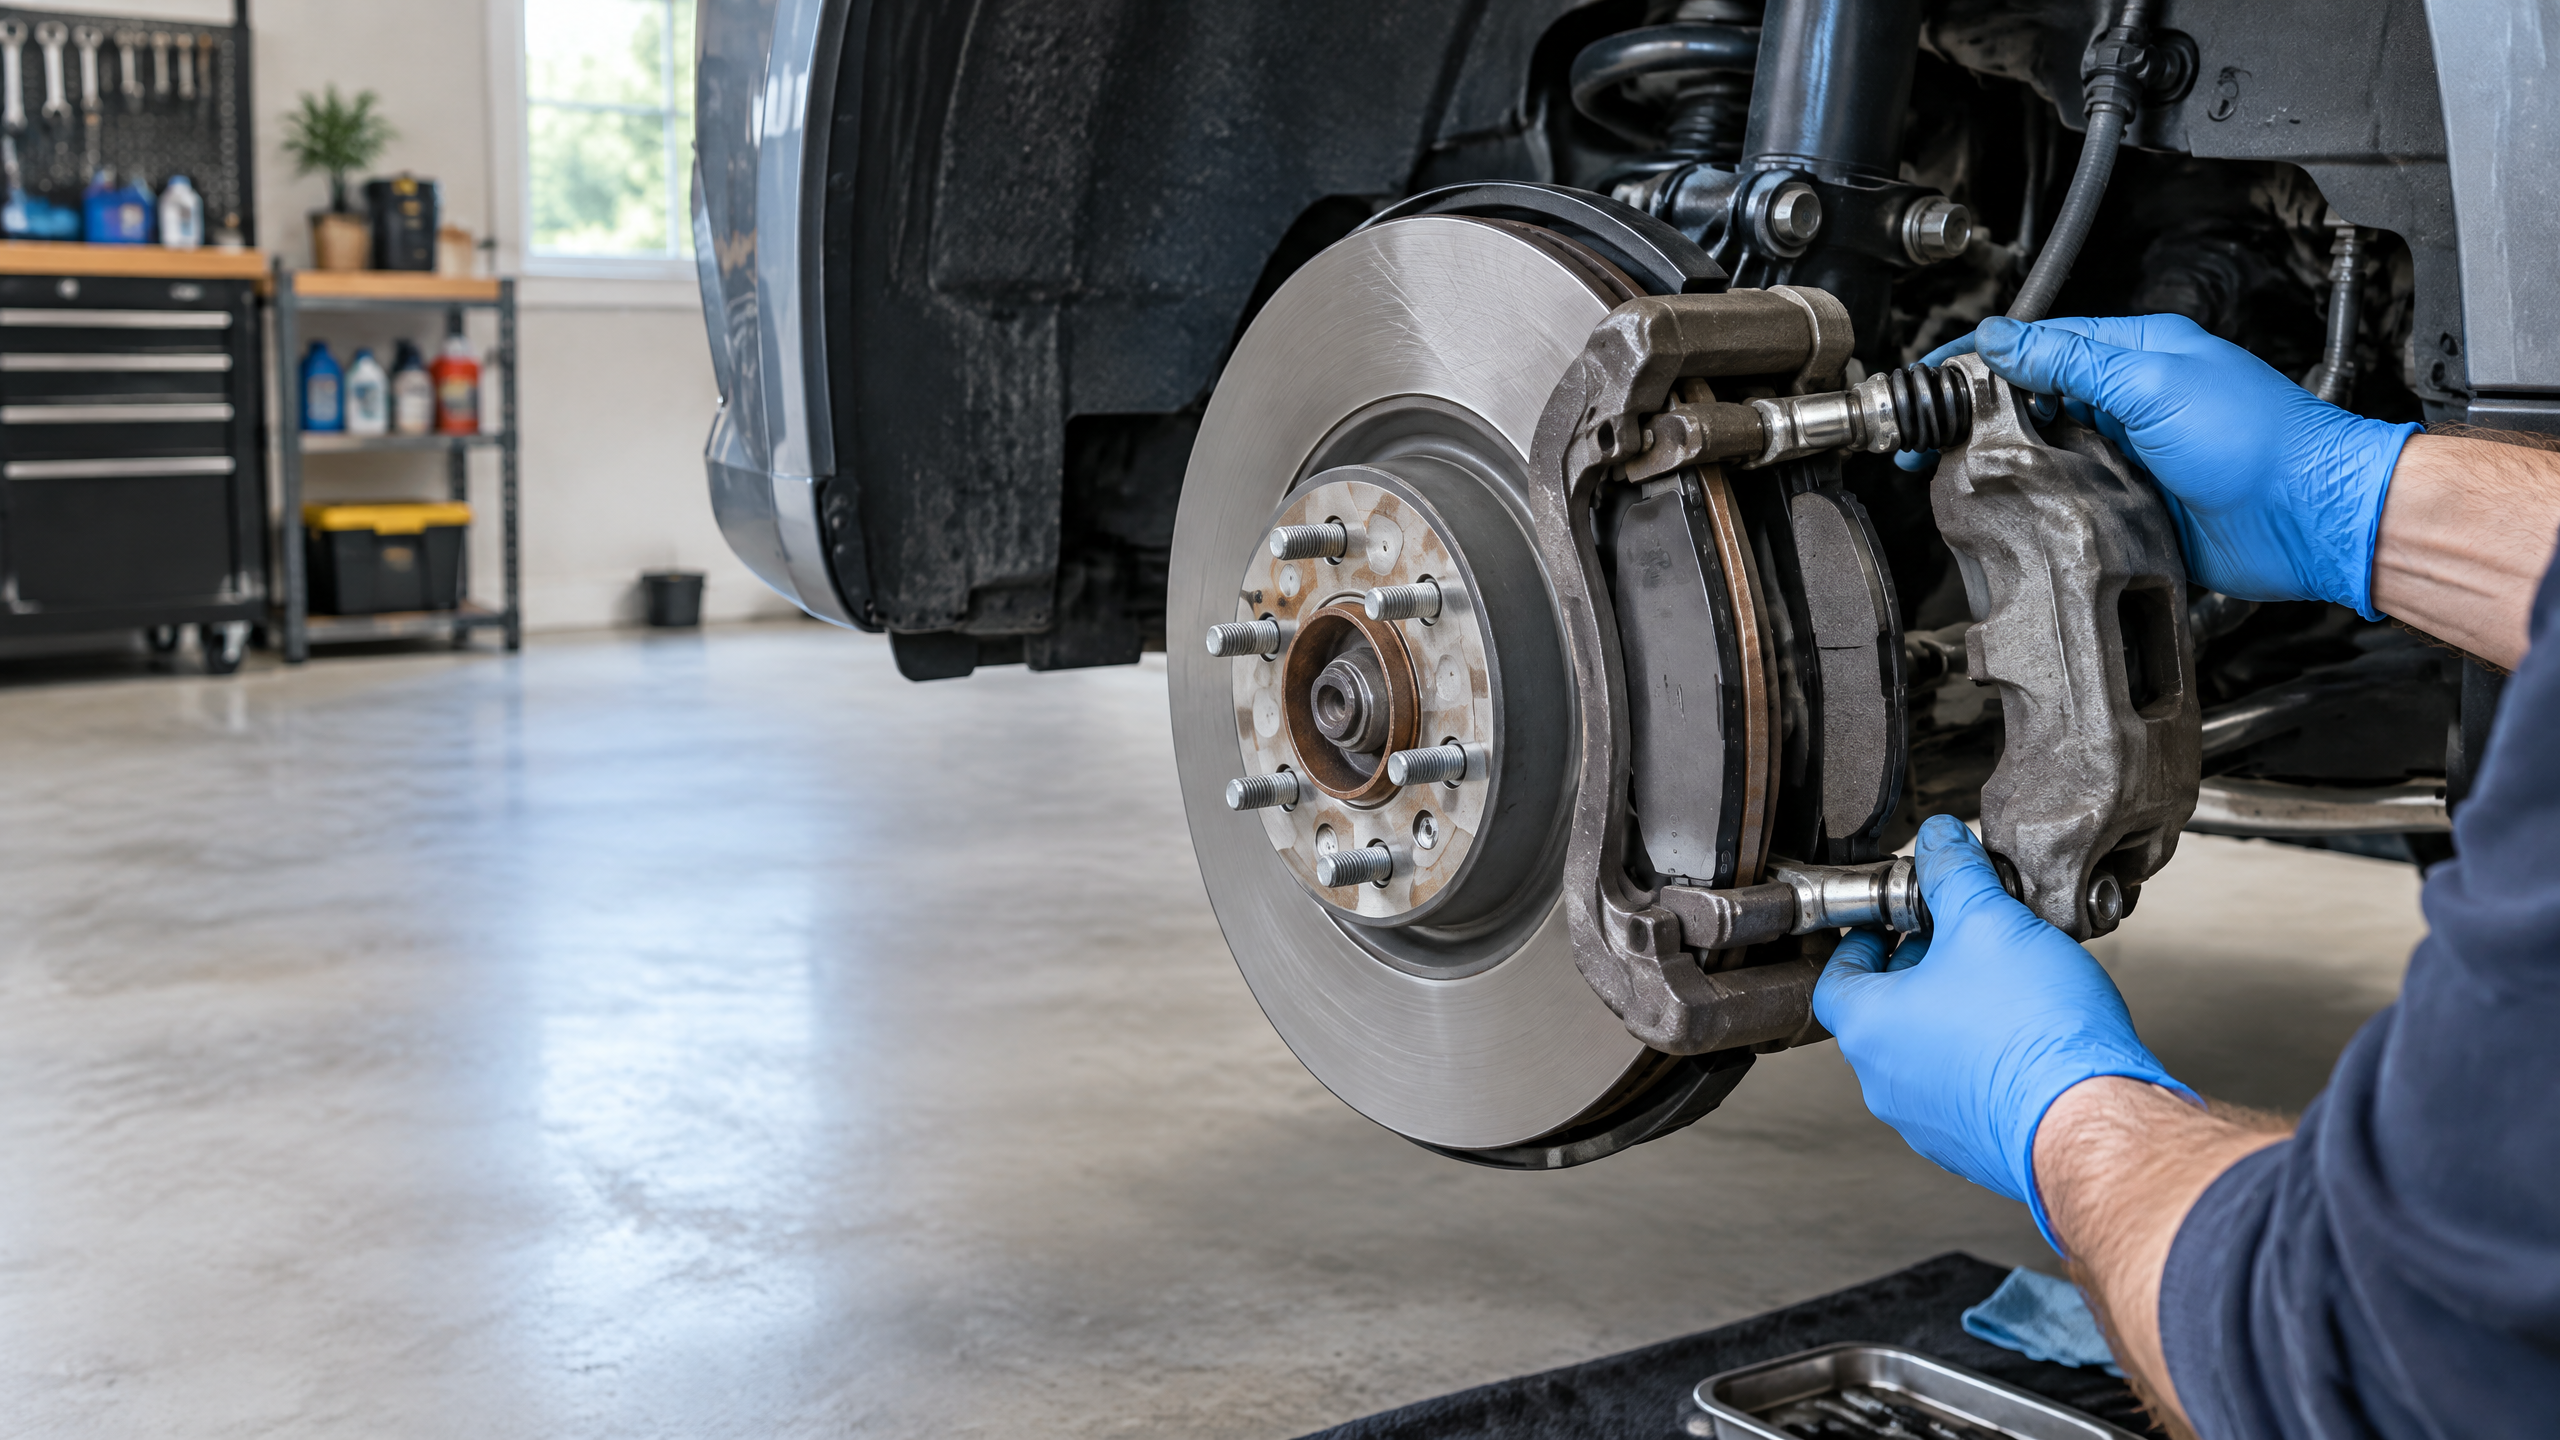
That high-pitched squeak every time you touch the brakes makes your car sound cheap, even if it isn’t. You pull up to a stoplight, gently tap the pedal, and eeeeee. Everyone looks. You know your pads are still good, you just had them checked, but the car sounds like it’s falling apart.
I’ve chased that noise on my own driveway more times than I care to admit. On my old Corolla, on my brother’s F-150, and most memorably on a 2012 Camry that ate through pads every 15,000 miles. And nine times out of ten, it isn’t the pad material itself. It’s dry metal touching dry metal where the pad should be sliding and floating freely.
If you can change a tire, you can fix this. It’s a 45-minute job that shops often skip or rush, and it will save you $150 in labor and make your brakes quiet, smooth, and longer-lasting.
Let’s do it properly.
Why Your Brakes Squeak Even With Good Pads
To understand the fix, you have to understand the noise.
Brakes work by clamping. When you hit the pedal, the caliper squeezes the pads against the spinning rotor. The friction material on the pad bites the rotor, and you stop. Simple enough.
But for that to happen smoothly, two things need to move just a tiny amount:
- The pad backing plate has to slide in the bracket. The steel ears on the sides of the pad sit in stainless steel clips. They need to slide in and out a millimeter or two as the pad wears.
- The caliper has to float on its slide pins. Most cars have floating calipers. The caliper body itself slides on two greased pins so it can center itself over the rotor and apply even pressure.
If either of those movements is restricted by rust, dirt, or dried-out grease, you get what engineers call stick-slip. The metal sticks, then suddenly slips, then sticks again, hundreds of times per second. That vibration acts exactly like a violin bow on a string. You hear it as a squeal, a squeak, or that annoying low-speed groan in parking lots.
Most quick pad-slap jobs are guilty here. They pull out the old pads, push the piston back, drop in new pads, and send you on your way. They don’t wire-brush the rust that has built up under the stainless shims. They don’t pull, clean, and re-grease the slide pins. So six months later, the ears start to bind, the caliper starts to drag on one side, and the squeak comes back.
On that 2012 Camry I mentioned, I was convinced I had a bad batch of pads. I replaced them twice. The third time I actually looked, the slide pins were bone dry. No grease at all, just black dust. The rubber boot had a tiny tear and all the grease had washed out over winter. The caliper wasn’t floating, so the inner pad was doing all the work, wearing at an angle and vibrating like crazy.
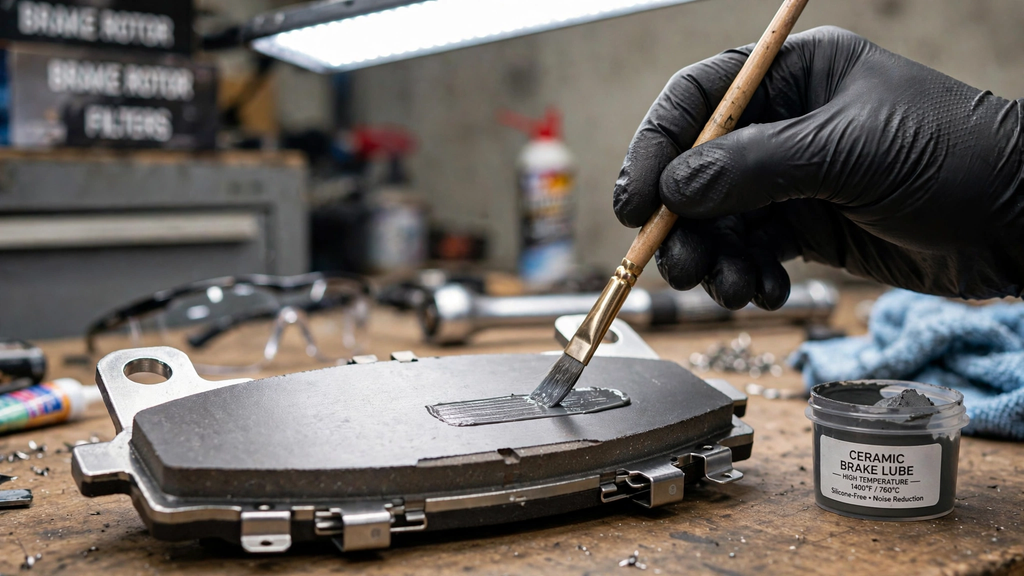
Pad backs get a rice-grain thin film of ceramic lube to kill vibration.
What You Actually Need to Lube (And What You Should NEVER Lube)
This is where people mess up. Brake systems need very specific grease, in very specific places, in very small amounts. More is not better.
You DO lube these three spots:
1. Slide pins and their bores:This is non-negotiable. Use 100% silicone-based brake grease only. It’s usually purple, clear, or pink and says “silicone” and “for slide pins/boots” right on the tube. Why silicone? Because petroleum-based grease (regular bearing grease, white lithium, WD-40) will swell the rubber boots and the pin bushings. Once those swell, the pin seizes for good. Ask me how I know.
2. Pad backs where they contact the shims and piston: This is your anti-squeal layer. The back of the pad is a steel plate. It vibrates against the piston and the caliper fingers. You need a thin, high-temp lube to dampen that. Use a ceramic-based brake lube or moly-based anti-squeal paste. The black or dark grey stuff in the little packets. It’s designed to stay put at 400+ degrees and not melt and run.
3. Pad ears and bracket contact points:Where the little steel ears of the pad touch the stainless clips in the bracket. Just a whisper of that same ceramic/moly lube. This is what lets the pad slide freely instead of binding.
You NEVER lube these:
Never, ever put any lube, grease, or anti-seize on the friction material itself or on the face of the rotor. It doesn’t matter if you think “just a little will stop the squeak.” It will contaminate the pad, kill your stopping power, and you’ll have to throw the pads away. If you get grease on the friction surface, clean it with brake cleaner immediately or replace the pad.
A lot of old forums will tell you to use copper anti-seize on everything. Don’t use it on slide pins. It dries out, gets gritty, and turns into grinding paste. Save the copper stuff for exhaust bolts.
Tools and Grease That Actually Work
You don’t need a lift or air tools for this. I do this in my driveway with basic hand tools.
For tools:
- A good jack and a pair of jack stands. Never work under a car supported only by a jack.
- Lug wrench or breaker bar
- Socket set – most Japanese cars are 14mm or 17mm for caliper bolts, trucks are often 18mm or 19mm. Check yours first.
- C-clamp or a proper brake caliper piston tool. For rear brakes with an electronic parking brake, you may need a scan tool or a wind-back tool.
- Stiff wire brush – a small brass or steel one
- Small file or sandpaper
- Can of brake cleaner – get two, you will use it
- Rags that don’t leave lint, a small wire to hang the caliper, and nitrile gloves
For grease – you need two, not one:
I keep both in my toolbox because they do different jobs and mixing them causes issues.
- Silicone Pin Grease: Look for Permatex Ultra Disc Brake Caliper Lube (purple), Sil-Glyde, or 3M Silicone Paste. It stays rubber-safe and doesn’t wash out.
- High-Temp Ceramic Brake Lube: Permatex Ceramic Extreme, CRC Brake Calm, or similar. This is your anti-squeal paste for pad backs and ears. It has a very high solids content and won’t melt at rotor temperatures.
Total cost for both tubes is about $15 and they will last you five brake jobs. Stainless hardware clips are cheap insurance too – if your old clips are rusted, pitted, or bent, spend the extra $10 and replace them. Don’t try to salvage crusty clips.
Step-by-Step: Fixing The Squeak at Home
Do one side at a time, so you have the other side as a reference. Give yourself an hour the first time. Put your phone on speaker and take your time.
1. Prep and remove the wheel
Loosen your lug nuts while the car is on the ground. Jack the car up at the proper jack point, put it securely on a jack stand, and remove the wheel. Turn the steering wheel if you need better access to the caliper.
2. Remove the caliper
There are usually two bolts on the back of the caliper that hold it to the bracket. Remove those. The caliper should now lift off. If it doesn’t want to move, don’t pry against the rotor. Wiggle it gently. Once it’s off, hang it from the spring or strut with a piece of wire or a bungee cord. Do NOT let it dangle by the rubber brake hose. That damages the hose internally.
3. Pull the old pads and slide pins
Note how the pads were oriented. There is often an inner and outer pad, and sometimes wear indicators that should be on a specific side. Take a quick photo before you pull them. Pull the slide pins out of the bracket. They should slide out smoothly. Inspect the rubber boots. If a boot is torn, cracked, or full of water, replace it. That’s how pins dry out.
4. This is the important part – CLEAN
This is the step shops skip. Take your wire brush and aggressively clean the bracket where the stainless clips sit. You will find rust underneath. Lots of it. That rust lifts the clip up and pinches the pad ear. Scrape it until you see clean metal. Spray with brake cleaner and wipe dry.
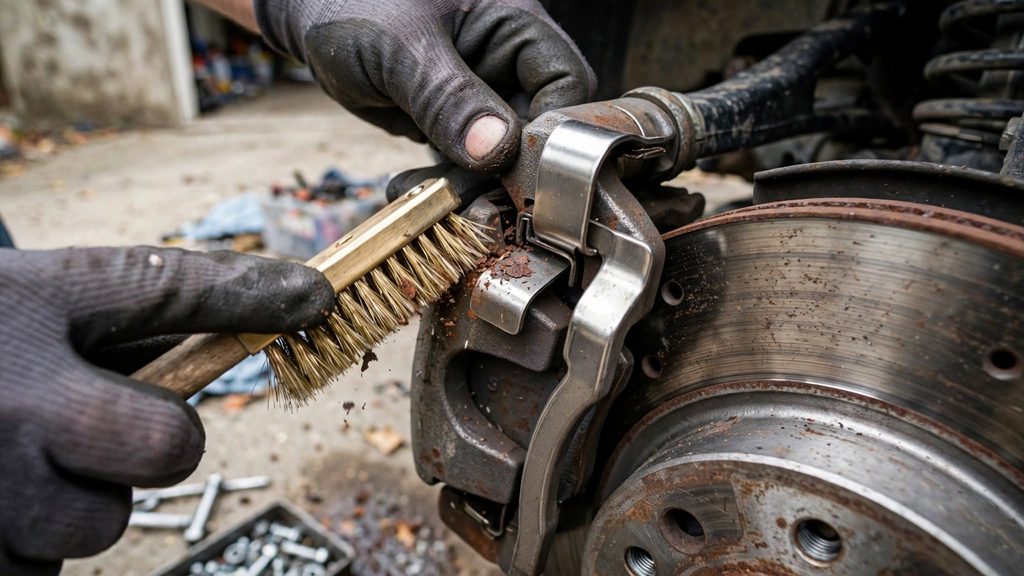
The step everyone skips — wire-brushing rust from under the stainless clips.
Clean the stainless clips themselves. If they’re grooved or pitted from the pad ears digging in, replace them.
Now clean the slide pins until they are shiny. No black residue. Wipe out the bores in the bracket with a rag and brake cleaner. Make sure there is no water or old grease left inside.
Clean the pad ears lightly with sandpaper if there’s rust buildup.
5. Lube correctly – thin is winning
Apply a light, even coat of silicone grease to the slide pins. You don’t want a big glob. Just enough to make them slick. Work them in and out of the bore a few times to spread it. They should glide like they’re on ice.
Now for the pads. Here is the trick: think rice-grain sized amount. On the back of each pad, where the shim touches and where the piston/caliper fingers will touch, spread a paper-thin film of ceramic lube. Just enough to cover the metal, not enough to squeeze out. Do the same on the pad ears where they will touch the clips.
If your pads came with new shims attached, make sure you lube between the shim and the pad back as well. That’s where most vibration starts.
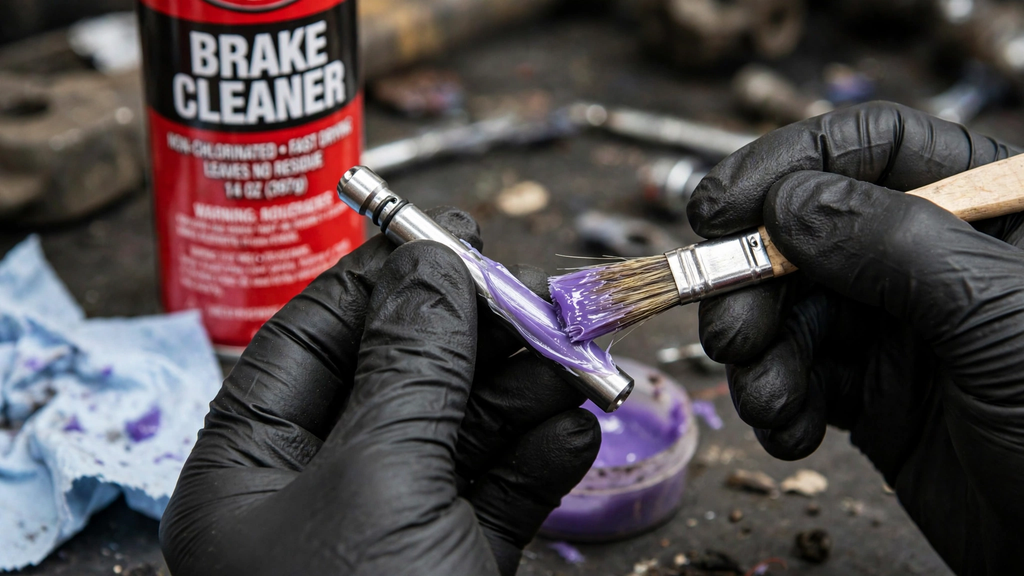
Slide pins need 100% silicone grease only — thin coat, purple grease shown here.
6. Reassemble and torque
Reinstall the clean (or new) stainless clips. Slide the pads back in – they should slide easily now with light finger pressure. If you have to hammer them in, you didn’t clean enough.
Compress the caliper piston slowly with your C-clamp. Open your brake fluid reservoir cap first and watch the fluid level so it doesn’t overflow. Go slow. For rear electronic parking brakes, you can’t just push – you have to put the car in service mode or use the wind-back tool.
Place the caliper back over the pads, reinstall the slide pin bolts. Look up your car’s torque spec – usually around 25-35 ft-lbs for caliper guide bolts, but check your manual. Don’t overtighten and strip the bracket.
Reinstall the wheel, hand-tighten lugs, lower the car, torque lugs to spec in a star pattern.
7. The crucial pump and bed-in
Before you move the car, pump the brake pedal several times until it feels firm. You just pushed the pistons back, so the first pedal push will go to the floor. Pump it.
Now bed the pads. This is how you prevent noise from coming back. Find an empty road. Do 5 moderate stops from 35 mph down to about 5 mph. Don’t come to a complete stop. Drive for a minute to let things cool. Then do 3 harder stops from 45 mph down to 5 mph. Drive for 3-5 minutes without using the brakes much to let everything cool down. This transfers an even, thin layer of friction material onto the rotor and eliminates that uneven film that causes chirping.
Go home with your windows down and listen at low speed. Quiet.
🔧 Brake Squeal Diagnosis Quiz
Answer 3 quick questions to find your likely cause:
Mistakes That Make The Squeal Worse
I’ve made all of these, so you don’t have to.
- Using the wrong grease on pins.Copper anti-seize, white lithium, general-purpose grease – they will all swell rubber or dry out. In two months you’ll have a seized caliper that drags, overheats, and warps your rotor.
- Over-greasing.If you slather grease everywhere, heat will make it melt and migrate onto the rotor and pad friction surface. Then you have squealing AND reduced braking. A thin film is all you need.
- Not cleaning rust first. New grease over a layer of rust is useless. The rust will keep lifting the clip and binding the pad. You have to get to bare metal.
- Forgetting to pump the pedal.If you reverse out of the driveway without pumping, you will have no brakes for that first second. It’s terrifying.
- Skipping the shims.Some pads come with cheap shims that don’t fit well. If your old shims are in good shape and the new ones are flimsy, reuse the old OEM shims. A good shim is a big part of noise damping.
When Lubing Isn’t Enough
If you did everything right and you still hear a squeak, don’t panic. There are two other common culprits.
First, morning squeal. If it only squeaks for the first 2-3 stops in the morning, especially after rain or humidity, that’s normal. A light layer of surface rust forms overnight on the rotors. It scrubs off after a few stops. Nothing to worry about.
If it’s a constant squeal even when you are NOT touching the brake pedal, your wear indicator is touching the rotor. Your pads are actually worn out.
And if it’s a rhythmic chirp that gets faster as you go faster, measure your rotor thickness variation. A rotor that is more than 0.001 inch out of parallel will chirp even with perfect lube. That needs to be measured with a micrometer and usually means resurfacing or replacing the rotors.
But for 90% of daily drivers that have good pads and rotors, this cleaning and lubing job fixes it for good.
Do this every time you swap pads, and once a year if you live somewhere where roads get salted in winter. It takes an extra 20 minutes during a pad change, but your brakes will stay quiet, slide free, wear perfectly even, and stop better. And you won’t sound like a cheap taxi every time you pull up to a light.
Related posts:
 The Ultimate Year-Round Car Maintenance Checklist: Oil, Brakes, Fluids & More
  The Complete Guide to Engine Oil: Types, Viscosity, and When to Change for Peak Performance
  Headlight Restoration Guide: Remove Haze and Improve Night Vision
  How to Keep Your Car From Overheating in Traffic: 5 Checks Before Summer
Leave a Reply