
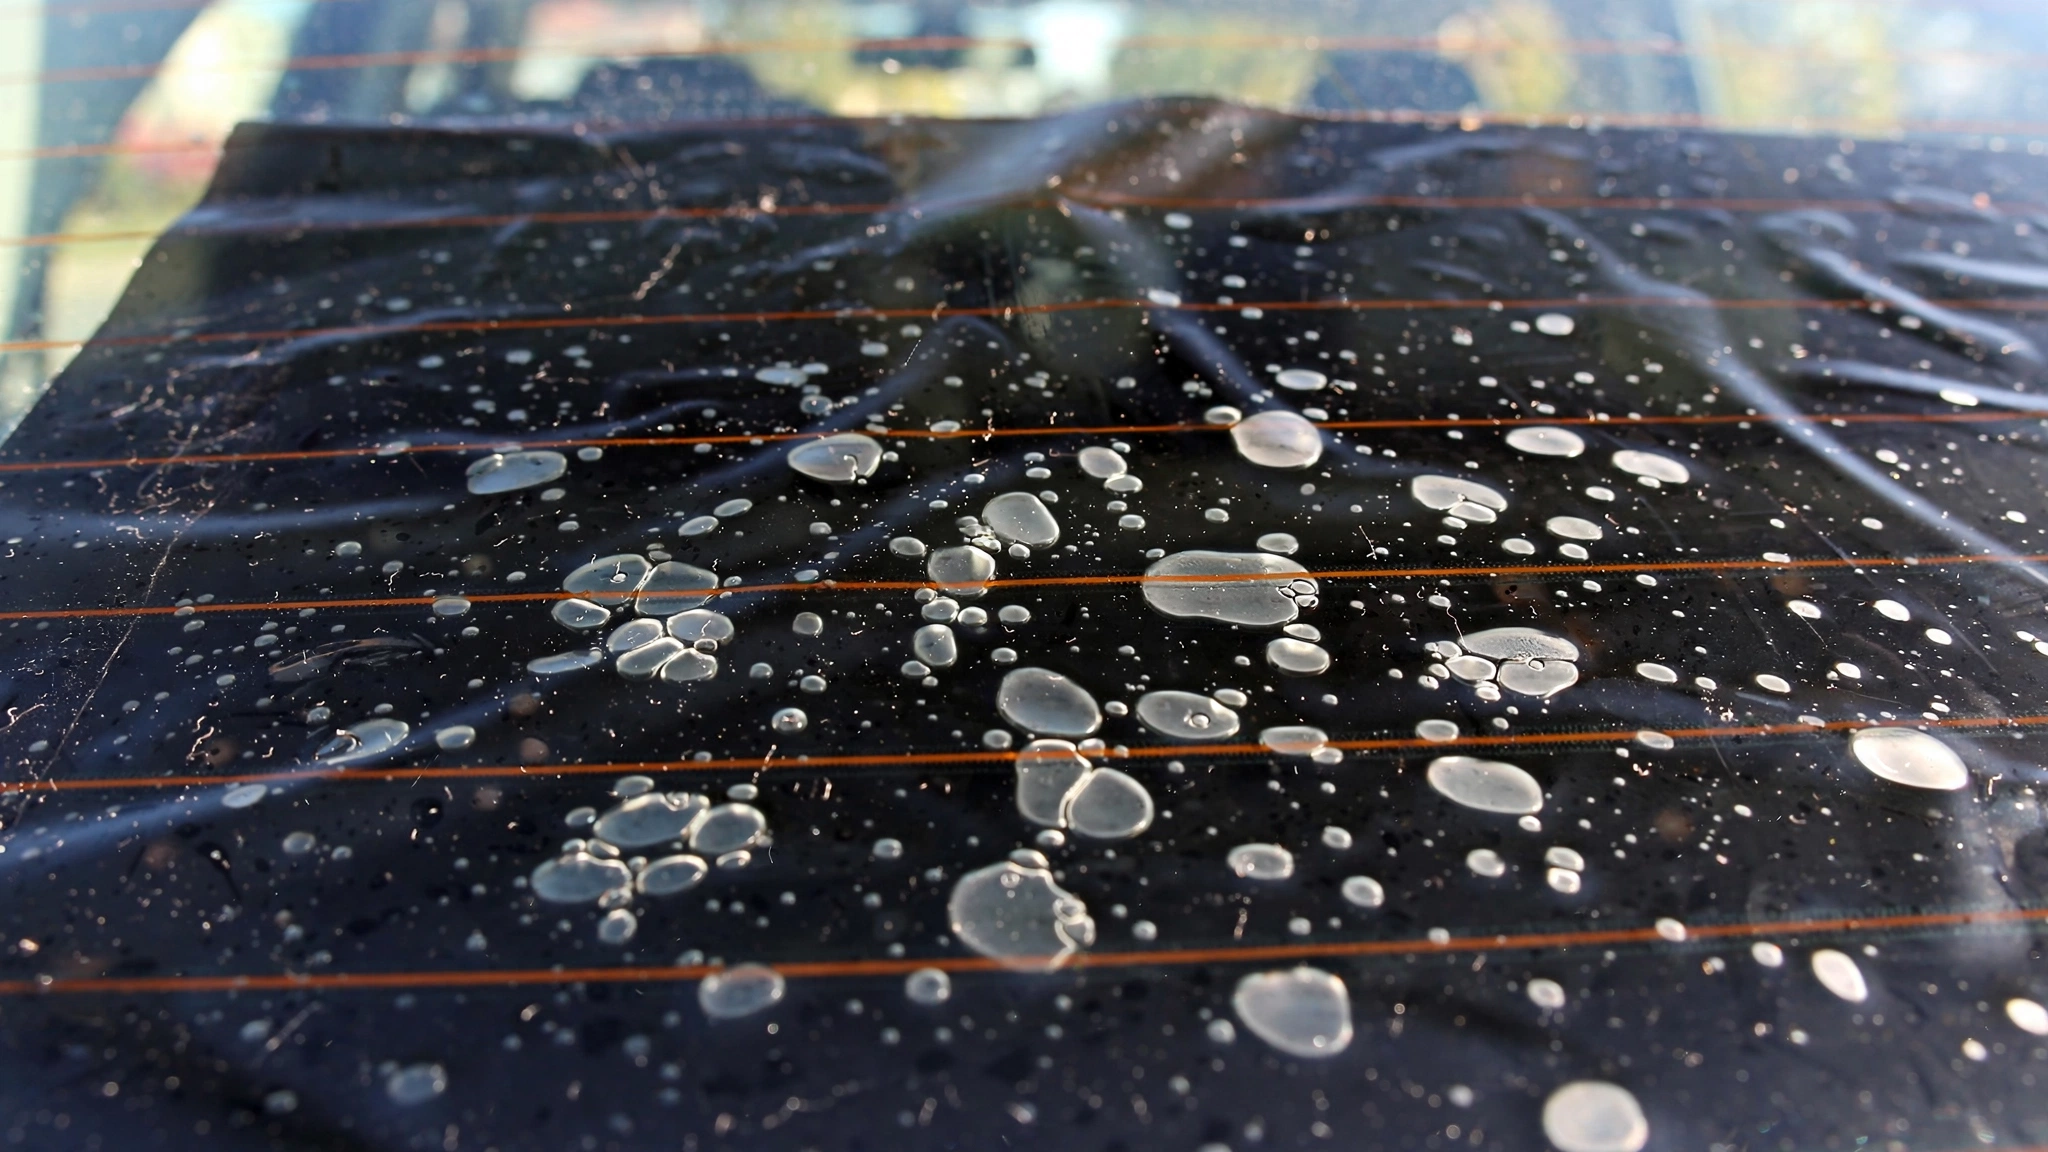
I’ll never forget that August afternoon in Phoenix. I’d just finished tinting my Mazda 3’s rear windows myself — $38 film from Amazon, YouTube confidence, and zero patience. It looked perfect for about 20 minutes. Then the sun hit it. I came out from getting gas and the back glass looked like a case of chickenpox. Dozens of little silver bubbles, right over the defroster lines. I panicked and grabbed a box cutter. Yeah. Don’t do that.
I learned the hard way that you can absolutely save bubbled tint without gouging your glass, but you have to know what kind of bubble you’re dealing with. After fixing that Mazda, helping three friends, and then redoing my cousin’s old Civic that had 6-year-old purple tint, I’ve figured out the process that actually works. And more importantly, what will scratch your window for good.
So if you’re staring at bubbles right now, take a breath. You probably don’t need to rip everything off. Let me walk you through how I do it now — the right way.
Why Tint Bubbles In The First Place?
Not all bubbles are equal, and that’s where most people mess up. If you try to fix a heat-failure bubble the same way you fix a soap bubble, you’ll crease the film or scratch the glass underneath.
The Two Main Types
1. Water / Soap Bubbles: These show up in the first 48-72 hours after installation. They look clear, kind of like water droplets trapped under the film. They happen because you (or the shop) didn’t push out enough slip solution. These are the easy ones. I actually had about 70% of mine disappear on their own after parking in the sun for two days.
2. Air / Adhesive Failure Bubbles: These show up weeks or months later. They look silvery-white, almost dusty. The adhesive has lost its grip, usually from dust underneath, cheap glue, or extreme heat cycles. My Mazda’s were 50/50 — small water bubbles around the edges and two big ugly air pockets in the center. The air ones are trickier.
If your tint is more than 3-4 years old, purple, and bubbling everywhere? That’s not worth saving. The adhesive has chemically broken down. We’ll get to that.
What You’ll Need (And What Will Scratch Your Glass)
This is where you win or lose. The wrong squeegee will leave swirl scratches you’ll see every single day when the sun hits.
- Soft Teflon or Blue Max squeegee – 4-inch or 6-inch wide. NOT the hard yellow plastic one. Cost $8. Wrap it in a microfiber sleeve if you can.
- Heat gun with adjustable temp – or a hair dryer on high. I use a Wagner Furno 300 set to 120°F to 150°F max for tint work. Never above 180°F near defroster lines.
- 30-gauge needle or pin – I use an insulin syringe needle, size #30, 0.5 inch. Much finer than a sewing pin. Less damage to film.
- Spray bottle – with distilled water + 2-3 drops of baby shampoo. No Windex. Ammonia kills tint.
- Lint-free microfiber towels – at least 2. 300 GSM or higher.
- Isopropyl alcohol 70% – for cleaning glass edges only.
Tools you should NOT use: razor blades on the inside of the glass (especially on rear windows), metal scrapers, paper towels, credit cards (too sharp on edges), and those green kitchen scrubby pads.
Step-By-Step: The No-Scratch Fix Method I Use Now
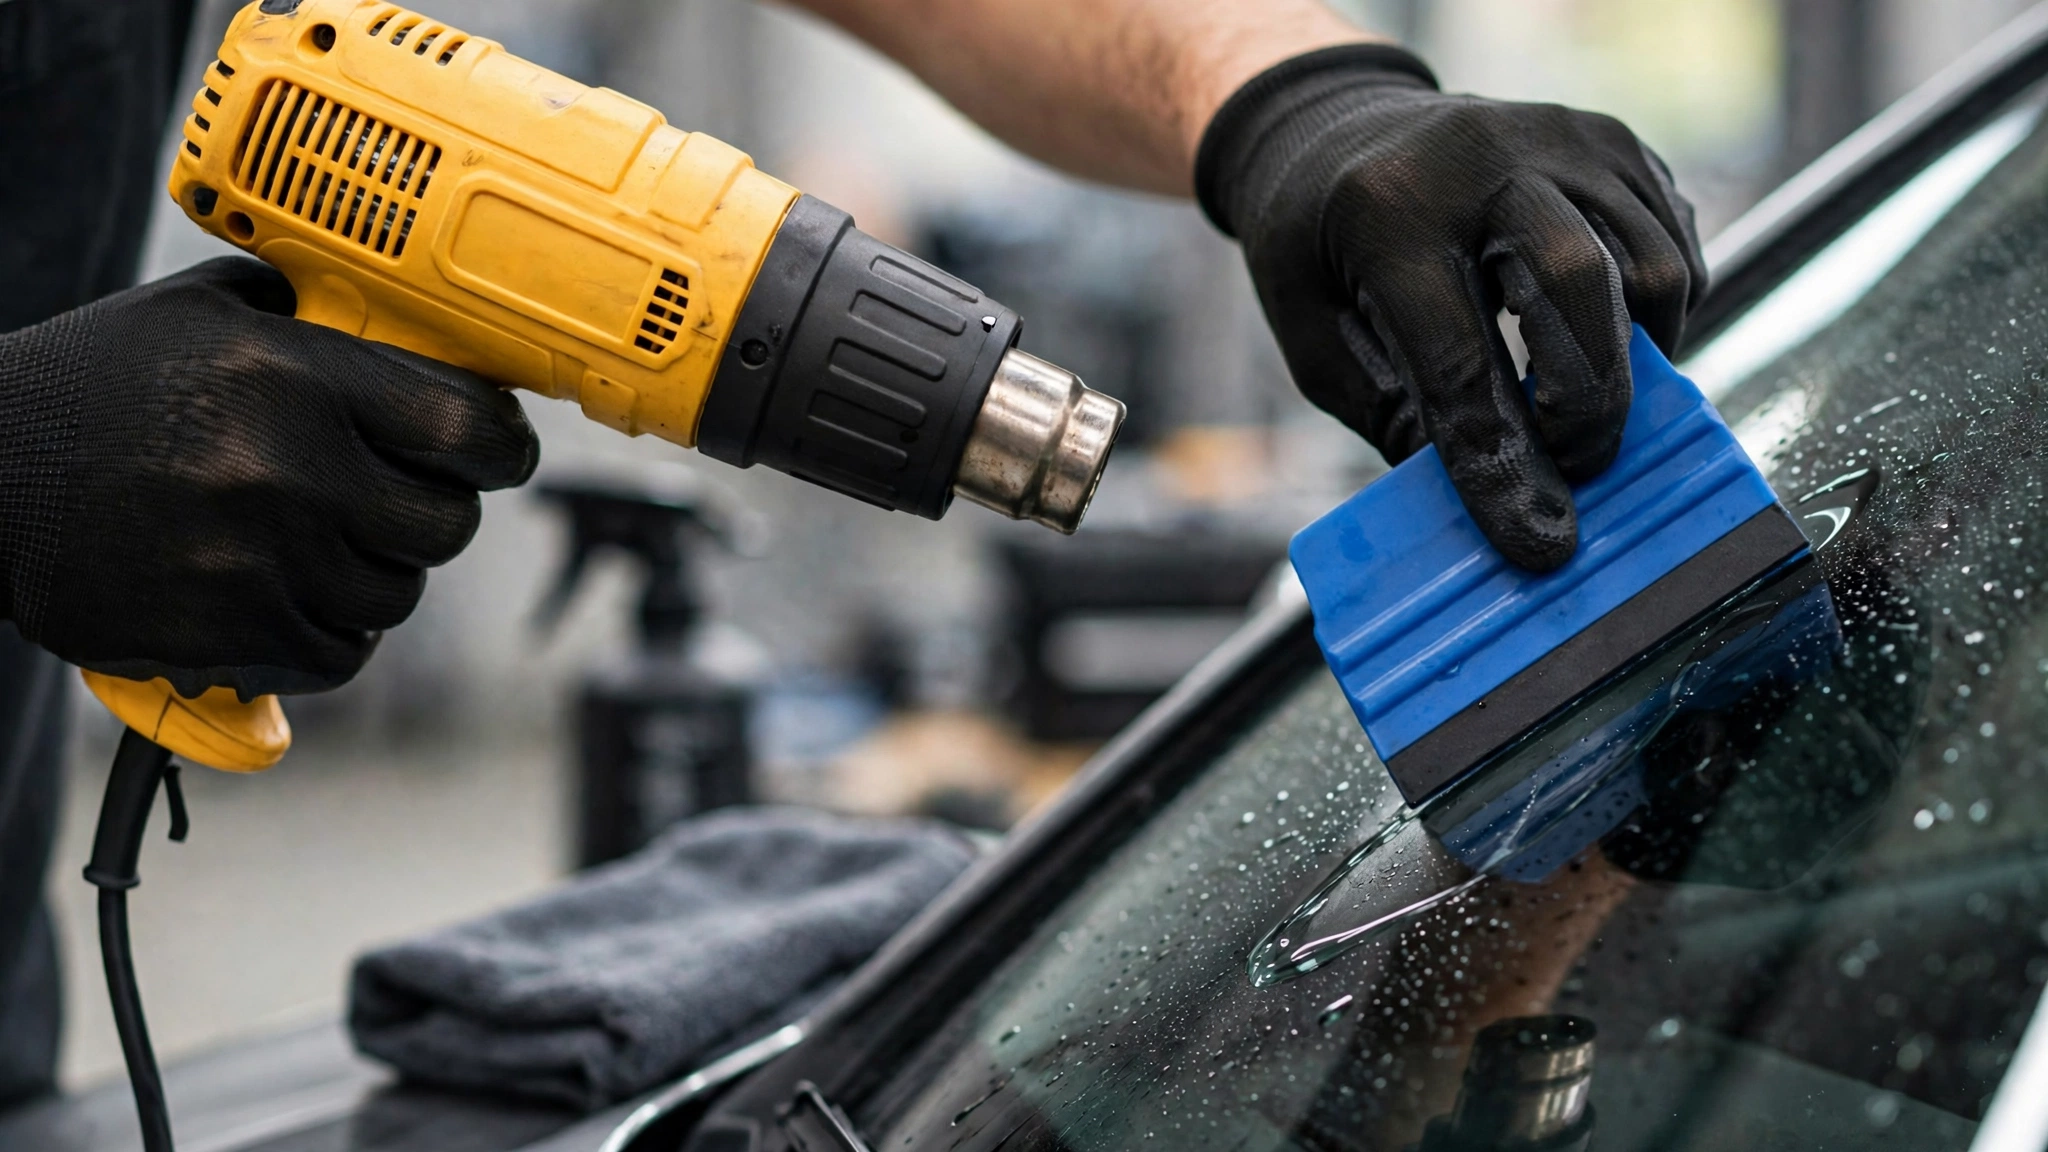
Step 1: Diagnose The Bubble Age and Location
Before you touch anything, figure out how old the tint is. Less than 2 weeks old? 90% of bubbles are still water and they’ll fix easy. More than 2 years old? Expect adhesive failure. Location matters too. If bubbles are directly over defroster lines or the black dot matrix (frit) at the top of the rear window, you have to be extra gentle. You cannot razor there without destroying it.
Park the car in direct sun for 30 minutes first. You want the glass around 100-110°F. Warm film is flexible. Cold film cracks.
Step 2: The Needle and Squeegee Technique (For Bubbles Under 1/8 inch)
This is my go-to for small bubbles and what saved my Mazda.
- Mist the outside of the tint lightly with your soapy water. This lets your squeegee glide without dragging.
- Warm the bubble area with heat gun on LOW, 130°F, 7 inches away, moving in circles for 10 seconds.
- Take your 30-gauge needle. Poke at the very edge of the bubble, not the center. Angle it almost flat, about 15 degrees to the glass. You’re making a tiny vent, not a hole.
- Immediately place your Teflon squeegee 1/2 inch above the poke and slowly push toward the poke hole. You’ll feel a little pop and see air/water escape. Do NOT push hard – about 2-3 lbs of pressure max. Let the heat do the work.
- Wipe, then heat again for 5 seconds and do a final light squeegee.
On my first try I stabbed straight down like I was popping a balloon. Left a visible pinhole that collected dust. Lesson learned – edge poke is everything.
Step 3: The Heat Reactivation Method (For Bigger Soft Bubbles 1/8 to 1/2 inch)
If the bubble is larger or there’s a cluster, don’t poke 20 holes. You’ll get polka dots.
- Heat the entire 6-inch area around bubbles to about 140°F. Use an IR thermometer gun if you have one – they’re $15 at Harbor Freight and save you.
- Spray the film lightly.
- Starting from the side of the bubble farthest from the edge of the window, use your squeegee to slowly push toward the nearest edge of the film. Think of sweeping air toward the exit.
- If it resists, heat 5 more seconds. You’ll feel the adhesive get tacky again. Sometimes you’ll need 3-4 slow passes.
- For rear windows, squeegee parallel to defroster lines, never across them.
I fixed my cousin’s 2011 Civic rear window this way – it had a 3-inch water pocket that looked hopeless. Three heat cycles and it laid flat. Two years later it’s still good.
Step 4: When To Stop and Redo
Look, sometimes you have to know when you’re beat. If you see any of these, stop trying to fix bubbles and plan a full removal:
- Tint is purple or blueish and bubbles are under every square inch
- Film feels brittle and crackles when you push
- Bubbles come back 24 hours after you fixed them
- More than 15-20 bubbles per window
In those cases you’re fighting dead glue. Removing it cleanly is actually easier long term, and you won’t have scratched glass from endless poking.
Comparison: Fix Methods vs Risk to Glass
I’ve tried all three popular methods over the years. Here’s what actually happens, not what YouTube tells you:
| Method | Best For | Scratch Risk (1-10) | Tools Needed | Success Rate On New Tint (<1 mo) |
|---|---|---|---|---|
| Needle + Teflon Squeegee | Bubbles < 1/4 inch, water bubbles | 1 – Lowest | 30-ga needle, 4-in Teflon, heat gun | 95% |
| Heat + Squeegee Only (No Puncture) | Medium water pockets, 1/4 to 1 inch | 2 – Very Low | Heat gun at 130-150°F, Blue Max squeegee | 85% |
| Razor Blade / Credit Card Scrape | Everyone tells you but please don’t | 9 – Will Scratch | Single-edge razor, hard plastic | 40% and you damage frit |
| Full Removal & Retint | Old adhesive failure, purple tint | 3 – Low if done right | Steamer (212°F), 3M adhesive remover, plastic razor | 100% (new film) |
The data is pretty clear from the tint shop I talked to in Tempe – they fix about 30 cars a month with bubble complaints. They told me they throw away every metal tool for interiors. Plastic razor blades only, and Teflon squeegees. When they see a DIY with razor scratches on the inside glass, they have to polish with cerium oxide, and it never looks perfect.
Chart Insight: Why Heat Matters So Much
A buddy who runs a tint shop showed me his failure log last year – he tracks comeback jobs. I sketched the pattern into a quick chart concept: On the X axis you have temperature of the glass during fix, from 70°F (cold garage) to 160°F (hot sun + heat gun). On the Y axis you have bubble return rate after 30 days.
What it shows is non-linear and kind of shocking. At 70-85°F fixes, return rate is around 60-70% because the adhesive never really reactivated – you just moved water around. At 110-140°F, return rate drops to under 10%. But above 165°F, return rate spikes again to 45% because you’ve overheated and cooked the adhesive. That little sweet spot is why pros are so obsessive with temp guns. I was just blasting my Mazda on high heat before, which actually made it worse. Now I keep it around 130°F and I can feel the difference – the film gets soft like vinyl, not sticky-melted.
Don’t Forget The Edges and Dot Matrix
The top 2 inches of most rear windows have that black ceramic dot matrix. Bubbles love that spot because film doesn’t stick well to the bumpy texture. You can’t squeegee it flat the same way – you’ll get silver fingers.
What works: Lightly heat to 120°F, then press with your thumb wrapped in microfiber, hold 15 seconds. Some guys use a thin bead of clear Elmer’s glue stick under there, I prefer to just live with a tiny edge gap rather than add glue that will haze later. If you have to, use a 3M Primer 94 pen dabbed very lightly – one coat only.
Torque Specs If You Remove Door Panels For Better Access
You’ll get a much cleaner job if you can roll the window slightly down after pulling the top seal back. If you do pop the door panel:
- Door panel screws: typically 8mm or 10mm – torque to 7 Nm (62 in-lb) on reinstall
- Door handle bracket: Phillips #2, plus 10mm bolt at 5 Nm (44 in-lb)
- Window regulator bolts (if you touch them): 8mm, torque to 8 Nm (71 in-lb) – don’t overtighten, you’ll bind the regulator
- Always use plastic trim tools, size 20mm wide flat pry, to avoid scratching paint on panel clips.
My Final Check Process
After I fix, I do this weird thing I learned from an old tint guy: sit inside the car at sunset and look out. That’s when bubbles scream at you. Then look from outside at a sharp angle in direct sun. If you don’t see anything from both angles, you’re good.
Don’t roll windows down for 48 hours after a fix. The moisture needs to cure. And don’t wash inside of windows for 3-4 days. I use a small sticker on my dash as a reminder – sounds dumb but I’ve ruined a fresh push by blasting AC at the window.
You’ve got this. Start small, keep the heat low, poke at the edge not the middle, and use soft tools. My Mazda went from bubble disaster to still looking solid two Arizona summers later – if mine survived that, yours can survive anything.
Tested on my 2015 Mazda 3, cousin’s 2011 Civic, and friend’s 2019 RAV4. Always spot test. When in doubt on rear defroster or expensive ceramic tint (like 3M Crystalline $600+ job), pay a pro – cheaper than replacing rear glass.


Leave a Reply