
Your Engine Can’t Breathe Through a Dirty Sock
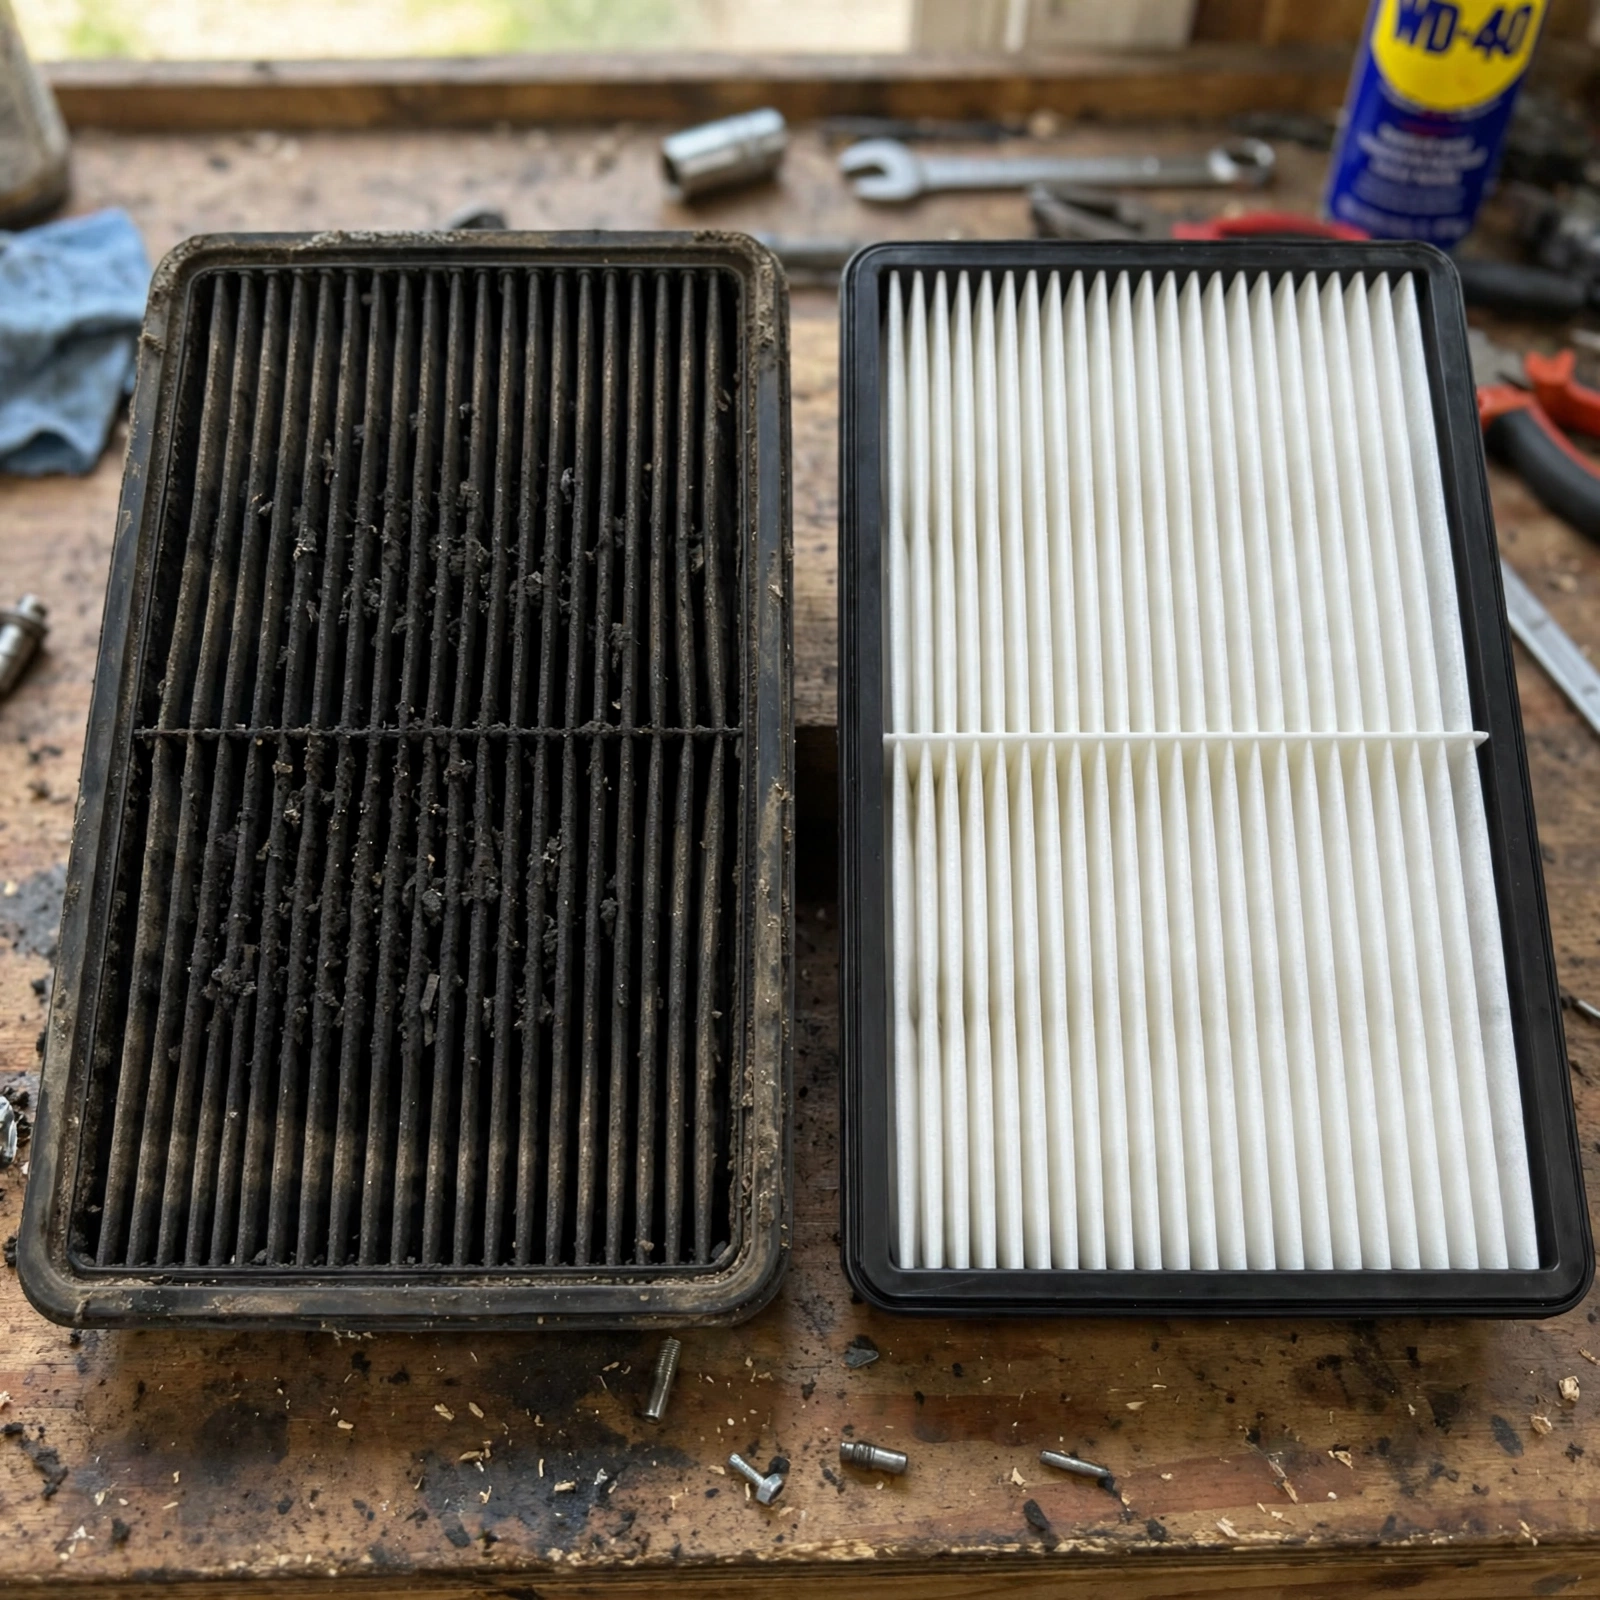
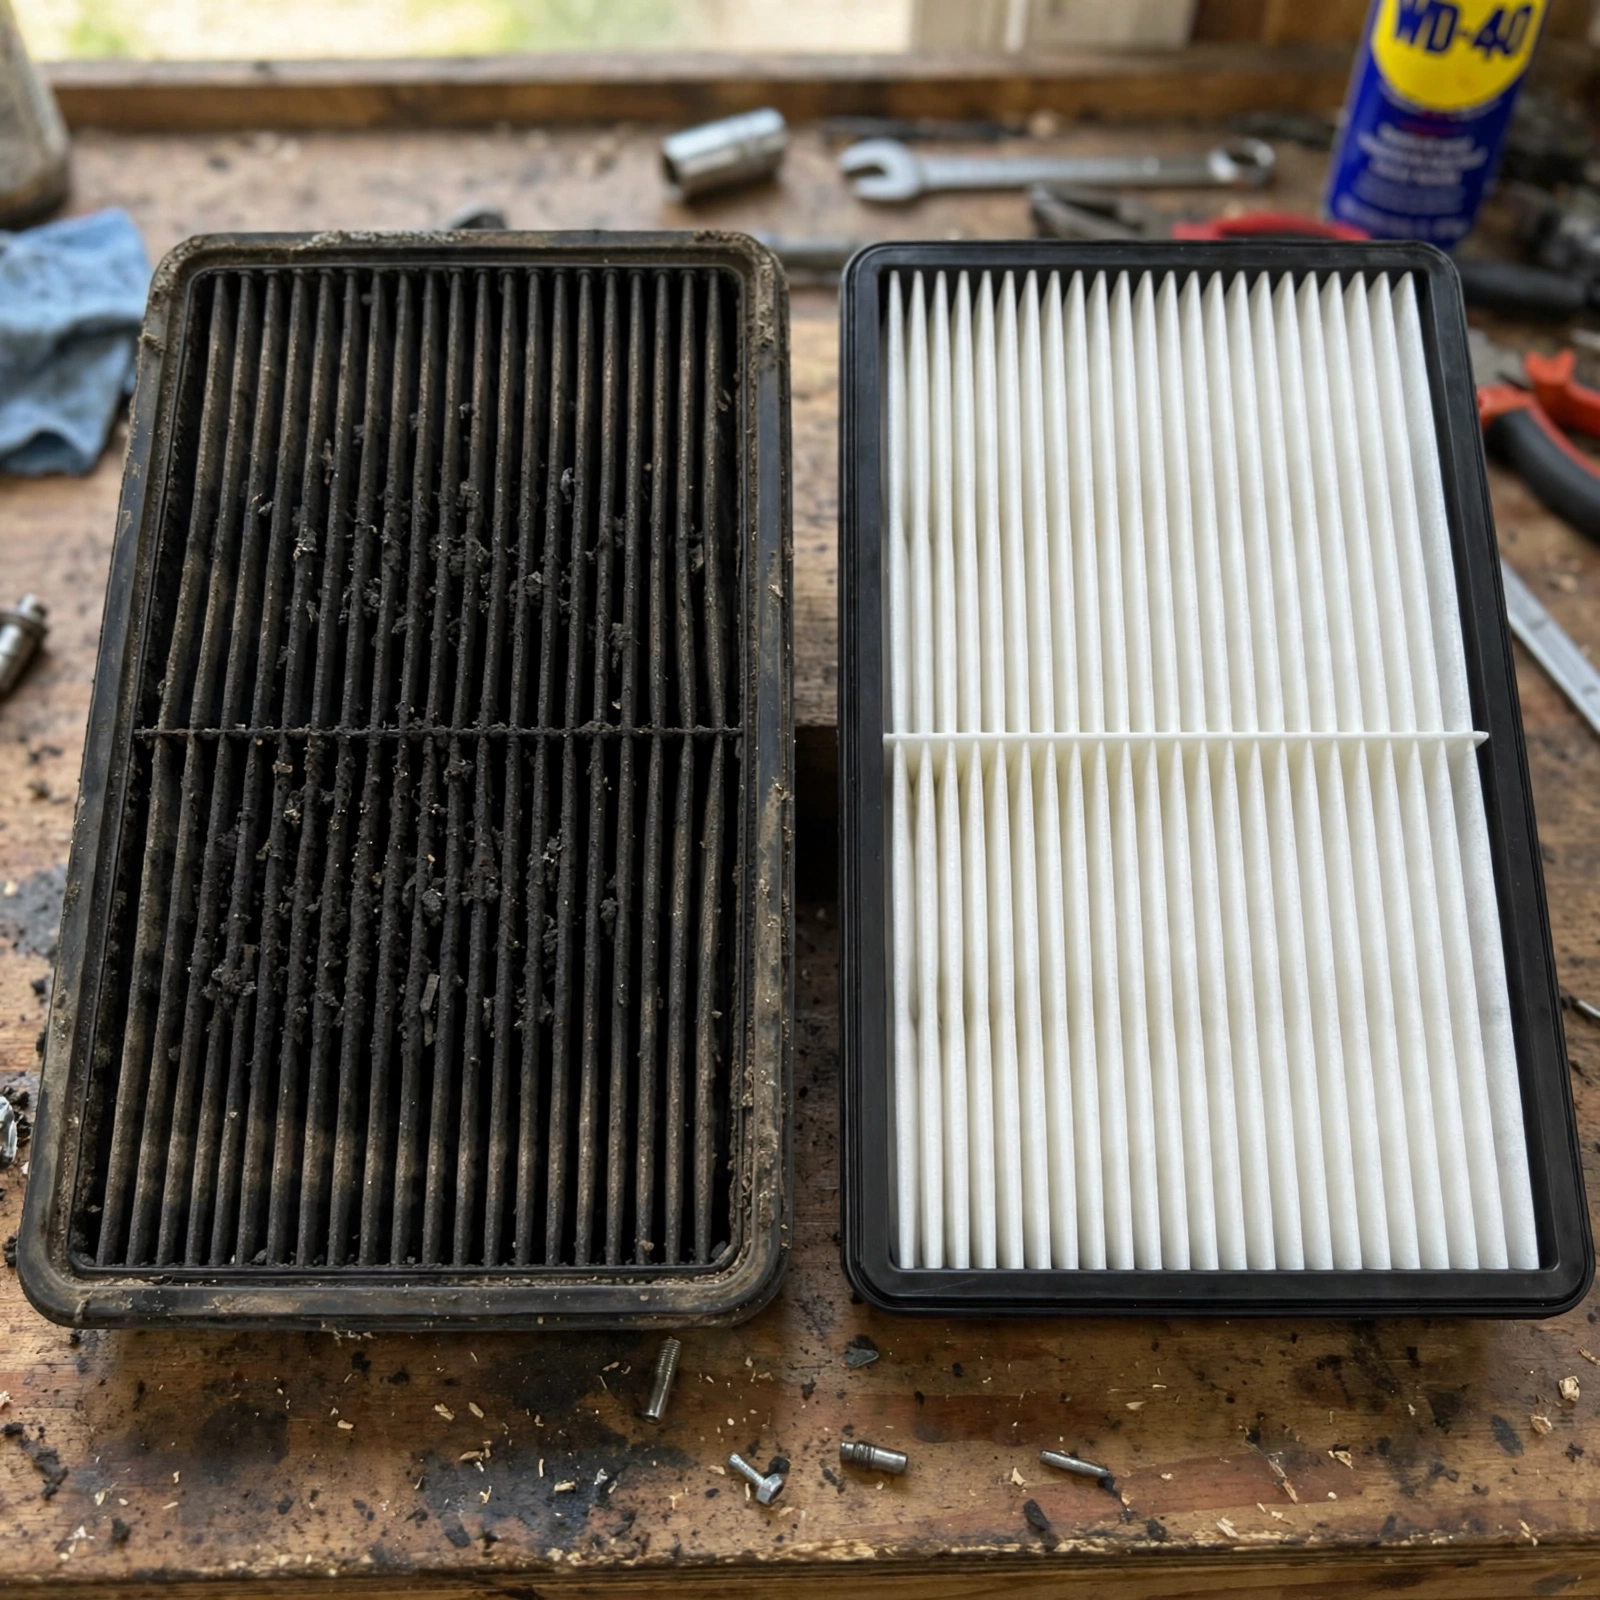
I was under my Mazda in the garage last summer, hands greasy from an oil change, when I realized the car felt sluggish on the freeway. Not a misfire. Not a code. It just felt like it was breathing through a pillow. I popped the airbox open — no tools, just two metal clips — and the filter inside was black, matted, and full of leaves. That 30-second look saved me about 2 mpg for the next year.
You don’t need a shop for this. You don’t need a ratchet. If you can open a lunchbox, you can check your engine air filter. In most cars it takes literally two minutes. I’ll walk you through it like I’m standing next to you in the driveway.
What the Air Filter Actually Does
Think of it as your engine’s dust mask. Every gallon of gas needs about 9,000 gallons of clean air to burn correctly. The filter catches dust, pollen, bugs, sand, and that fine road grime that would otherwise sandblast your cylinder walls and MAF sensor.
When it’s clogged, your ECU compensates. Modern fuel injection will adjust, so you won’t always feel a huge power loss, but you will see it in other ways. The throttle feels lazy, your long-term fuel trims creep up, and your intake honk gets quieter.
- Dirty filter = restricted flow. On a flow bench, a clogged paper filter can flow 40-60% less than new.
- Hot engine bay warning: If you just drove, that airbox is warm. Not burn-danger hot like coolant, but let it cool 5 minutes if you’ve been on the highway.
- No compressed air cleaning. Blowing it out with shop air rips the paper fibers. You create bigger holes than the dirt was blocking.
How Often Should You Actually Look?
Your owner’s manual says 15,000 to 30,000 miles. That’s optimistic if you drive in the real world. I check mine every oil change — about 5,000 to 7,500 miles — because it takes 90 seconds.
| Driving Environment | Check Interval | Replace Interval |
|---|---|---|
| City / Highway, clean suburbs | Every 7,500 miles | 20k-30k miles |
| Dusty, construction, dirt roads | Every 3,000-5,000 miles | 10k-15k miles |
| Pollen season / wildfire smoke | Every 2 weeks visual | As needed, often 12k |
| High-performance / turbo cars (GTI, WRX, etc.) | Every 5,000 miles | 15k miles max |
My friend’s Tacoma that lives on gravel in Arizona? We change it at 10k every time. My garage-kept Civic? It still looks white at 15k. Environment matters more than mileage.
No Tools? Really No Tools?
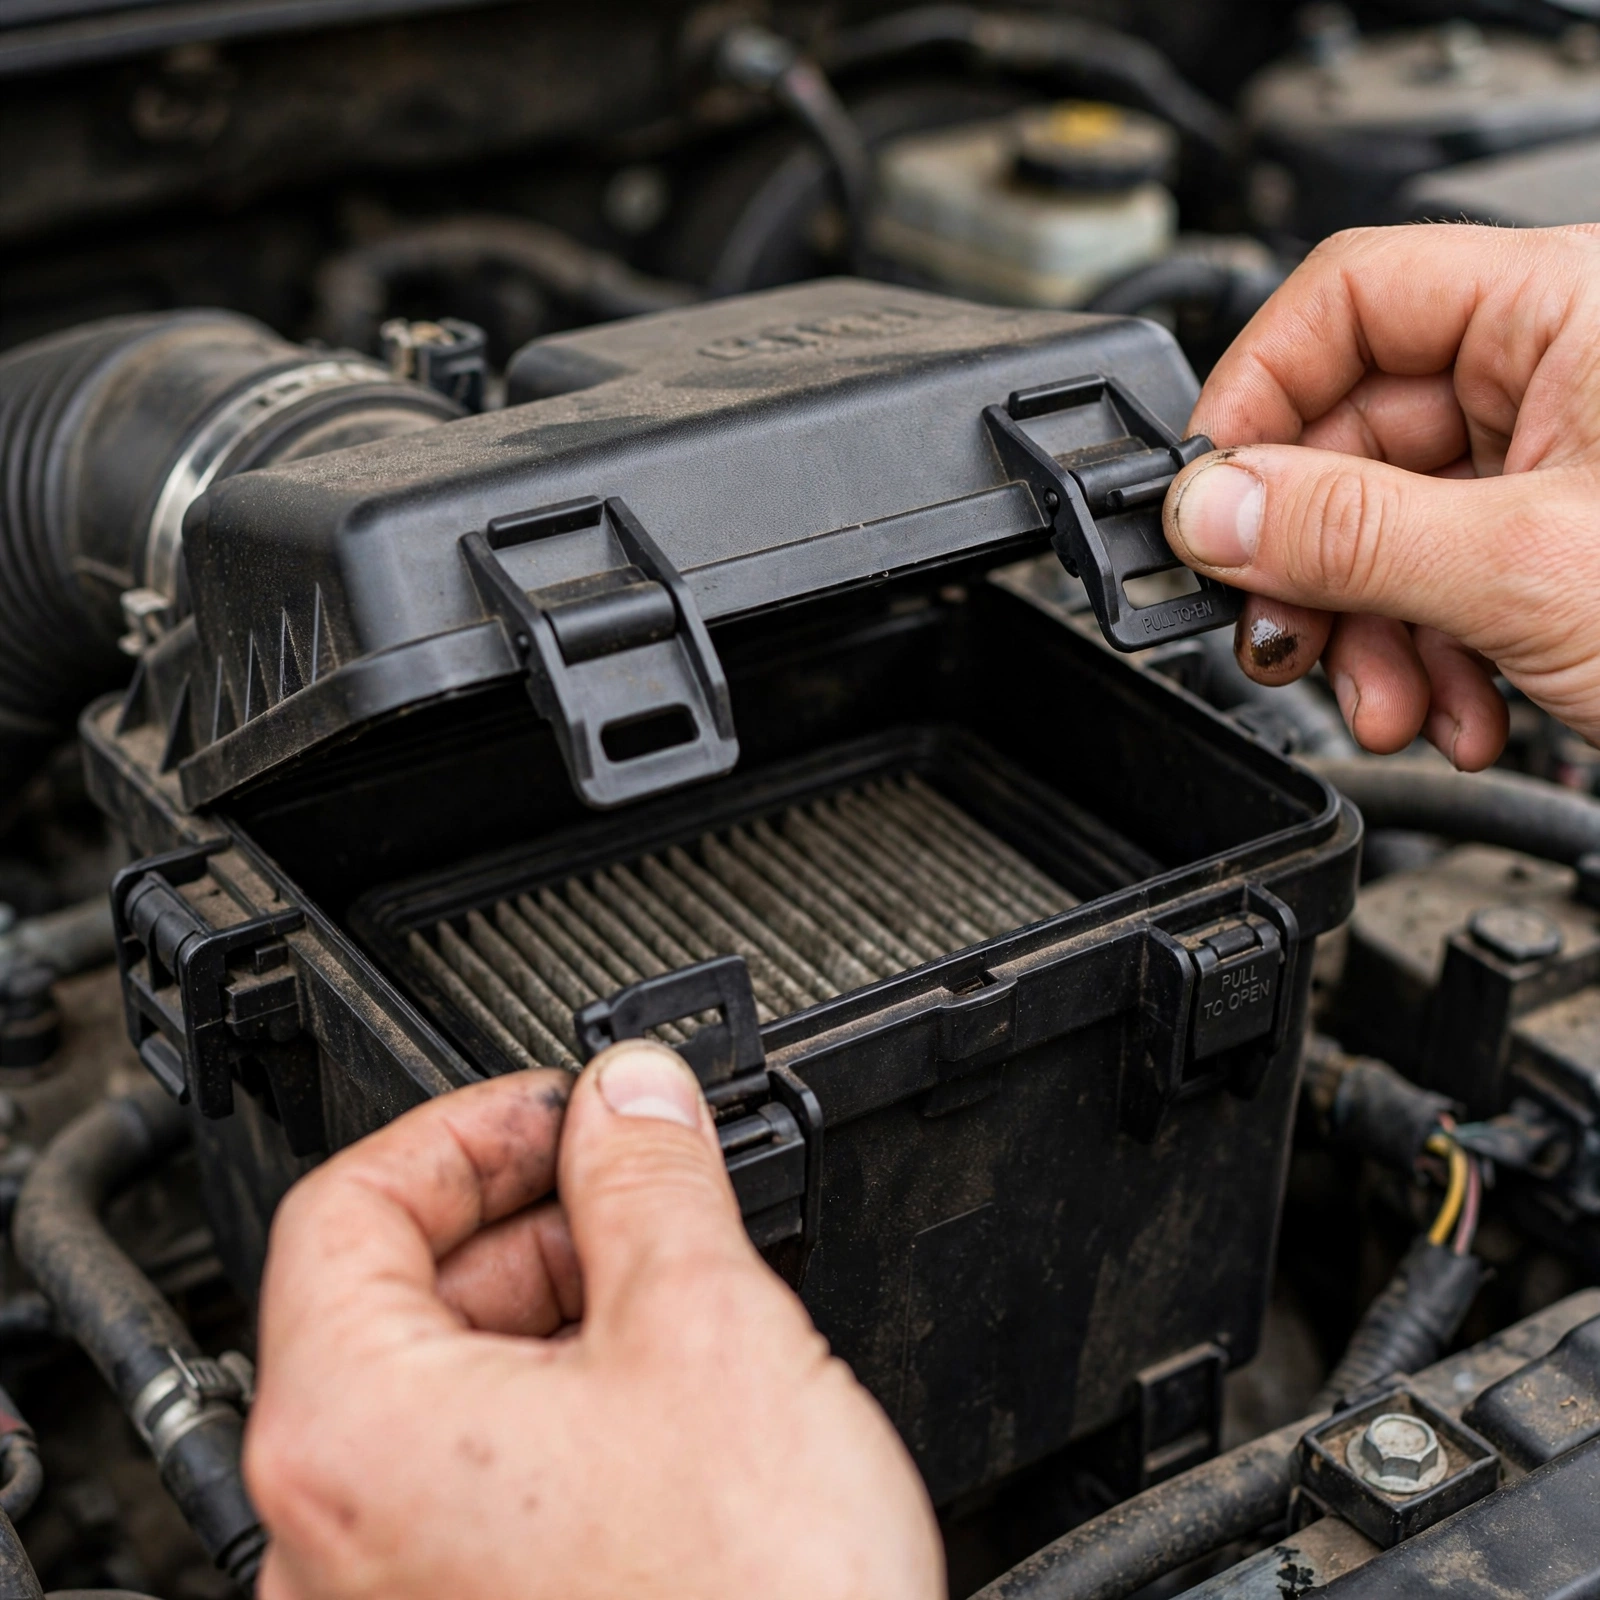
For 80% of cars made after 2005, yes. Toyota, Honda, Subaru, Ford, Chevy, Hyundai — they use spring clips or snap-over tabs on the airbox lid. You flip them with your fingers.
The other 20%? Some German and older domestics use four Phillips screws or 8mm / 10mm bolts on the lid. If you have a VW, BMW, or a 2008 Malibu, you might need a screwdriver or a 10mm socket. Even then, that’s a 3-minute job, not a 2-minute one. No need to disconnect the MAF sensor or intake tube for a check.
- Real mechanic safety note: Never run the engine with the airbox open. Unfiltered air past the MAF sensor can carry grit into the engine. Plus a loose clip can get sucked toward the throttle.
- Dirt warning: Wipe the outside of the airbox with your palm before you open it. That rim collects sand. You don’t want that falling into the clean side.
- Torque if you have screws: If your box does have screws — snug is enough. It’s plastic. About 20-30 in-lbs, which is 2.3-3.4 Nm. Don’t crank it like a lug nut (those are 80-100 ft-lbs / 108-135 Nm).
The 2-Minute Check: Step by Step
Park on level ground, pop the hood, engine off. You’ll need daylight or your phone flashlight.
- Step 1: Find the box. Follow the big black plastic snorkel from the grille. It ends in a rectangular or square black box near one fender. Usually 10×10 inches. That’s it.
- Step 2: Undo clips. Feel along the sides — 2 to 4 metal wire clips. Push your thumb down and outward. They flip off with a little pop. If it’s screws, use a Phillips or 8mm socket — no need for a flare wrench or anything fancy here.
- Step 3: Lift lid. The lid stays attached to the intake hose. Just lift it like a hinge and prop it up. You’ll see the filter sitting inside like a rectangular book.
- Step 4: Lift filter out. Grab the rubber edge. It pulls straight up. Don’t shake it inside the box — take it out and hold it away from the engine.
- Step 5: Inspect. Do the color check and light test below. Takes 10 seconds.
- Step 6: Put it back. Drop it back in, same orientation. Check the seal — rubber edge should sit flat, no folds. Clip the lid down until you hear both clicks.
How to Tell If It’s Bad: The Light Test and Color Test
Don’t overthink this. I’ve tossed filters that still looked okay from the top but failed the light test, and I’ve kept filters that looked gray but passed.
1. The Sunlight Test
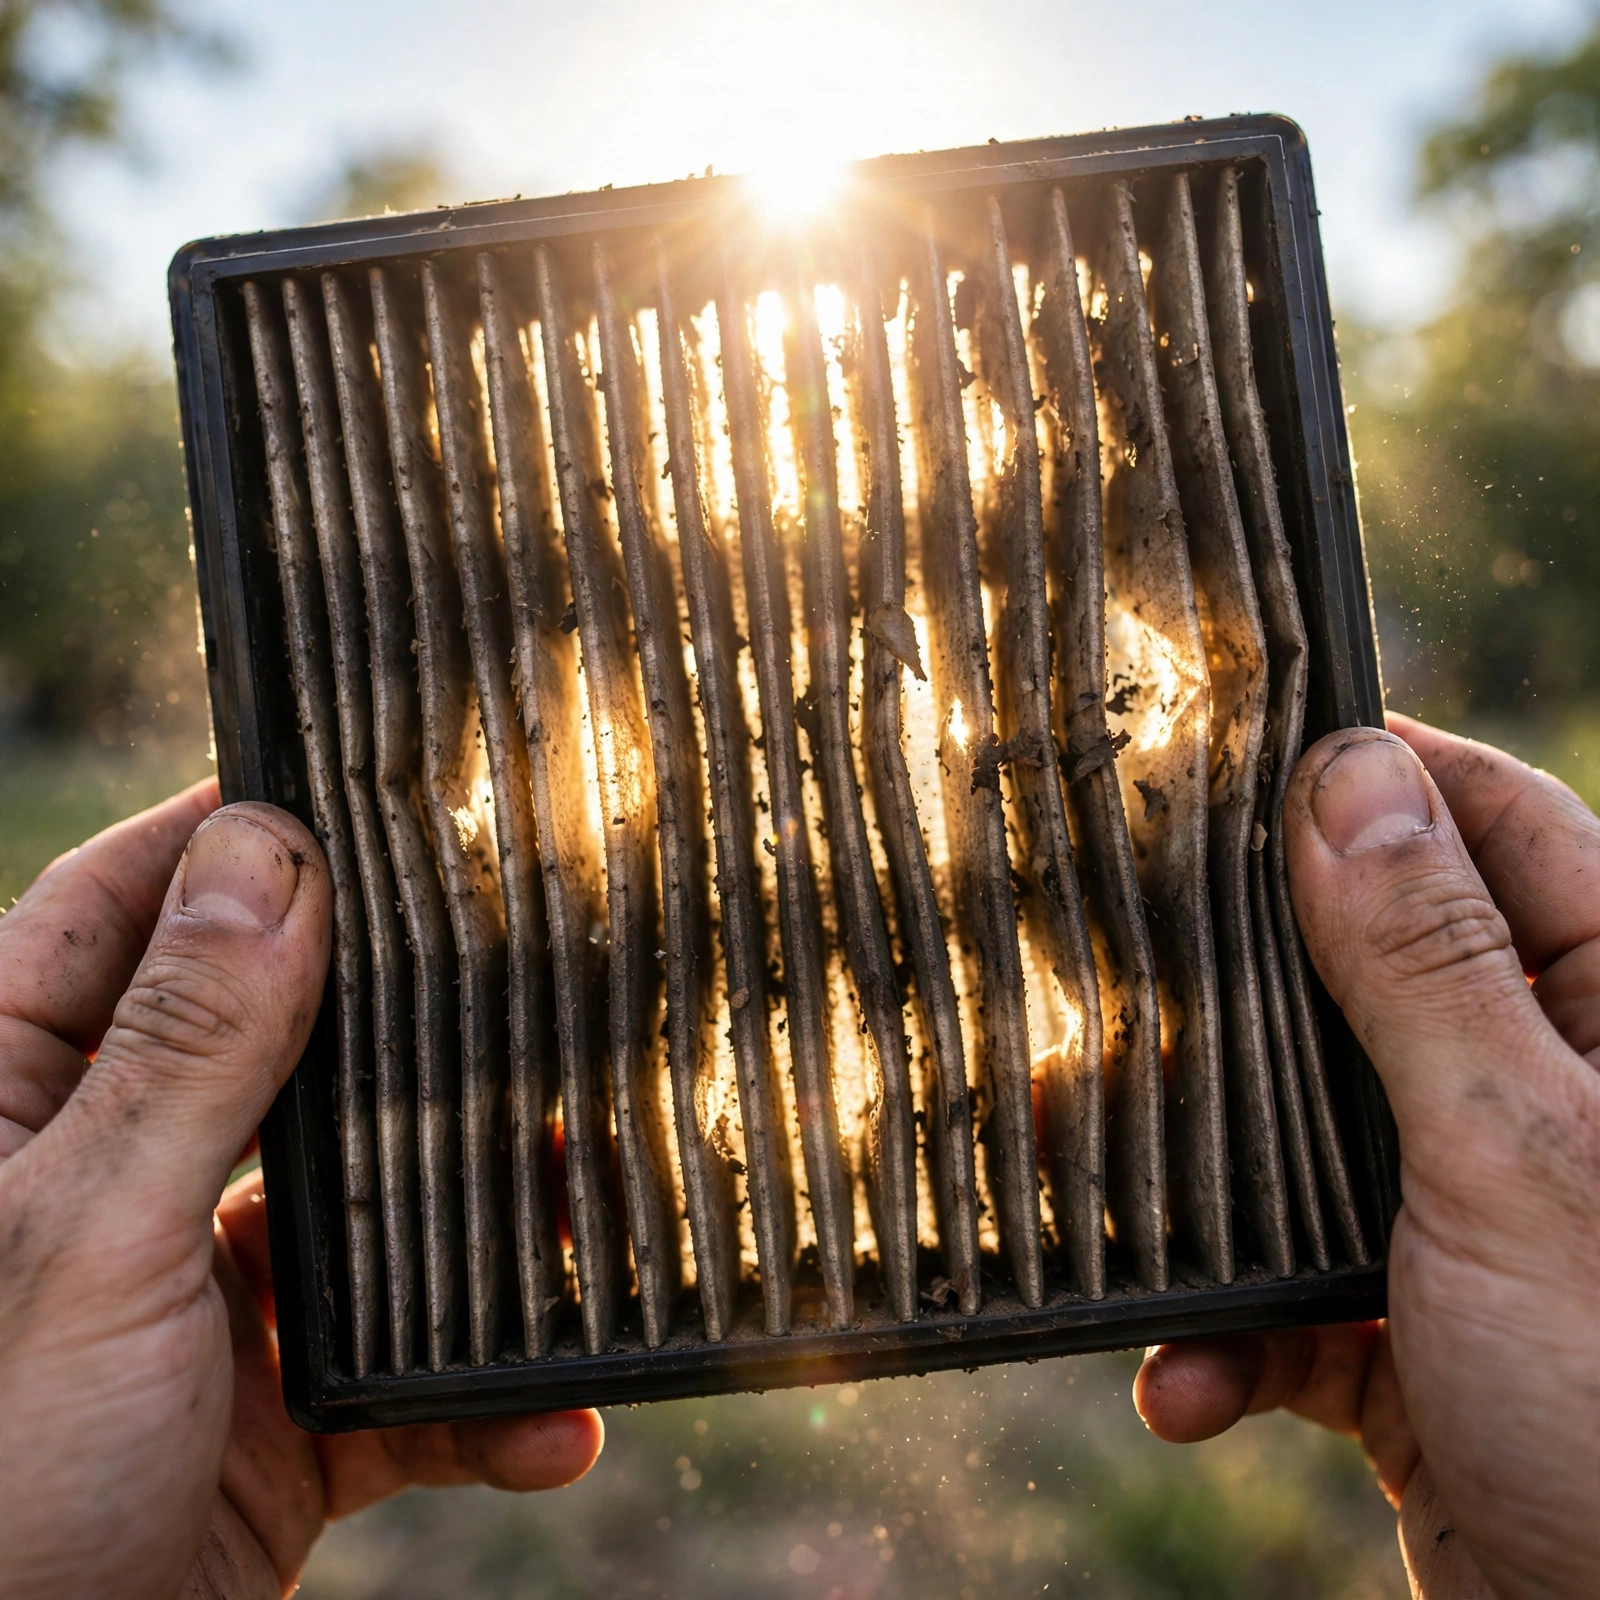
Hold the filter up to the sun or a bright light. A new white paper filter lets lots of bright dots through the pleats. If you can barely see light, or only at the very edges, it’s done. A little dust is fine. No light = replace now.
2. The Color Test
- White / off-white: Good. You’re fine.
- Light gray / light yellow: Normal. Check again next oil change.
- Dark gray, brown, oily black: Replace. That oily film is often from crankcase vapors mixing with dust.
- Bugs, leaves, mouse nest? Replace immediately. I’ve found acorns in there. Check the bottom of the box too and vacuum it out.
3. The Feel Test
Pinch the pleats. If grit falls off like sand, it’s saturated. If the rubber gasket is hard, cracked, or flat instead of springy, it’s not sealing — dust is going around it. That’s worse than a clogged filter because unfiltered grit kills MAF sensors and cylinder rings.
What If My Airbox Has Screws?
I ran into this on my brother’s 2013 Passat 2.5. Four Torx screws, not clips. Annoying, but still easy.
- You’ll need a Phillips #2 or T25 Torx or 8mm socket depending on model. VW likes T25, GM likes 8mm, Toyota likes 10mm on some trucks.
- Don’t drop screws into the fender. Use a magnetic tray or a cup holder. Losing one means it rattles forever near the wheel well liner.
- Snug, not gorilla-tight. Plastic threads strip at about 15-25 in-lbs. If you feel it keep spinning, stop — you just stripped it.
Quick safety: Some boxes have the MAF sensor mounted in the lid. There’s a thin wire inside that costs $180 to replace. Don’t touch it. Don’t spray brake cleaner near it. That wire reads air temp and flow and brake fluid or harsh cleaners can etch it.
Don’t Do These 5 Things
- Don’t run without a filter “to test power.” One good inhale of road dust can score your cylinders. I’ve measured 0.03mm cylinder wear from a truck that ran a week without a filter on a ranch.
- Don’t oil a paper filter. Oiling is for cotton-gauze filters like K&N only. Oil on paper clogs it faster and fouls the MAF sensor — you’ll get a P0171 lean code.
- Don’t vacuum the filter. You’ll pull the media apart. If it’s dirty, replace. Filters cost $12-$25. An MAF sensor costs $120-$300.
- Don’t forget to clean the airbox bottom. Dump out leaves and wipe with a damp rag. That junk under the filter will get sucked up as soon as you install a new one.
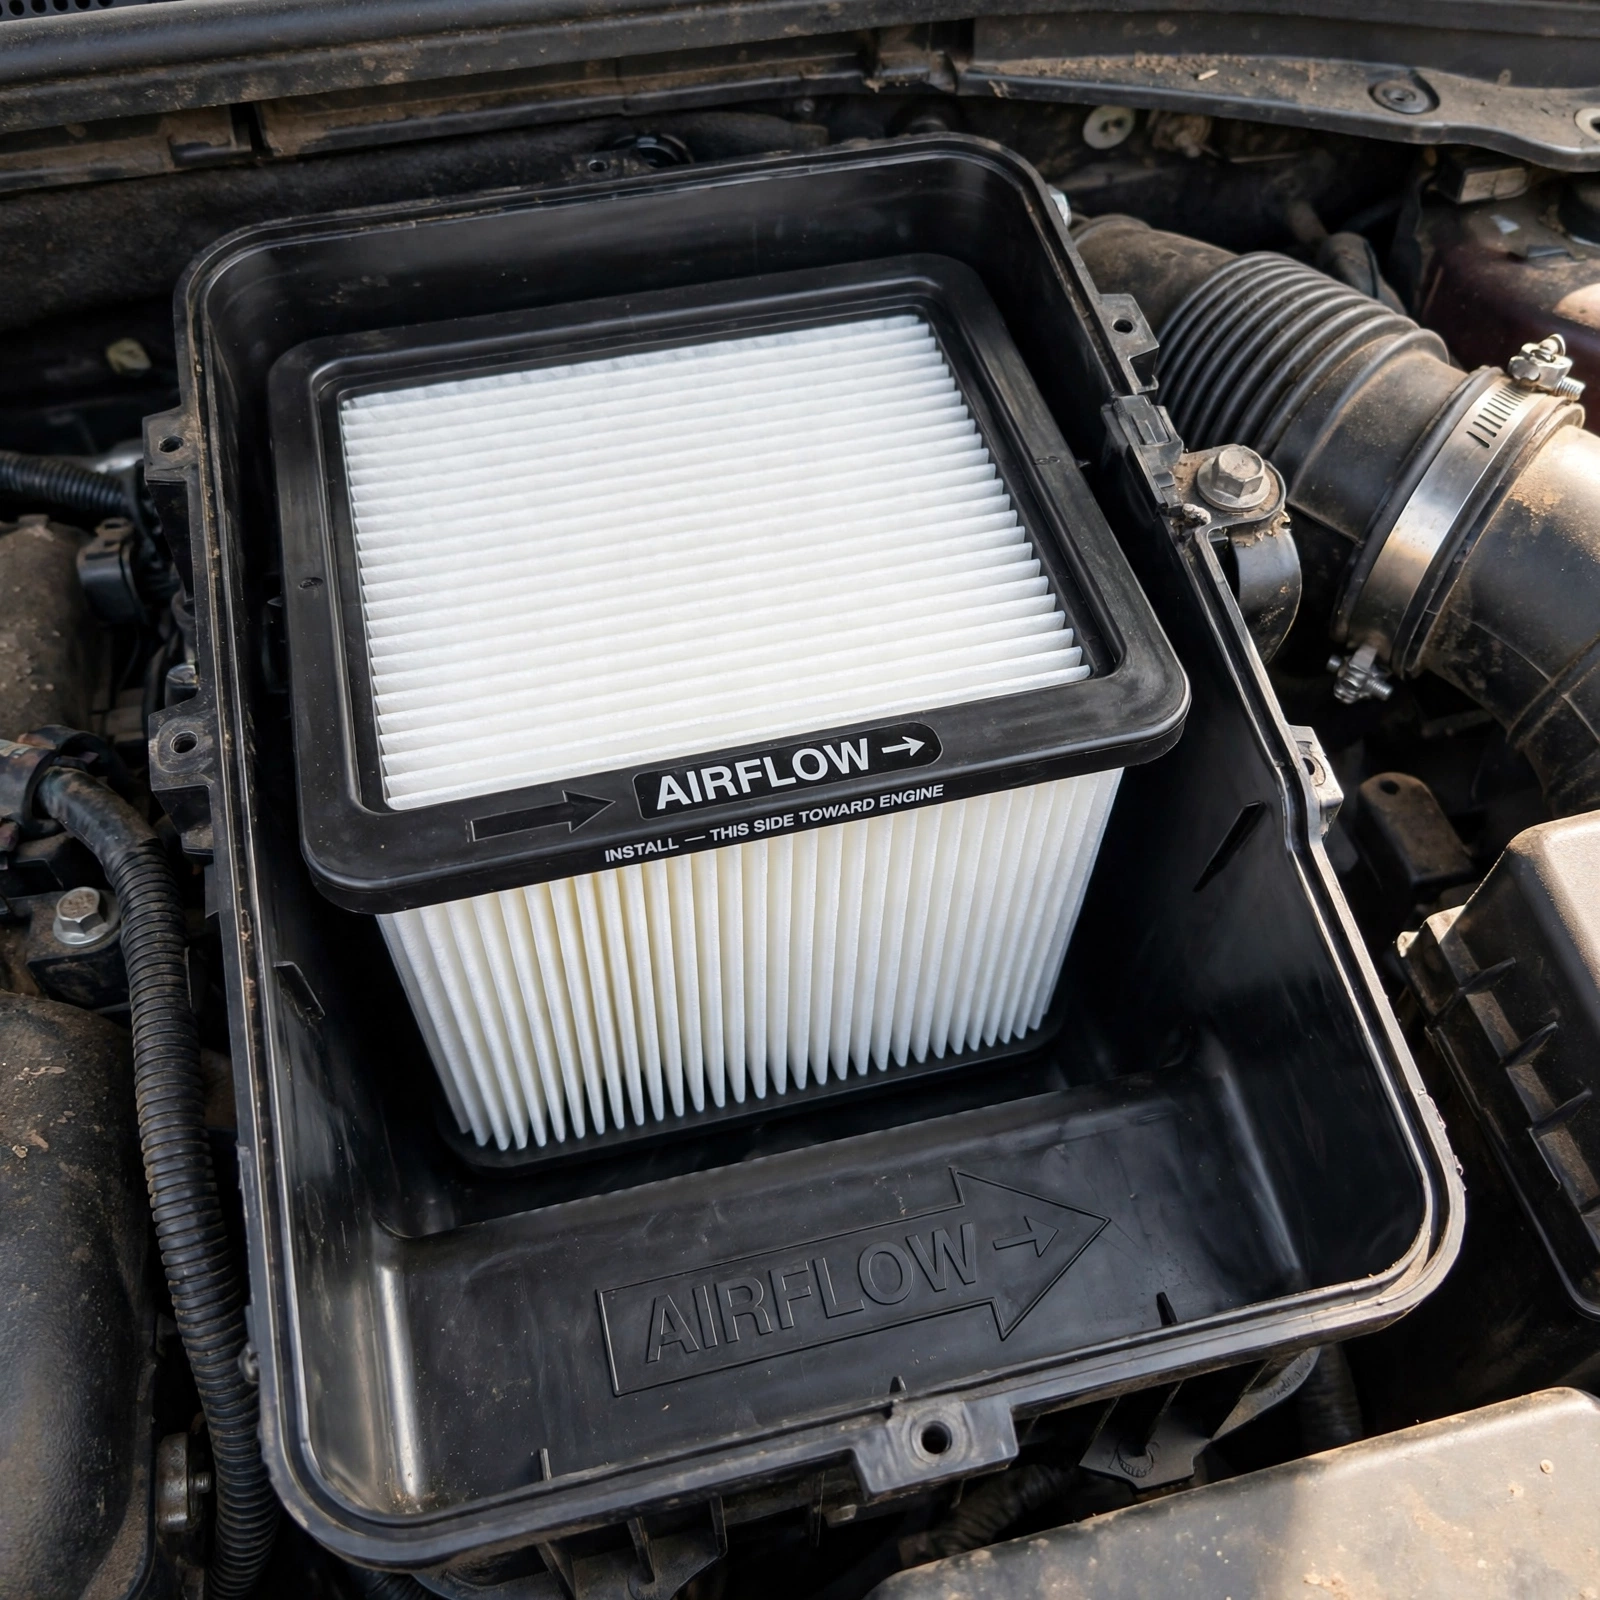
- Don’t install backwards. Yes, there’s a direction. Most have an Up or airflow arrow pointing toward the engine. Rubber seal always down toward the lower box.
If It’s Dirty: How to Replace It Correctly
I buy filters online for half the dealer price. WIX, Mann, Denso, Purolator — all fine. Avoid no-name that feels thin like tissue.
- Step 1: Note orientation. Before you pull the old one, look which side faces up. Take a phone pic. New one goes same way.
- Step 2: Clean the box. Old filter out, use a damp paper towel to wipe lower box. Check for rodent droppings. Mice love airboxes in winter — I found a nest in a parked CR-V.
- Step 3: Seat new filter. Drop it in, don’t force. The rubber gasket should contact evenly all the way around. Press each corner gently. No gaps.
- Step 4: Close lid. Align the back tabs first, then clip front. You’ll hear two distinct clicks. If it doesn’t sit flush, the filter is cocked diagonally. Pull and re-seat.
- Step 5: Double-check hose. Make sure that big accordion intake hose didn’t pop off the back of the box. If you hear a whistle after install, that’s why.
Pro check: After install, with the engine idling, put your hand around the airbox seam. Feel for air escaping that bypasses the filter seal. No whistle, no leak, you’re good.
Does a Dirty Filter Really Hurt MPG?
On old carbureted cars, yes — a lot. On modern fuel-injected cars, less than people claim, but still real.
Lab tests by Oak Ridge National Lab showed nearly no MPG change at steady highway speed with a moderately clogged filter because the ECU trims fuel. But hard acceleration hurts. The engine pulls timing and enrichment to compensate, so you burn more when you punch it.
In my own logs with a ScanGauge on my Mazda 3, going from a black filter (no light test) to new, my average city loop went from 26.1 mpg to 27.8 mpg — about 1.7 mpg. That’s $90 a year at $3.60/gal if you drive 12k miles. Filter cost me $18.
My 90-Second Routine You Can Copy
Here’s what I do every second oil change in my driveway, engine cold, coffee in hand:
- Pop hood, flip two clips — my hands stay clean if I grab only the plastic.
- Lift filter, hold to sky — light test.
- Wipe box bottom with rag I keep in the garage.
- Drop filter back, clip. Done.
If it’s gray, I write the mileage on the new filter edge with a Sharpie. That way the next guy (future me) knows when it went in. Simple trick that saves arguing with service writers who say “you need a new filter” at 8k miles.
Bottom line: You don’t need tools, you don’t need a lift, and you don’t need to pay $49.99 for a “premium air filter service.” You’ve got two minutes and two thumbs. Check it this weekend and you’ll know your engine is breathing right.




Leave a Reply