
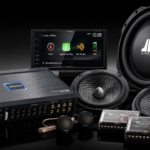
I’ve had customers drop $2,000 on a new sub, amp, and component speaker set, only to come back to my shop a week later sounding deflated. “It doesn’t sound like the YouTube demo,” they tell me. And honestly? Most of the time, the gear is fine. Nobody tuned it.
I learned this the hard way myself, years ago, in my own truck. I had a beautiful set of components installed, a clean amp wiring job, no rattles, nothing loose. And it still sounded like garbage. Boomy in some spots, harsh in others, vocals buried somewhere under the dash. I spent a whole Saturday with a laptop, a cheap measurement mic, and a six-pack chilling in the cooler, just chasing down where it was all going wrong.
That afternoon taught me something every car audio installer eventually learns: a car is one of the worst possible rooms to listen to music in. It’s small, it’s lopsided, and it’s full of glass and carpet fighting each other. Tuning is how you make peace between your gear and that ugly little metal box.
This guide walks through how I actually tune a system on my bench and in customer vehicles, what tools I reach for, and the specific mistakes I see DIYers make over and over.
Why Your Car Fights You on Sound Quality

Picture a living room with the couch centered, speakers placed evenly, a rug on the floor, curtains on the windows. That room was basically built for good sound by accident.
Now picture your car. Nothing about it was designed with acoustics in mind.
Here’s what you’re up against:
- Hard, reflective surfaces everywhere. Windshields, side glass, and dash plastic bounce sound waves back at you a few milliseconds after the direct sound hits your ear.
- Soft, absorbent surfaces right next to them. Carpet, headliner, and seat foam soak up certain frequencies unevenly.
- Bad speaker placement. Mid-bass drivers usually sit low in the door, somewhere around your ankle. Tweeters get stuck on the dash or A-pillar, way off-axis from your ear.
- An off-center seating position. If you’re in the driver’s seat, you’re sitting right on top of the left speakers and several feet from the right ones.
That reflected sound arriving late causes something called comb filtering. It’s the same effect you get if you yell into a long hallway and hear a weird flutter on the echo — except in your car, it’s quietly wrecking your frequency response every time you turn the key.
And because you’re closer to the left side speakers than the right, the whole stereo image collapses toward your door. Instead of a vocalist sitting nicely in the middle of the dashboard, you get a singer who sounds like they’re standing on your left knee.
I can’t reshape your car’s interior. Nobody can. But I can manipulate the signal heading into your speakers so your ears stop noticing the problem. That’s the entire job of tuning.
The DSP: Your Tuning Command Center

Back in the day, “tuning” meant cranking the bass knob on your head unit and calling it a day. I still see guys at car shows doing exactly that, and I just shake my head.
Real tuning today happens through a Digital Signal Processor (DSP). Think of it as a tiny computer that sits between your source unit and your amplifiers. It takes the raw audio signal and lets you shape it with way more precision than any analog knob ever could.
A DSP handles three jobs that matter most:
- Crossovers – deciding which speaker gets which frequencies
- Time alignment – making sure sound from every speaker reaches your ear at the same moment
- Equalization (EQ) – smoothing out the peaks and dips your car’s interior creates
Let’s go through each one the way I’d walk a customer through it in my shop.
1. Crossovers: Keeping Each Speaker in Its Lane
No single speaker can cleanly reproduce the full range of human hearing, roughly 20 Hz up to 20 kHz. That’s why a real system splits the work up:
- Subwoofers handle the deep bass
- Mid-bass drivers pick up the lower midrange
- Midrange speakers carry vocals
- Tweeters take the high end
A crossover is the electronic gatekeeper deciding what frequencies go where.
A High-Pass Filter (HPF) lets the high stuff through and blocks the low stuff. I always set an HPF on tweeters, no exceptions. Send raw bass into a tiny tweeter voice coil and you’ll cook it. I’ve replaced more than a few tweeters that died exactly that way, usually because someone skipped the crossover to “get more output.”
A Low-Pass Filter (LPF) does the opposite job, letting bass through to the sub and cutting the highs.
Getting the crossover point right matters more than people think. Set it too high between your mid-bass and tweeter, and you’ll hand off vocal frequencies to a speaker that wasn’t built to handle them. Too low, and you risk distortion or burning out the smaller driver. I always pull up the manufacturer’s frequency response chart for the actual speakers in the car and pick crossover points where each driver is happiest, not just a generic factory default.
2. Time Alignment: Putting the Singer Back in the Middle
Sound travels at roughly 343 meters per second, or about 1,130 feet per second if you think in imperial units like I do most days in the shop. That sounds fast, but inside a car cabin, those few feet of distance difference actually matter.
Since the driver sits closer to the left door speaker than the right one, the left speaker’s sound physically arrives at your ear first. That tiny head start scrambles the stereo image before you’ve even touched an EQ.
Time alignment fixes this by intentionally delaying the signal to whichever speaker is closer to you. I measure the distance from each speaker to the tip of my nose (sitting normally in the driver’s seat, not leaning), plug those numbers into the DSP, and let it calculate the delay in milliseconds.
When I get this dialed in right, it’s honestly my favorite moment in any tuning session. The individual speakers seem to disappear, and you get a single, solid “soundstage” floating somewhere above the dash. Close your eyes and you can point to where the guitarist is standing versus the drummer behind them. That’s the mixing engineer’s original intent finally showing up in your car instead of getting scrambled by physics.
Time Alignment Calculator
DSP Time Alignment Calculator
Uses speed of sound (~13,500 in/s) to synchronize wave arrival at the driver’s seat.
3. Equalization: Taming the Peaks Without Wrecking Your Amp
Even with perfect crossovers and dialed-in time alignment, your cabin still has its own personality. Road noise and resonance inside that metal box create peaks and dips no amount of crossover work will fix.
A common one: a nasty peak around 50 Hz from cabin resonance that makes bass sound boomy and one-note instead of tight. Another classic is a harsh spike around 4 kHz, often from sound bouncing off the center console, that makes vocals sound like they're shouting at you.
This is what a parametric EQ on your DSP is for. You pick a frequency, decide how much to cut or boost it, and adjust the width (called the "Q" factor) of that adjustment.
Here's the rule I drill into every customer who wants to learn tuning themselves: cut, don't boost.
It's tempting to find a dip in your response and crank that frequency up to fill it in. Don't. Boosting eats into your amplifier's headroom and is one of the fastest ways to cause clipping distortion, which can actually damage your speakers over time. Cutting the peaks instead gets you a flatter, more natural-sounding system without asking your amp to work harder than it has to.
The Tools I Actually Use to Measure What's Happening

Your ears are the final judge of how a system sounds, but ears lie to you. Hearing is subjective, it fatigues over a long session, and it's easily fooled by loudness alone. You need objective data to know what's actually happening inside the cabin.
The standard setup I use is a Real Time Analyzer (RTA) paired with a calibrated measurement microphone, something like the miniDSP UMIK-1. I clip the mic to the headrest, right around where the driver's ear would be, and run a calibration file specific to that exact microphone (every UMIK-1 ships with its own calibration data, so don't skip loading it).
From there, the DSP plays "pink noise" through the system. Pink noise carries equal energy across the frequency spectrum, so any peaks or dips you see on the graph are coming from the car itself, not the test signal.
My laptop's RTA software shows the actual frequency response hitting that microphone, in real time, as a graph. The first time most people see this graph for their own car, they're shocked at how jagged it looks. There's no shame in it. Every car looks rough on an RTA before you start working.
From there, I compare that messy real-world graph against a target curve, a frequency response shape that's been tested and proven to sound pleasant inside a vehicle. Most target curves lift the sub-bass a bit, taper gently through the midrange, and roll off slightly at the very top. Using the parametric EQ, I nudge the car's actual response closer and closer to that target curve, one adjustment at a time.
Common Tuning Problems I See (and How I Fix Them)
After enough sessions, you start recognizing the same handful of issues over and over. Here are the ones that come up most in my shop.
Problem: Muddy or "chesty" vocals
This usually comes from too much energy somewhere between 200 Hz and 500 Hz. Car doors have a natural resonant frequency that sits right in that range, and it loves to muddy up vocals.
Fix: Pull up your RTA, find the peak in that range, and make a small, targeted cut. I'm talking 2–3 dB, not a huge slash. Vocals clean up fast once that peak settles down.
Problem: Bass sounds like it's stuck in the trunk
Good sub-bass should feel like it's coming from the front of the car, blending with your mid-bass. If the bass cuts in and out, suspect a loose connection, not a tuning issue, check your amp's power and ground wiring with a test light before touching the DSP. But if the bass is steady and punchy, just clearly localized to the back seat, you're dealing with a phase or crossover problem.
Fix: Try flipping the sub's polarity 180 degrees in the DSP. If that doesn't solve it, lower your subwoofer's low-pass filter point. Frequencies above 80 Hz start becoming directional to the human ear, meaning you can actually point to where they're coming from. Keeping your sub's crossover under 80 Hz helps "hide" the subwoofer's location and pulls that bass sensation forward into the cabin.
Problem: Harsh, fatiguing highs
If a 20-minute drive with music on leaves your ears tired, you've likely got a peak somewhere in the upper midrange or treble, often from reflections bouncing straight off the windshield.
Fix: Check your RTA for a spike anywhere between 2 kHz and 8 kHz, and cut it back. A little natural roll-off at the very top end is normal and actually preferred in a car. It keeps the sound from turning bright and grating at higher volumes.
Problem: Lopsided soundstage
If the music sounds like it's mostly coming out of one door instead of the dashboard, you've likely got a time alignment or level balance issue, not an EQ problem.
Fix: Re-measure the distance from each speaker to your listening position and re-run the time alignment calculation. Check your left/right level balance too. Sometimes it's not delay at all, just one channel running a few dB hotter than the other.
Car Audio Symptom Diagnostic Tool
Make use of the car audio diagnostic tool below to help you fix car audio tuning issues effortlessly:
Car Audio Symptom Diagnostic
Select the issue that best describes your current sound system performance:
Common Tuning Problems I See (and How I Fix Them)
After enough sessions, you start recognizing the same handful of issues over and over. Here are the ones that come up most in my shop.
Problem: Muddy or "chesty" vocals
This usually comes from too much energy somewhere between 200 Hz and 500 Hz. Car doors have a natural resonant frequency that sits right in that range, and it loves to muddy up vocals.
Fix: Pull up your RTA, find the peak in that range, and make a small, targeted cut. I'm talking 2–3 dB, not a huge slash. Vocals clean up fast once that peak settles down.
Problem: Bass sounds like it's stuck in the trunk
Good sub-bass should feel like it's coming from the front of the car, blending with your mid-bass. If the bass cuts in and out, suspect a loose connection, not a tuning issue, check your amp's power and ground wiring with a test light before touching the DSP. But if the bass is steady and punchy, just clearly localized to the back seat, you're dealing with a phase or crossover problem.
Fix: Try flipping the sub's polarity 180 degrees in the DSP. If that doesn't solve it, lower your subwoofer's low-pass filter point. Frequencies above 80 Hz start becoming directional to the human ear, meaning you can actually point to where they're coming from. Keeping your sub's crossover under 80 Hz helps "hide" the subwoofer's location and pulls that bass sensation forward into the cabin.
Problem: Harsh, fatiguing highs
If a 20-minute drive with music on leaves your ears tired, you've likely got a peak somewhere in the upper midrange or treble, often from reflections bouncing straight off the windshield.
Fix: Check your RTA for a spike anywhere between 2 kHz and 8 kHz, and cut it back. A little natural roll-off at the very top end is normal and actually preferred in a car. It keeps the sound from turning bright and grating at higher volumes.
Problem: Lopsided soundstage
If the music sounds like it's mostly coming out of one door instead of the dashboard, you've likely got a time alignment or level balance issue, not an EQ problem.
Fix: Re-measure the distance from each speaker to your listening position and re-run the time alignment calculation. Check your left/right level balance too. Sometimes it's not delay at all, just one channel running a few dB hotter than the other.
A Word on Safety While You're Under the Dash
Tuning itself won't hurt you, but getting to your gear often means pulling door cards, dash panels, or kick panels, and that's where I see people hurt their cars (and occasionally their knuckles).
A few things I always tell people before they start pulling trim:
- Disconnect the negative battery terminal first if you're touching any amp wiring or running new RCA cables near the steering column. A 10mm socket handles most negative terminal clamps on common makes.
- Use a plastic trim removal tool, not a screwdriver, when popping door cards loose. Metal tools chew up plastic clips and leave visible gouges in your interior panels.
- Keep any fluids far away from your gear and trim. I know this sounds unrelated to audio, but I've seen guys tuning a system right after a brake job, and brake fluid on bare metal trim or paint will eat right through the clear coat down to bare metal in minutes. Wipe your hands and tools clean before you start handling interior panels.
- Label your wiring as you disconnect it. A wad of unlabeled RCA cables and speaker wire behind a dash is a nightmare to put back together at 9 PM when you just want to test your tune.
Trusting Your Ears Over the Graph
Here's something that took me a while to accept: the RTA graph is a map, not the destination.
I had a session a couple years back where the graph was about as close to the target curve as I'd ever gotten one. Beautiful, smooth line, hugging the target almost perfectly. I put on a song I know inside and out, an acoustic track with a guitar I could practically feel in the room when I'd heard it live.
It sounded cold. Flat. The snare drum had no life in it at all.
The microphone had measured the room correctly. It just hadn't captured what actually moves a person listening to music. I ended up backing away from that "perfect" curve and made some manual adjustments by ear in the mid-bass and treble until the track sounded the way I remembered it.
That's the part of this job that's still art, not science. Use the RTA to knock out the big acoustic problems first, the comb filtering, the major peaks, the time alignment errors. That gets you about 90% of the way there. Then close the laptop, put on music you actually know well, and let your ears finish the last 10%. No graph will ever replace that step.
Final Thoughts From the Garage
Good car audio isn't about how much you spent on speakers. I've heard $300 systems tuned properly that sound better than $3,000 systems nobody bothered to dial in.
It takes patience, a willingness to sit in a parking lot for an hour with pink noise playing while your neighbors wonder what you're doing, and a genuine interest in learning how sound behaves in a small, ugly, reflective metal box. You'll get frustrated. I still do, on tricky vehicles with weird cabin resonances.
But when you finally nail that time alignment, smooth out the worst peaks, and hear a vocalist sitting clean and centered on your dashboard like they're really there, you'll understand why I still enjoy doing this after all these years behind the wheel and under the dash.
Leave a Reply