
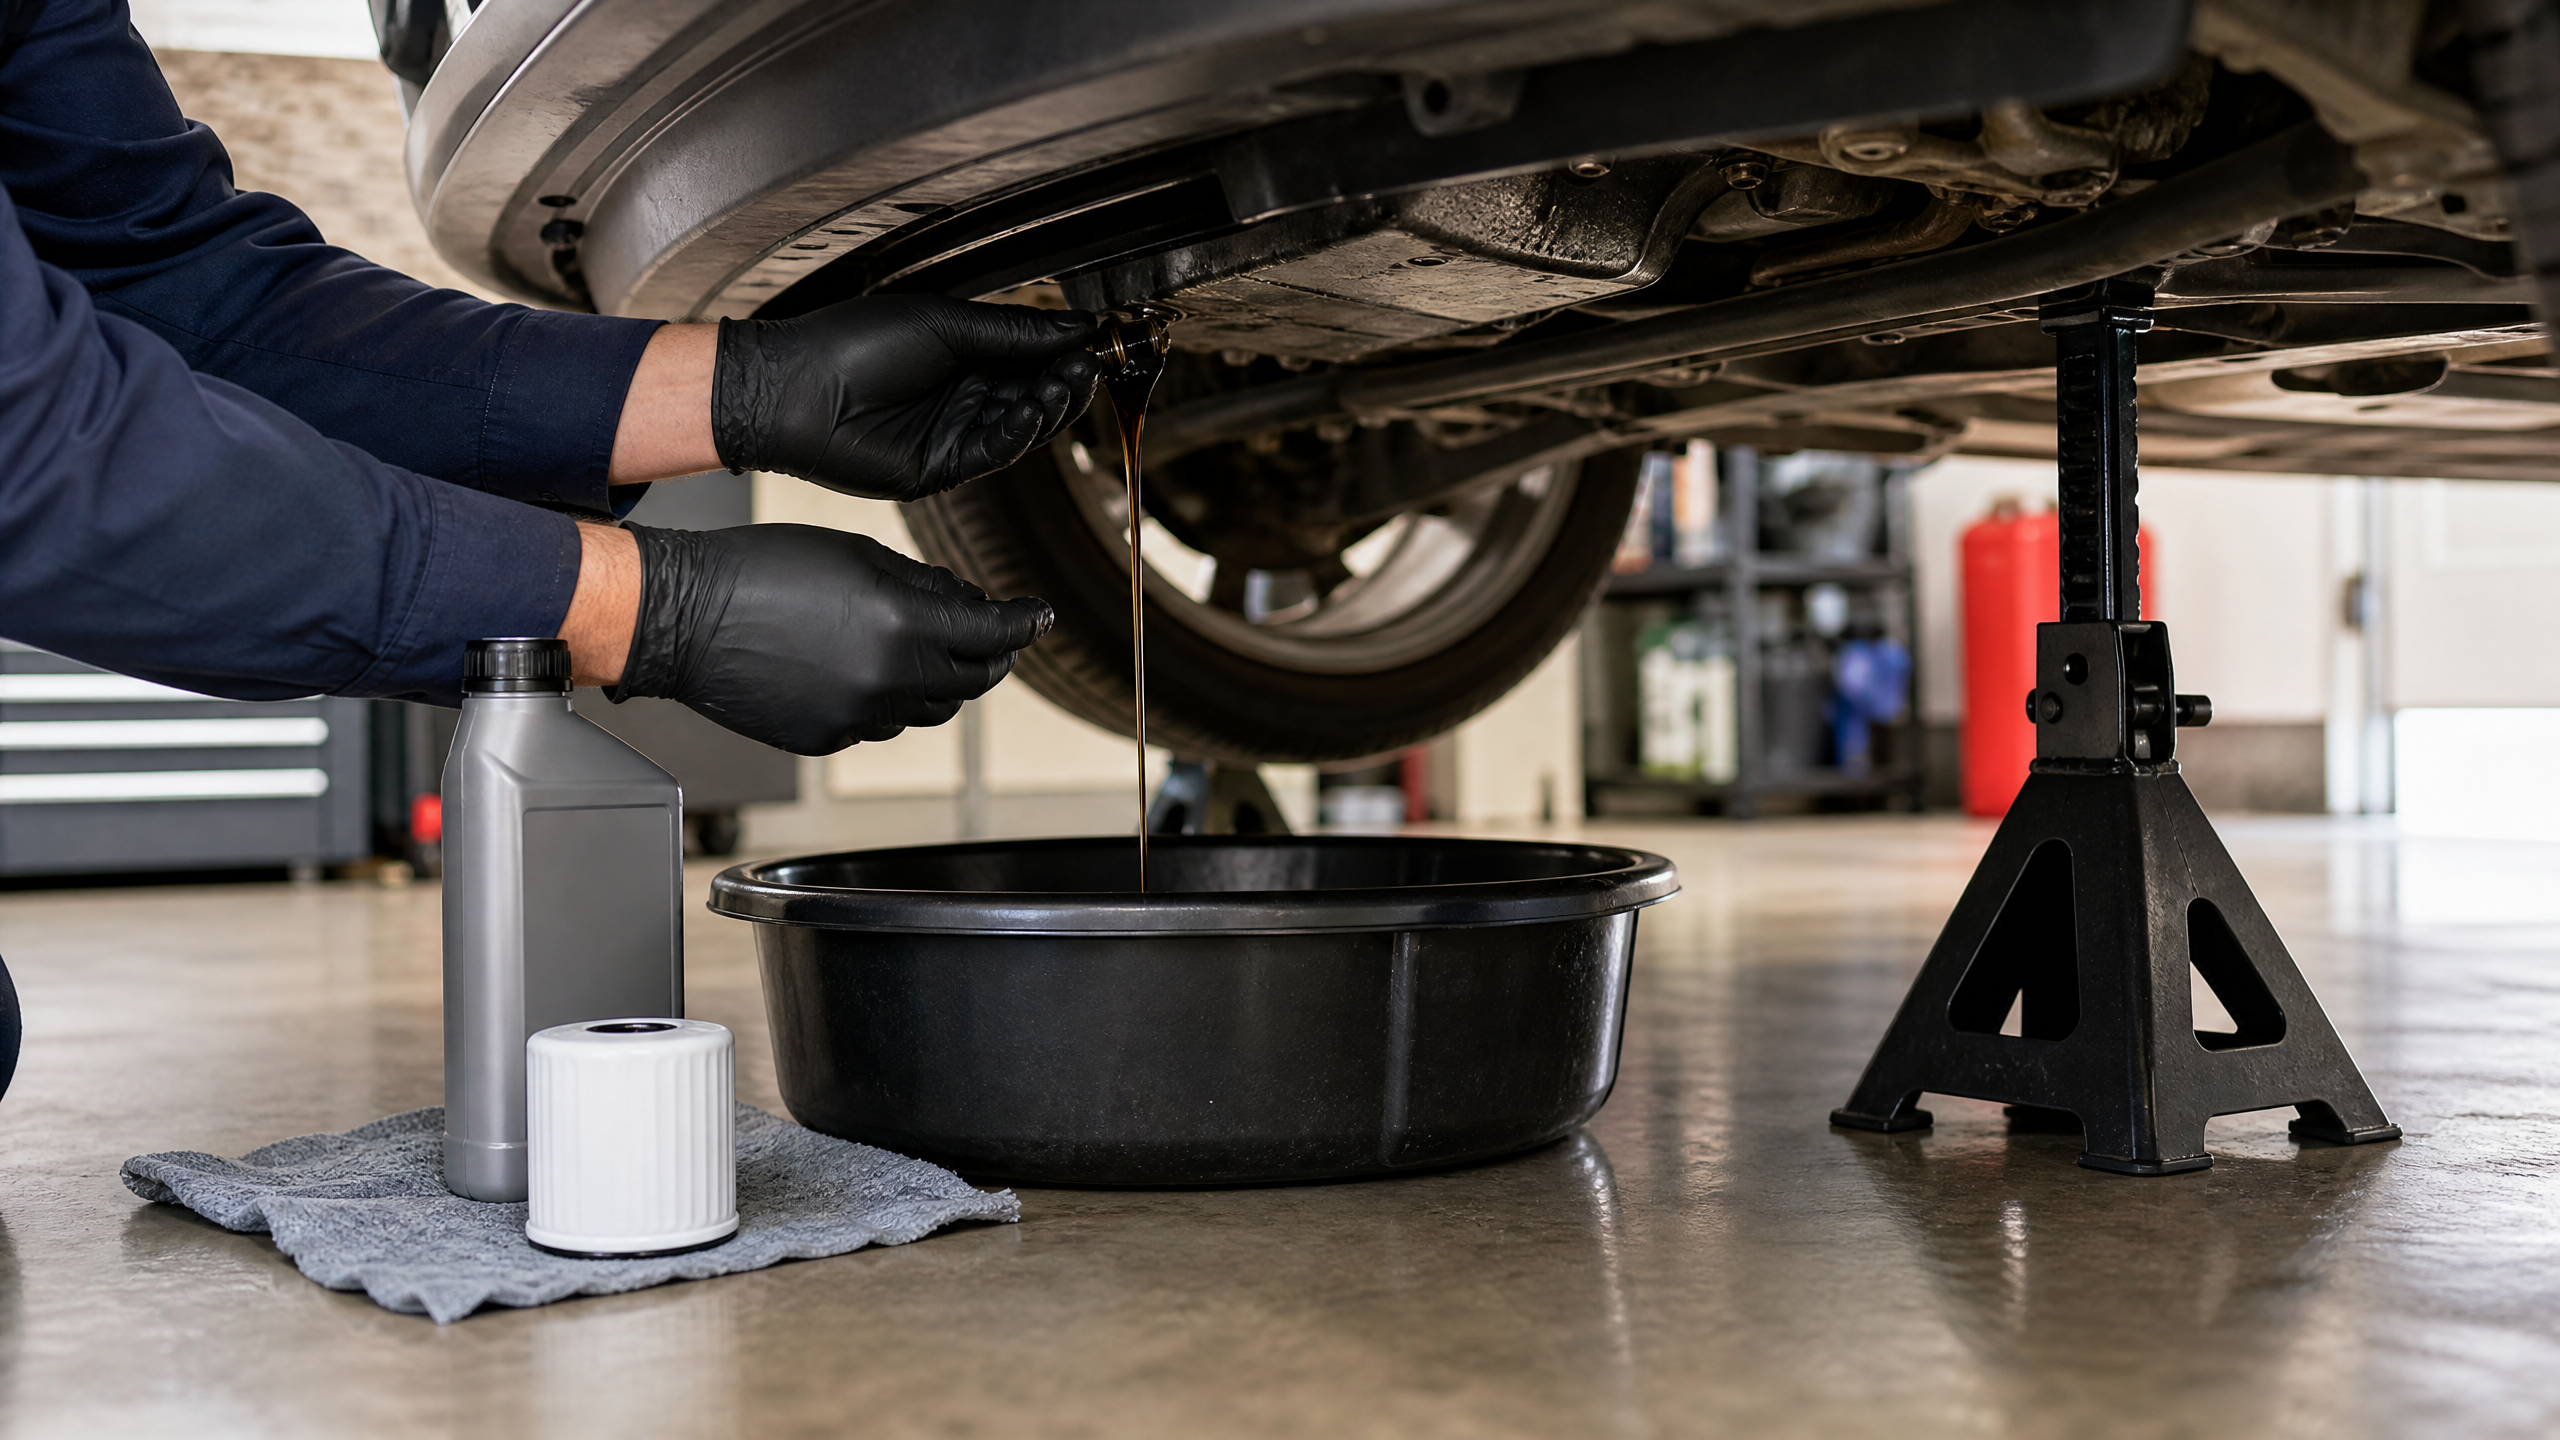
DIY Oil Change: Save Money with an Easy Step-by-Step Tutorial
A customer walked into my shop last fall waving a quick-lube receipt: $138 for a synthetic oil change on a 4-cylinder Corolla, plus a “fuel system cleaning” he never asked for. I do this for a living and I still flinched.
The parts for that same job run about $42 at any parts store. The labor is twenty-five minutes in your driveway on a pair of ramps.
I’ve changed more oil than I can count, on my own trucks and on customer cars. This is the exact routine I follow, with the mistakes I see DIYers make called out before you make them.
What You’ll Spend vs. What the Shop Charges
| Item | DIY cost | Shop cost |
|---|---|---|
| Full synthetic oil (5–6 quarts) | $25–$35 | bundled |
| Oil filter | $8–$14 | bundled |
| Drain plug washer | $2 | bundled |
| Labor | $0 and 25 minutes | $30–$60 |
| Typical total | $35–$50 | $90–$140 |
Do it four times a year and you keep $200–$350 in your pocket. You also know exactly what went into your engine and how tight the plug got.
There’s a second payoff nobody advertises: an oil change is a built-in inspection. You’ll spot a weeping axle seal, a rusty brake line, or a loose splash shield while they’re still a $10 fix instead of a tow-truck surprise.
Know What Your Car Needs Before You Buy Anything
Your owner’s manual lists the viscosity (like 0W-20 or 5W-30) and the capacity (like 4.4 quarts with filter). The oil filler cap usually has the viscosity molded right on it. Buy the oil that matches the cap, not the oil that’s on sale.
Next, find out which filter style your engine uses. Older and simpler engines use a spin-on canister that screws onto the side or bottom of the engine. Many modern cars use a cartridge filter: a paper element inside a plastic housing on top of the engine, sealed with an O-ring. The cartridge job is actually easier — no crawling, no gusher — but you must replace the O-ring and the housing seal every time, or it will weep.
Check whether your car has a plastic splash shield or skid plate under the engine. Most do now. Look at the fasteners before you buy anything: some are 10mm bolts, some are T30 or T45 Torx, and some are quarter-turn plastic clips that need a flat blade. Knowing this at the store beats knowing it on the driveway.
Buy a name-brand filter that lists your car on the box. Cheap no-name filters have weak anti-drain-back valves, and that means a dry start every single morning. Dry starts are where engine wear lives.
The Tool List (Short and Cheap)
- Car ramps or a floor jack plus two jack stands. Ramps are the easy button for oil changes. Never crawl under a car held up by a jack alone.
- Wheel chocks, parking brake set.
- The right socket for the drain plug — usually 14mm, 15mm, or 17mm. Some Fords and German cars use 13mm or a square drive.
- Driver for the skid plate if your car has one, matched to the fasteners you checked.
- Oil filter wrench for spin-on filters. A cap-style wrench sized to your filter beats a band wrench every time. Band wrenches slip and crush the canister.
- Drain pan, 6–8 quart capacity, with a pour spout.
- Funnel, nitrile gloves, shop rags.
- Torque wrench for the drain plug. Yes, really.
- New crush washer for the plug, copper or aluminum to match.
- For cartridge filters: the new O-ring set that comes with the element, and a Torx or hex socket for the housing cap, often 13mm or 27mm depending on the car.
Setup and Safety Before Your Hands Get Dirty
Work on flat, solid ground. Ramps on gravel dig in and tip. Ramps on a slope turn your car into a four-thousand-pound rolling problem.
Hot oil drains fast and carries more junk out, but “warm” is the word. Two or three minutes of running is perfect. Oil at full operating temperature is hot enough to burn skin on contact, so keep rags and gloves on and your sleeves down.
Set the parking brake and chock the wheels that stay on the ground. If any part of you goes under the car, it sits on jack stands, never on the jack.
The Step-by-Step
1. Warm it up, briefly. Run the engine two or three minutes. Warm oil flows like water instead of syrup.
2. Get it up safely. Drive straight onto the ramps, set the parking brake, chock the rear wheels. Jack and stands instead? Lift at the factory points and shake-test before you trust it.
3. Open the fill cap. Pop the hood and twist the oil cap off. It breaks the vacuum and the oil drains in half the time.
4. Drop the shield. Remove the splash shield fasteners and set them in a magnetic tray or a coffee can. They are small, black, and magnetic for your driveway.
5. Find the drain plug. Slide under with a light. The plug sits at the lowest point of the oil pan. Aim the pan so the stream lands mid-pan, not on the rim.
6. Break it loose, finish by hand. Loosen with the socket, then spin the last turns out with gloved fingers. When the oil gushes, push the plug aside fast — the first blast is hot and quick.
7. Let it drip. Give it 5 to 10 minutes. Gravity is slow but honest.
8. Fix the plug. Wipe it clean, check the threads, and fit the new crush washer. The old washer is crushed to the old pan. Reusing it is how plugs start weeping.
9. Torque the plug. The shade-tree rule is snug plus a quarter turn, but the manual’s number wins — usually 25 to 30 ft-lbs. Overtightening strips aluminum pans, and that turns a $3 washer into a $400 pan.
10. Move to the filter. Slide the pan under it. Crack it loose with the cap wrench and let it drain a full minute. Old filters hold a surprising half-quart of dirty oil.
11. Prep the new filter. Wipe the mounting surface on the engine clean — old gasket rubber loves to stick there. Swipe a film of new oil on the new gasket with a gloved finger. Count the gaskets on the old filter before the new one goes on. If the old gasket is still stuck to the engine and you install the new filter anyway, you’ll own a double-gasket gusher at first startup.
12. Hand-tight, then three-quarters turn. Screw it on by hand until the gasket touches, then follow the box — usually 3/4 turn more. No wrench on install. You want to unscrew it by hand next time.
12b. Cartridge housing version. Unbolt the housing cap, lift it straight out, let it drain. Pull the old element out, wipe the housing, fit the new O-rings on the cap and the seal at the bottom of the housing, drop in the new element, and torque the cap gently — usually 18 to 20 ft-lbs. A cracked housing from a ham-fisted torque is a classic comeback job.
13. Fill, run, check, top off. Funnel in. Pour one quart less than the listed capacity. Cap on. Run the engine one minute, watch the filter and plug for leaks, shut it off. Wait a minute, read the dipstick, top up to the full mark. Overfilling whips oil into foam, and foam doesn’t lubricate.
14. Reset the light. Most cars reset through a dash button sequence or a gauge-cluster menu. The manual spells it out in thirty seconds.
15. Write it down. Sticker in the door jamb or a phone note: mileage, date, oil brand, filter brand. Future you says thanks.
The Two-Minute Inspection While You’re Down There
With the shield off and the light on, sweep your eyes across the underside.
Look for wet shine at the axle boots, the transmission, and the oil pan rails. Shine means a seep. Dry dust is fine; wet dust is a leak starting.
Squeeze the brake hoses and look at the lines for rust blooms. Wiggle a tie rod end and check the sway bar links for torn boots.
Check the exhaust for rusty seams and the fuel lines for weeping. You’re already under there. The inspection costs nothing and catches small bills before they grow teeth.
The Used Oil Part Nobody Skips
Used motor oil is insoluble, loaded with heavy metals, and one change can foul a million gallons of fresh water.
Pour the cooled oil back into the new-oil jugs, cap them, and drive them to any parts store or quick-lube that accepts used oil. They take it free, no purchase required. Keep the oil and the old filter in separate containers if your recycler asks, and let the filter drain upside down in a sealed bag.
Never the storm drain, never the trash, never the ditch.
Mistakes I Keep Cleaning Up
Overtightening the filter. The gasket seals it, not your biceps. A crunched-down filter seizes on and comes off next time with a screwdriver and bad words.
Skipping the crush washer. A weeping plug stains the driveway and slowly empties your pan.
Overfilling. The crankshaft whips extra oil into foam. Foam is air, and air doesn’t carry heat or protect bearings.
Reusing the old O-ring on cartridge housings. The old ring is compressed and hard. It will seep within a week. The two-dollar ring is not the place to save money.
Ramps on gravel or a slope. Covered above, on purpose. It’s the only injury I’ve seen from this job.
Try It: Oil Change Savings Calculator
Punch in your numbers and see what a year of DIY actually keeps in your pocket.
What would DIY save you?
Wrap-Up
An oil change is the single best first job for any DIYer. Cheap tools, low risk, real savings, and you learn your way under your own car.
Do it on flat ground, torque the plug, lube the gasket, replace the O-ring, and recycle the oil. Your engine and your wallet both run cleaner.
Stuck filter or a stripped plug? Drop a comment with the car and year. I answer between jobs.
Related posts:
 Brake Fluid Breakdown: Understanding DOT Ratings and When to Bleed Your Braking System
  Why Is Your Car Leaking Clear Fluid? (How to Identify 5 Common Leaks)
  Rainy Season Car Care: Essential Tips for Safe Wet-Weather Driving
  The Science of Suspension: Choosing the Right Car Parts for Enhanced Performance and Comfort
Leave a Reply