I’ve spent a lot of late nights in my garage with a flashlight in my mouth and a panel popper in one hand, chasing down a rattle behind a door card. So when people ask me whether a car audio upgrade is “worth it,” I always laugh a little. Of course it is. I just want them to do it right the first time.
Factory stereos are fine for talk radio. They are not fine for music. If you’ve ever cranked the volume on a highway drive and gotten distortion instead of bass, you already know what I’m talking about.
This guide walks through every piece of a car audio system, in the order I’d actually upgrade them if it were my own car sitting in the driveway. No fluff, no guesswork. Just what I’ve learned from doing this on my own vehicles and a pile of customer cars over the years.
Why Your Factory Stereo Sounds Flat
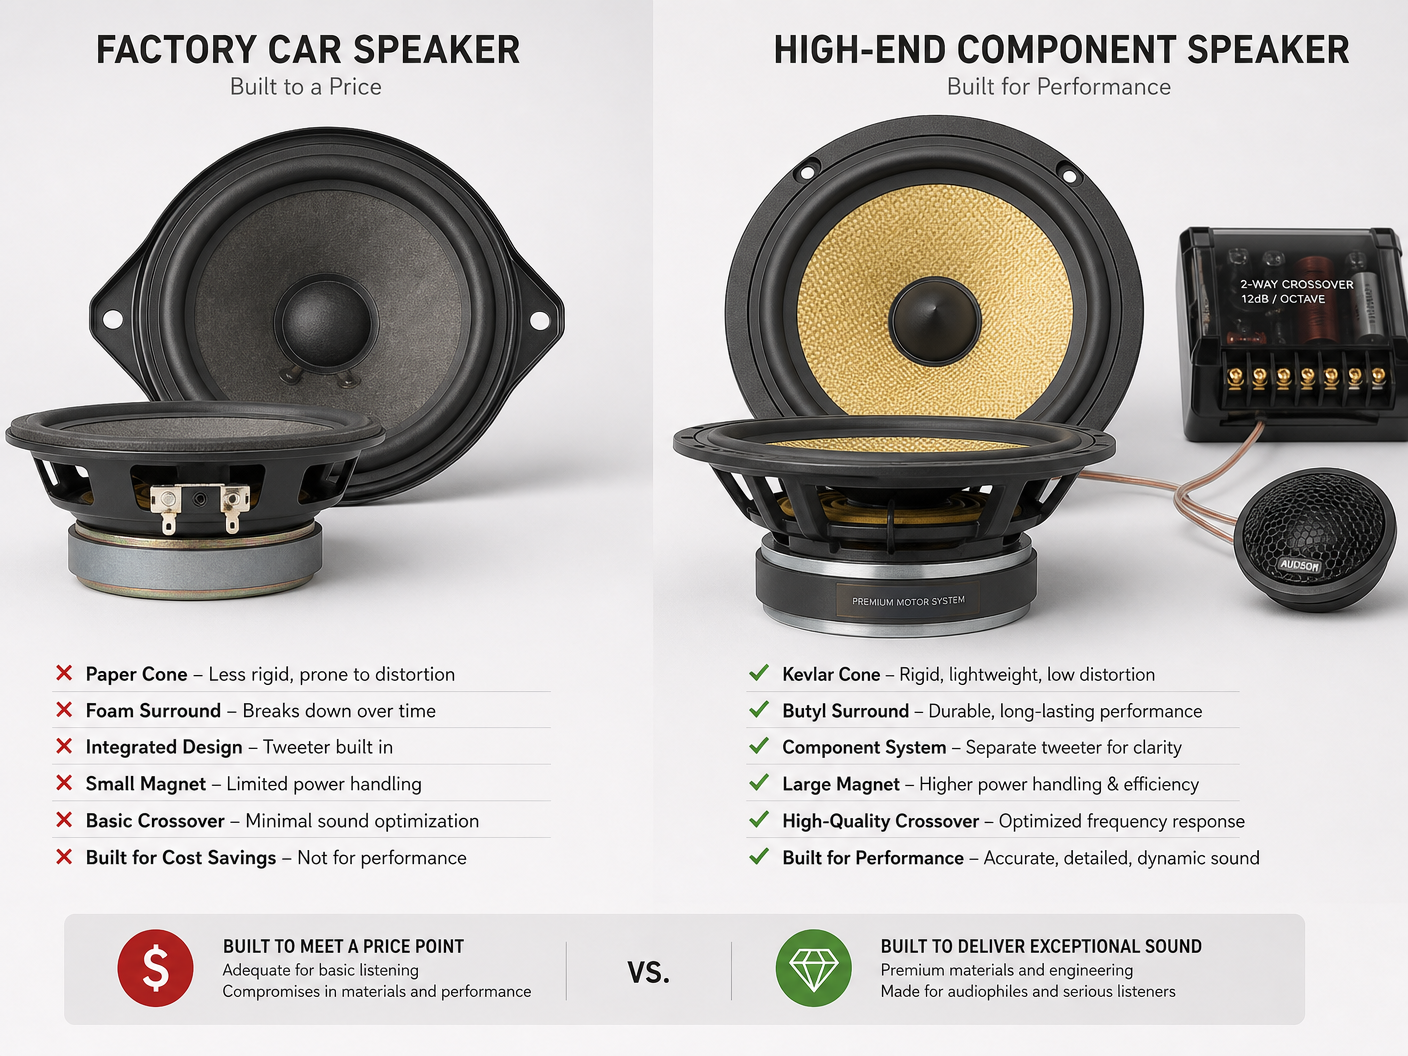
Car manufacturers build to a budget, not to a sound target. The head unit, the speakers, the wiring, all of it gets value-engineered down to whatever keeps the sticker price low.
That means you’re usually stuck with three weak links:
- Cheap paper-cone speakers that flex and distort once you push past half volume
- A head unit with almost no internal amplification, often putting out 15 to 20 watts RMS per channel
- Thin factory wiring that was never meant to carry serious current
My old sedan was a perfect example. Vocals came through like the singer was stuck in a coffee can, and the bass just wasn’t there. I popped the door panel one weekend out of curiosity and found a speaker with a cone about as stiff as a paper plate. That’s when the upgrade itch started.
Car Audio Upgrade Recommender Quiz
Take the quiz below to find what you need to prioritize in your next car audio upgrade project.
Car Audio Upgrade Recommender
Find your perfect starting point in 30 seconds.
What is your primary goal for this upgrade?
What is your estimated budget for this phase?
How comfortable are you with installation?
Your Recommended First Step
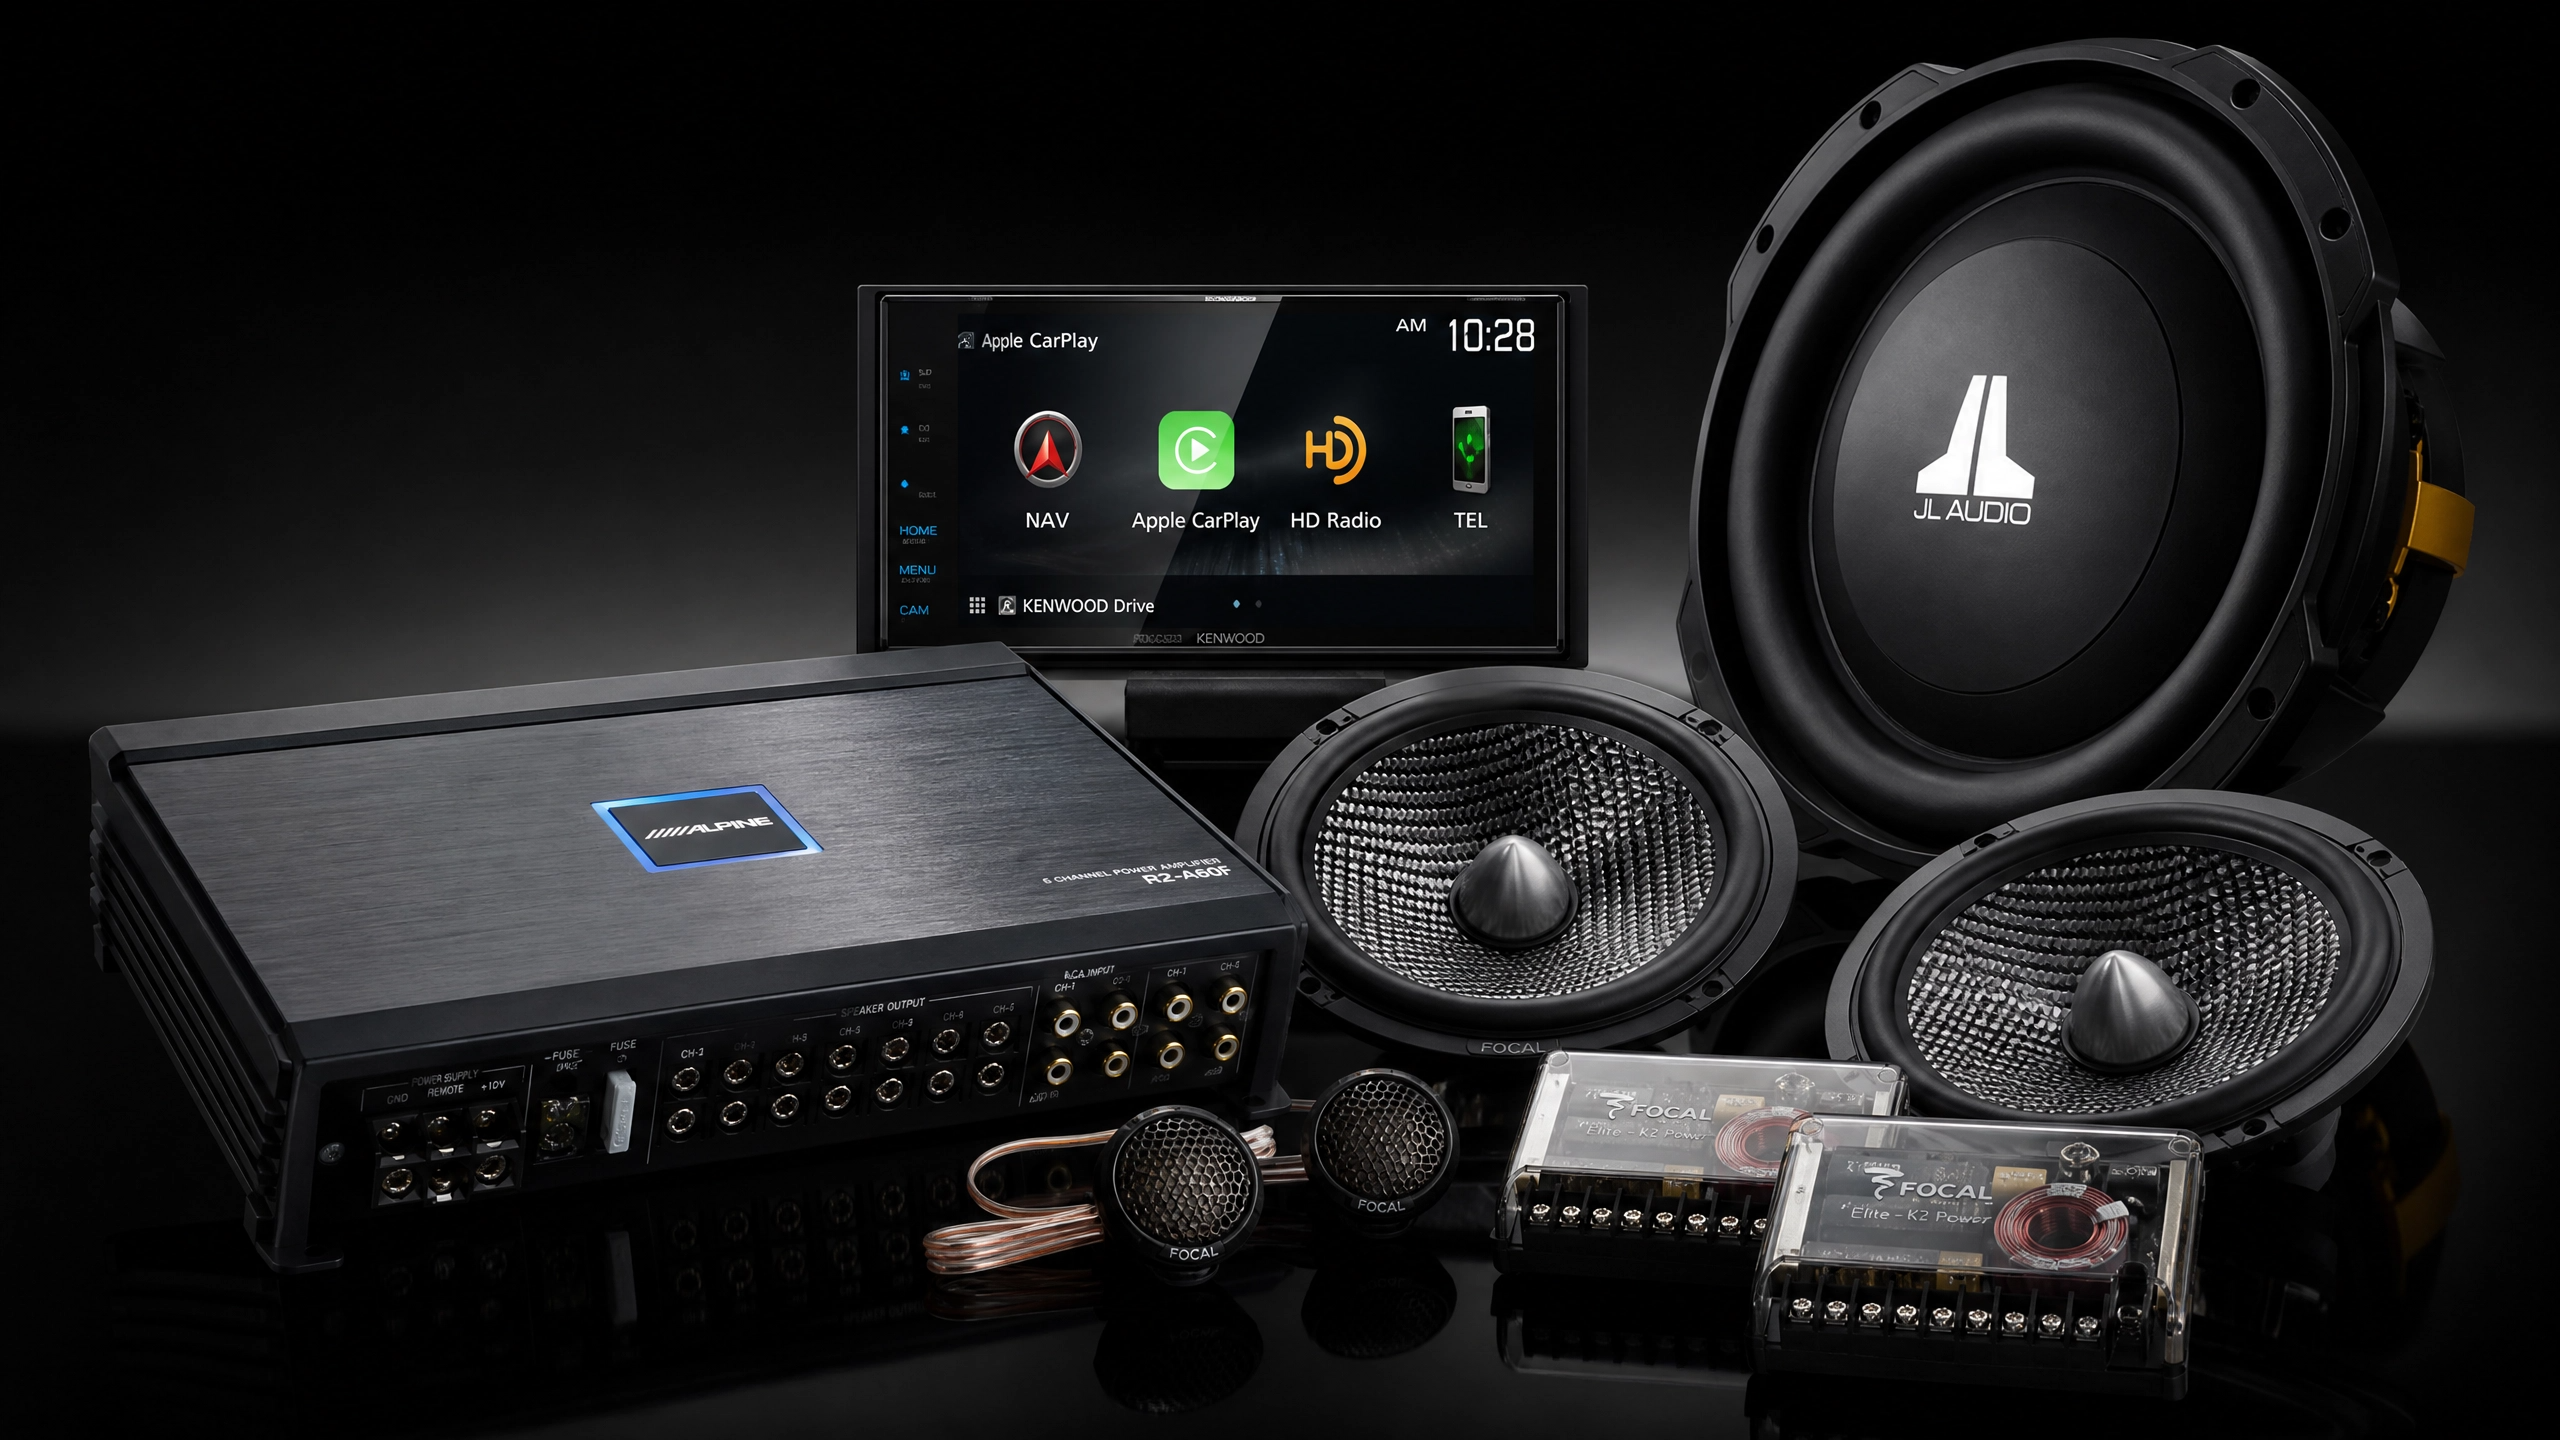
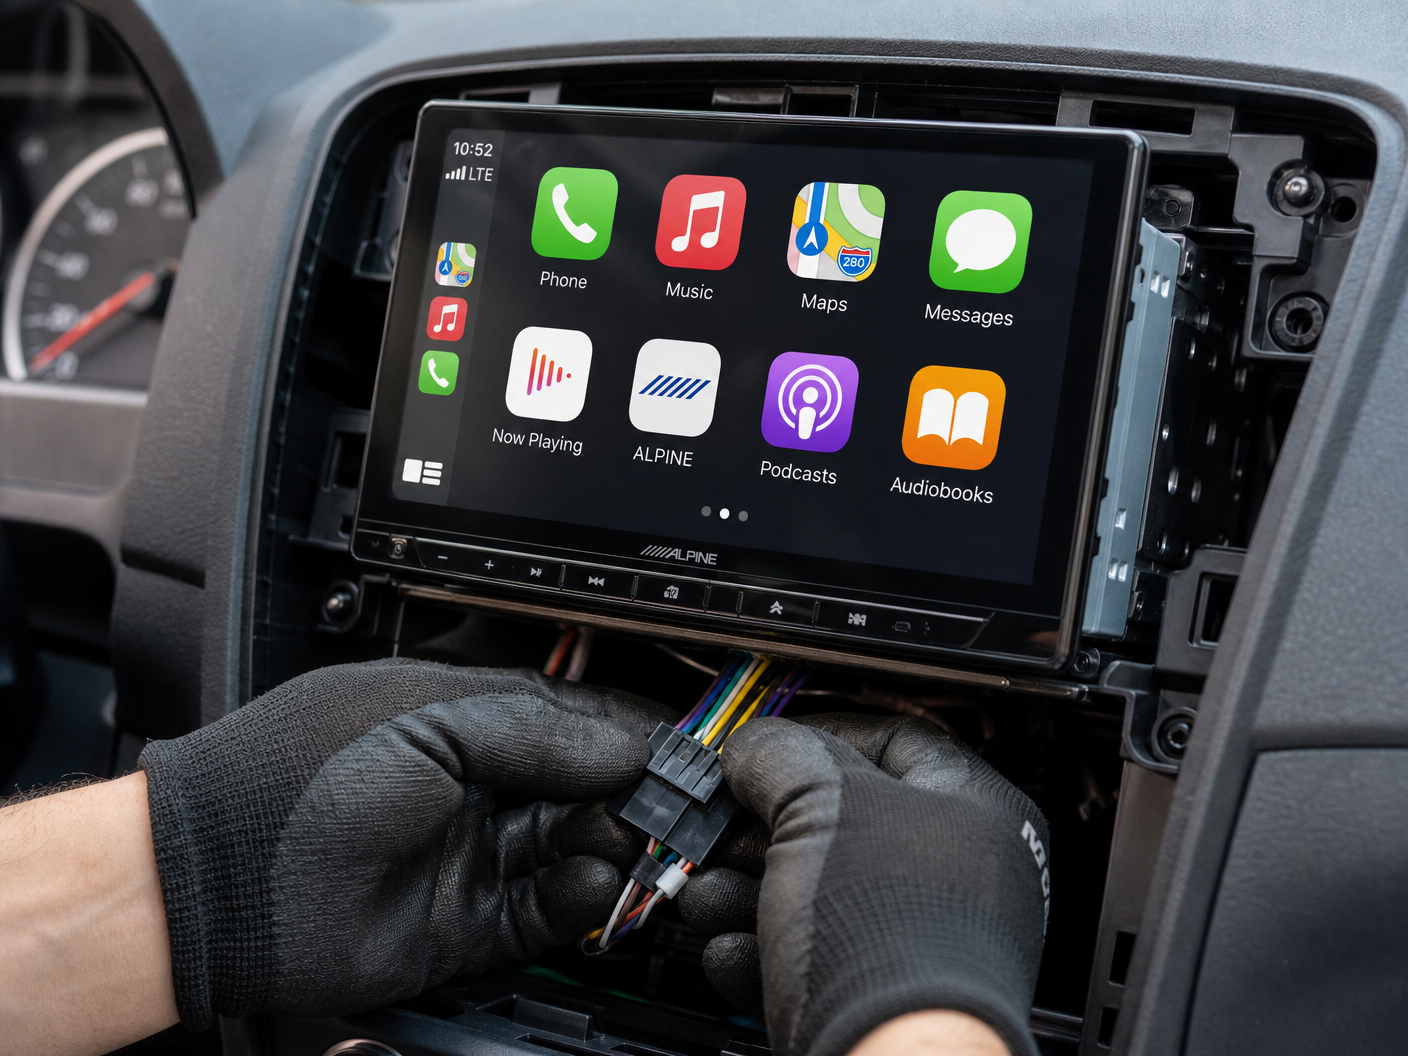
The Foundation: Your Head Unit
The head unit is the brain of the whole system. Every other component takes its signal from here, so a weak or noisy head unit limits everything downstream of it, no matter how good your speakers are.
Here’s how the main options break down.
Single DIN stereos. These are the standard compact size, about 2 inches tall by 7 inches wide. You still get Bluetooth, USB, and AM/FM, and they’re the easiest physical swap if your dash opening is small.
Double DIN stereos. Double the height of a single DIN, which opens the door to touchscreens, GPS, backup cameras, and Apple CarPlay or Android Auto. If your dash has a double DIN opening already, this is usually the better long-term pick.
Digital media receivers. No CD slot here, just Bluetooth, USB, and SD card support. Good fit if you stream everything and never use physical media anymore.
Digital signal processors (DSPs). This is the one most people overlook. On a lot of newer vehicles, the factory head unit is tied into the climate controls, the dash display, or some other system, and pulling it is a headache. A DSP sits between your factory head unit and your amp, cleans up the signal, and gives you real tuning control without touching the dash at all.
I added a DSP to a car with a great factory infotainment screen but mediocre sound, and it kept every factory function intact while letting me dial in the audio properly. If you’re not ready to rip out your dash, start there.
A quick safety note: before you pull any head unit, disconnect the battery’s negative terminal first. I use a 10mm socket on most negative terminal clamps. Skip this step and you risk a short when a stray wire touches metal, which can fry your factory wiring harness or set off an airbag light that’s a pain to clear.
Bringing Sound to Life: Speakers
Speaker upgrades give you the most noticeable improvement for the least amount of money. Factory speakers use thin paper cones and weak magnets, and they fall apart sonically once you push the volume.
Here’s what’s out there:
- Full-range speakers handle the whole frequency spectrum from one speaker. Affordable, easy to install, good entry point.
- Component speaker systems split the work between a woofer for low-mid frequencies, a tweeter for highs, and a crossover that sends the right frequencies to the right speaker. This is what serious audio guys run because you can place each piece for the best soundstage.
- Tweeters handle highs only. Mount them on the dash or A-pillar to get vocals and cymbals sounding crisp instead of buried.
- Mid-range speakers cover the middle of the spectrum, where most vocals and instruments actually live.
I swapped in a set of full-range speakers first, and the difference was obvious immediately. But it wasn’t until I installed a real component set up front that I understood what people mean by “soundstage.” Suddenly it didn’t sound like the music was coming from the door panels. It sounded like the band was sitting on my dashboard.
Before you buy anything, pull your door panel and measure the speaker opening with a tape measure. Don’t trust the spec sheet for your car’s trim level; aftermarket trims sometimes ship with different speaker sizes than the base model. I’ve seen guys order 6.5-inch speakers for a car that actually needed 6x9s, and that’s a returned box and a wasted weekend.
The Powerhouse: Amplifiers
Good speakers without enough power are just speakers that distort at a lower volume than your factory ones did. Factory head units typically push out 15 to 20 watts RMS per channel, which isn’t nearly enough to drive aftermarket speakers properly.
Amplifier types break down like this:
- Mono amplifiers power a subwoofer only, and that’s their whole job. Great for clean, deep bass.
- 2-channel amplifiers power either a pair of speakers or a single subwoofer, depending on how you wire them.
- Multi-channel amplifiers (4-channel or 5-channel) can run your full speaker set and a subwoofer off one unit, which keeps your wiring simpler.
Match the amp’s RMS output to your speakers’ RMS power handling. Too much power and you’ll blow a voice coil. Too little and you’ll get distortion at moderate volumes that sounds worse than running no amp at all. Check the spec sheet on both ends before you buy.
My first real mistake in this hobby was buying nice speakers and assuming the factory head unit could drive them fine on its own. It couldn’t. The moment I added a properly matched amp, those same speakers suddenly sounded like a completely different product.
Wiring tip from experience: when you run your power wire from the battery to the amp, use a fuse holder within 18 inches of the battery terminal. If that wire ever shorts against the chassis before the fuse, you’ve got a direct line from your battery to bare metal, and that’s a fire risk, not just a blown fuse.
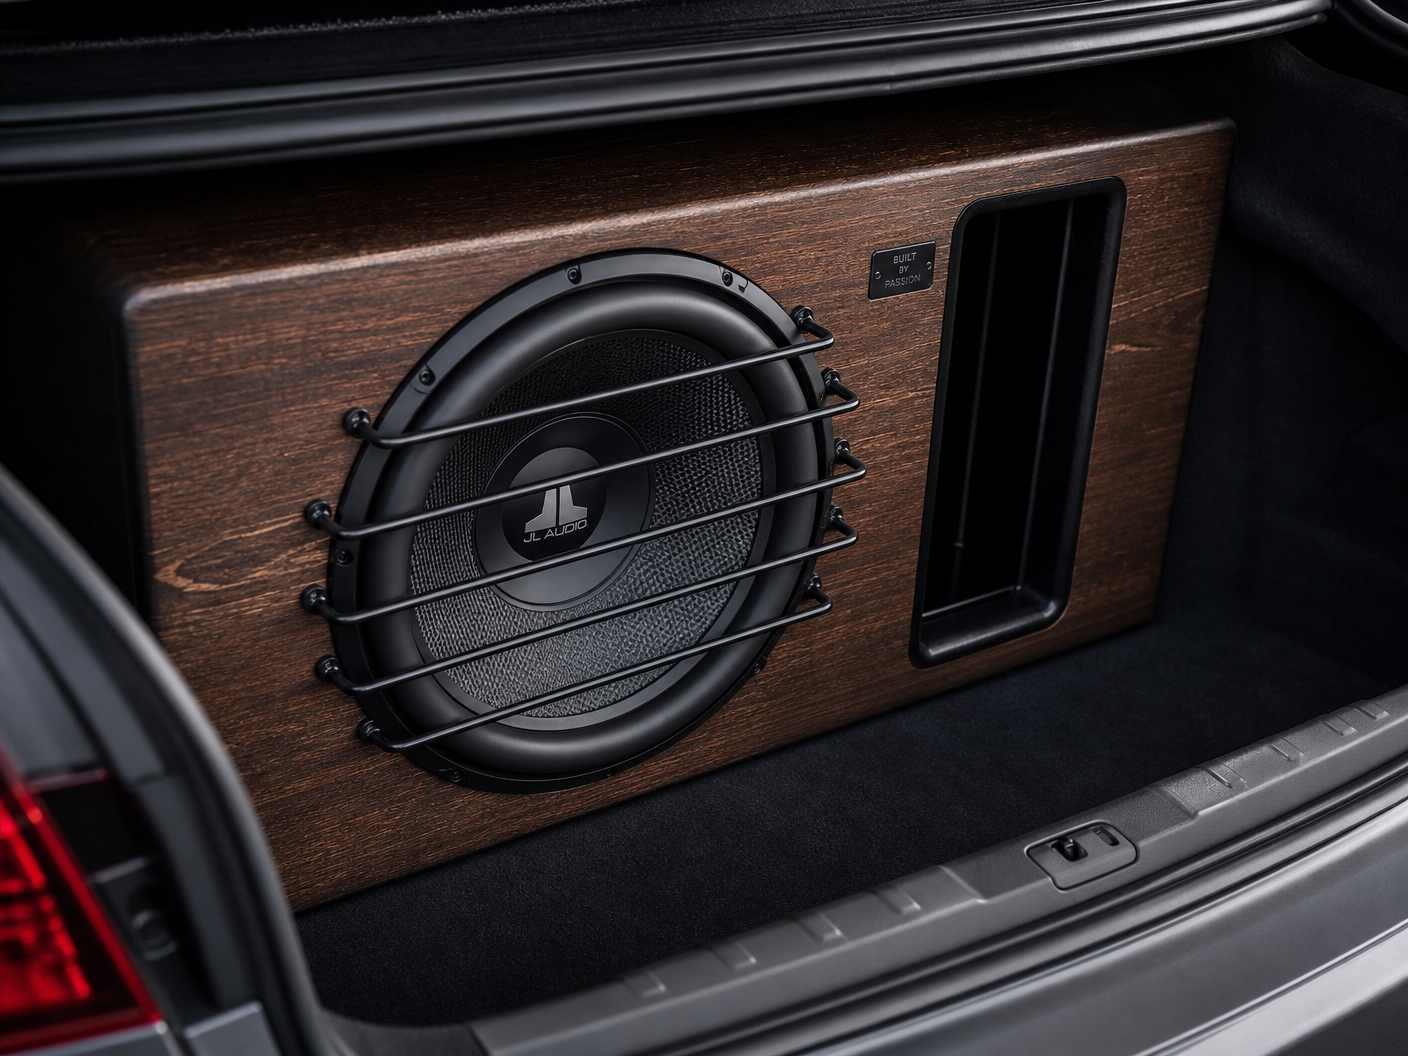
Feeling the Bass: Subwoofers
Most door speakers physically can’t reproduce low bass frequencies well. That’s not a quality issue, it’s a cone size and air displacement issue. You need a subwoofer for real low-end impact.
Your subwoofer options:
- Component subwoofers come bare, no box or amp included, which means total control over enclosure design and power setup. Best for people who want to build their own box.
- Enclosed subwoofers already sit in a sealed or ported box, ready to wire in. Simplest install if you don’t want to build anything.
- Powered subwoofers have a built-in amp, so they’re compact and mount easily under a seat or in a small trunk corner. Good for hatchbacks or anyone short on cargo space.
- Vehicle-specific subwoofers are shaped to fit a particular car’s spare tire well or side trunk wall, which saves cargo room compared to a standard box.
Adding my first subwoofer changed how I listen to music in the car, period. It wasn’t just louder. You could actually feel the kick drum hit, and the whole mix felt fuller instead of thin on the bottom end.
A practical note on enclosure type: sealed boxes give tight, accurate bass and work well in smaller cabins. Ported boxes are louder and boomier but take up more trunk space. If you’re not sure which one fits your car and your music taste, sealed is the safer first build.
The Silent Hero: Sound Deadening
Even a great set of components will fight against road noise, wind noise, and door rattles if your car’s panels aren’t treated. Sound deadening material applied to doors, floors, the trunk, and the roof adds mass, kills vibration, and blocks outside noise from creeping into your listening space.

What that actually buys you:
- A noticeably quieter cabin at highway speed
- Tighter, more controlled bass because door panels stop buzzing
- Cleaner mids because you’re not fighting road drone to hear vocals
I skipped this step on my own build for way too long. I had decent speakers and a solid amp, but I still had door rattles and road noise drowning out detail. Once I laid down sound deadening mat on the doors and floor, the bass tightened up and the mids cleared up noticeably. It’s the cheapest-feeling upgrade that makes the biggest difference, and most people skip it entirely.
Installation tip: use a roller, not your hand, to press the mat down once it’s placed. A hand doesn’t generate enough pressure to fully bond the adhesive, and a poorly bonded sheet will eventually buzz on its own, which defeats the purpose.
“Before vs. After” Audio Visualizer
Common Mistakes to Avoid
I’ve made most of these myself, so consider this the cheat sheet I wish someone had handed me.
- Skipping a realistic budget. Set a number you can actually afford before you start browsing. Upgrading in stages beats blowing your whole budget on one component.
- Not checking vehicle compatibility first. Measure your door speaker openings, check your dash’s DIN size, and confirm trunk space for a subwoofer box before you buy anything.
- Cheaping out on wiring. Undersized power wire chokes your amp and causes voltage drop under load. Use the correct gauge for your amp’s power draw, full stop.
- Chasing volume instead of clarity. Loud isn’t the same as good. A well-tuned, properly powered system at moderate volume will out-perform a blown-out, distorted system every time.
- Skipping professional installation when you’re in over your head. DIY is great when you know what you’re doing. I learned the hard way after a bad wiring job left me chasing an intermittent short for a week. If you’re not confident, get a shop to handle the wiring at minimum.
- Feeding the system compressed audio files. No amount of hardware fixes a low-bitrate MP3. Use lossless files or a quality streaming tier if you want your new system to actually shine.
Car Audio Upgrade Budget Estimator Tool
Upgrading your car audio system is an investment, not a guessing game. Use the estimator below to map out rough equipment costs before you start shopping.
Upgrade Budget Estimator
Select price ranges for components to estimate your total project cost.
Building Your System: The Order I Actually Recommend
This is the sequence I follow on my own builds, and the one I tell customers to follow too. Skipping steps usually means redoing work later.
Car Audio Upgrade Journey
A logical progression to premium sound
Define Your Goals and Budget
Determine what you want to improve—more bass, clearer vocals, or a complete overhaul. Setting a budget early guides every subsequent decision.
Start with the Head Unit (or DSP)
Your control center. A quality head unit provides a clean signal. If keeping the factory unit, a Digital Signal Processor (DSP) is essential for sound control.
Upgrade Your Speakers
The most immediate audible difference. Prioritize front speakers first to create the primary soundstage and improve clarity.
Add an Amplifier
Give your new speakers the power they deserve. A matched amplifier ensures clean, distortion-free sound at higher volumes.
Integrate a Subwoofer
Key for full-range sound. A subwoofer handles the low frequencies that standard speakers can’t, providing impactful bass and depth.
Consider Sound Deadening
Maximize performance by reducing road noise and vibrations. This creates a quieter, acoustically optimized environment for your components.
Professional Tuning
Unlock your system’s full potential. A professional can optimize crossovers, EQ, and time alignment specifically for your vehicle’s cabin.
Final Thoughts
An upgraded car audio system isn’t about being the loudest car in the parking lot. It’s about hearing the music the way it was actually recorded, with the detail and depth your factory system was never built to deliver.
Work through it piece by piece: head unit, speakers, amp, subwoofer, sound deadening. Each one builds on the last. Take your time, measure twice before you buy, and don’t be afraid to bring in a professional for the wiring if that’s where your comfort level ends.
I’ve put a lot of hours into these builds, on my own cars and other people’s, and the payoff is always the same. Every drive gets a little better.
References
[1] TAS Electronics. “The Ultimate Guide To Car Audio And Sound Systems.” TAS Electronics Blog. Available at: https://taselectronics.com/blog/guide-to-car-audio-and-sound-systems/
[2] Soundworks. “Best Car Audio Upgrades for Sound Quality.” SoundworksMD Blog. Available at: https://soundworksmd.com/best-car-audio-upgrades-for-sound-quality/
[3] Breakers Stereo & Performance. “10 Common Mistakes People Do During Car Stereo Installation.” Breakers Stereo & Performance Blog. Available at: https://breakersstereoandperformance.com/10-common-mistakes-people-do-during-car-stereo-installation/


Leave a Reply